


I've loved reading all the comments on my little blue cabinet post, you guys had some great ideas for what to do with those open cabinet doors. In the end I decided to go with baskets - which wasn't even one of the original options, y'all are good. Baskets will be perfect, esecially since I forgot to share that the right door doesn't actually open.
You see, it's a faux door...probably where the old radio speakers were housed. Even though I removed the interior wall between the two cabinet spaces, using the area behind that right "door" would have been very difficult. I don't know about you, but if it's difficult, I'm probably not going to do it.
Unfortunately, finding a basket that fit turned out to be trickier than I anticipated. All the square milk crate-style baskets I looked at were between 12 and 13 inches, and I needed my baskets to be closer to 11 inches square. I looked at so many stores and searched online for so long, I'm probably going to have nightmares tonight. The horrible 'I-played-tetris-for-too-long-and-I-still-see-it-when-I-close-my-eyes' type of nightmare... you know what I'm talking about.
Yesterday, I stumbled across these at Walmart (not my favorite store in the world, but hey -- desperate basket times call for desperate basket measures!)
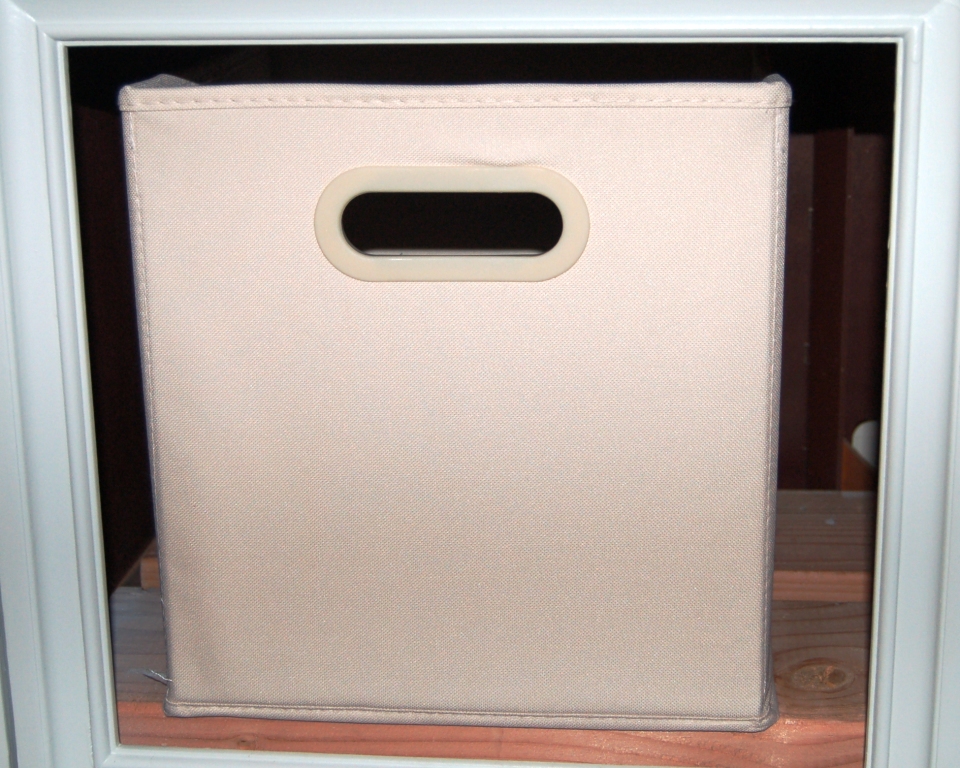
They are medium-sized fabric bins, and they cost only $6 each. Unfortunately they're lacking in both the "cuteness" and "basket-like" categories.
What to do, what to do...
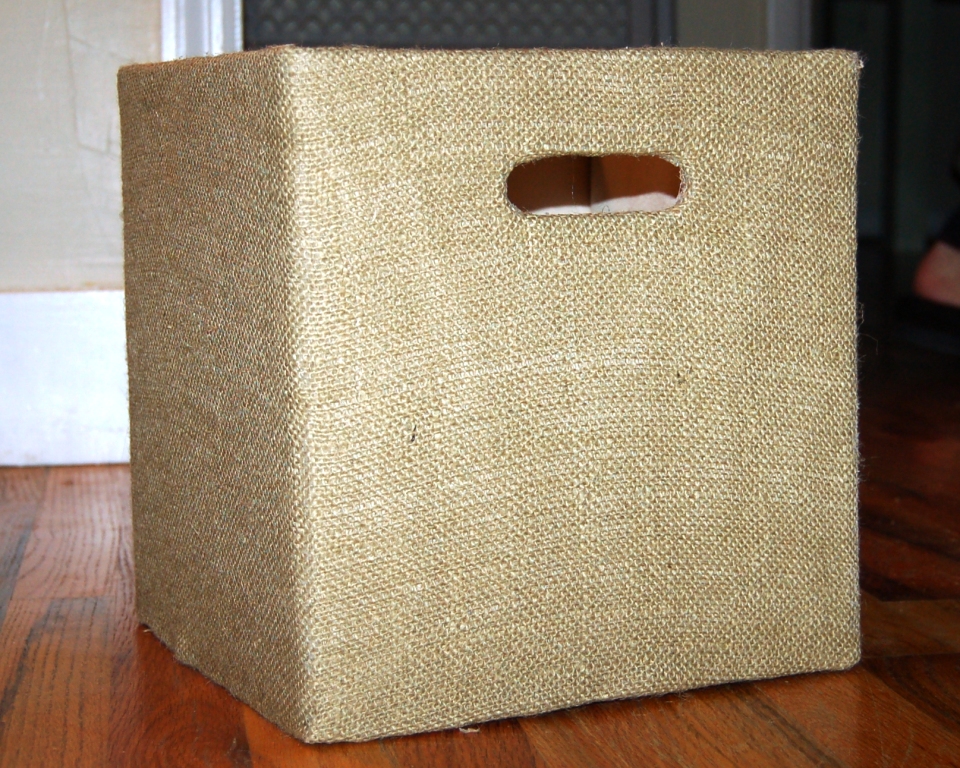
Pull out some leftover burlap and a glue gun and sort it out, of course!
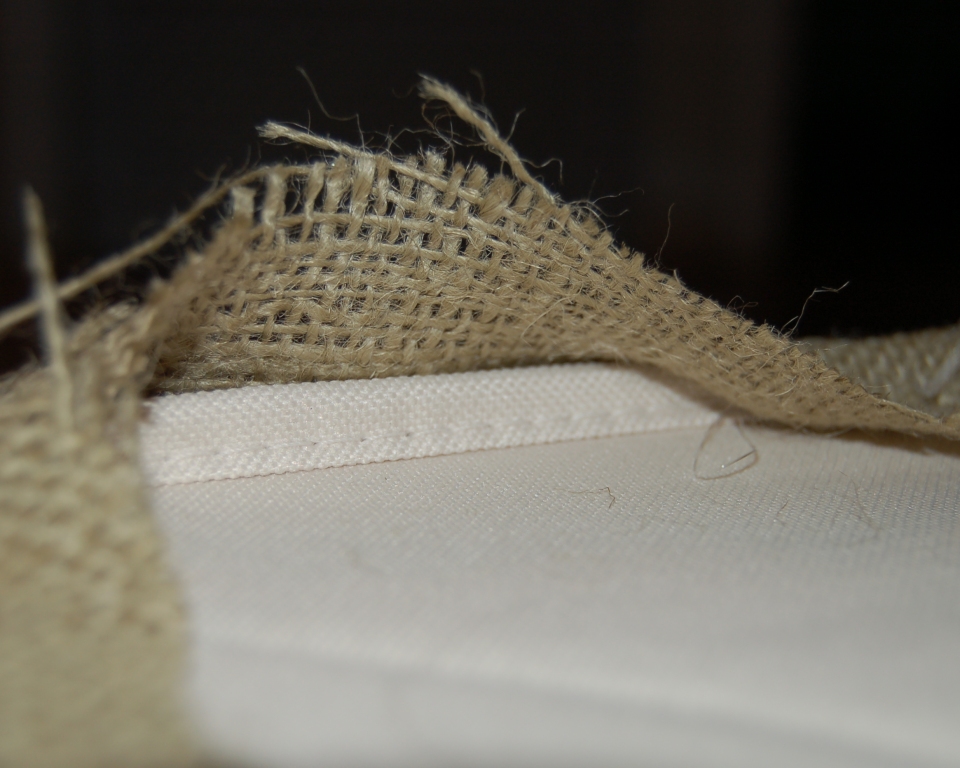
I started by wrapping a long strip of burlap around all sides, pulling it tightly and gluing along each corner to secure the fabric.
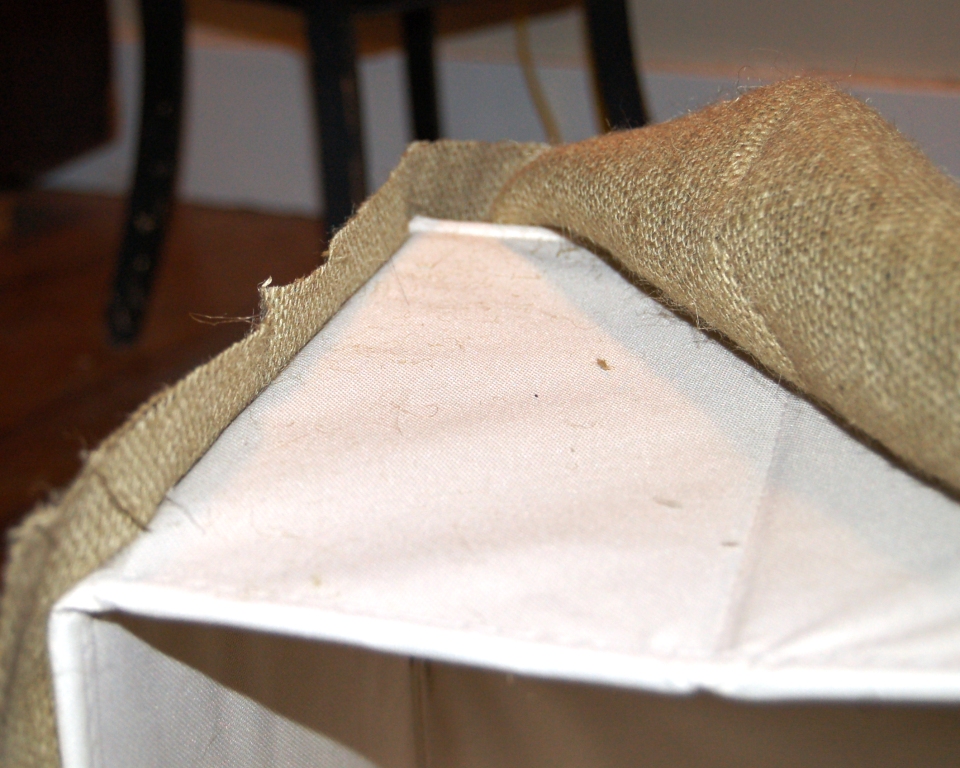
Then I folded the raw edge under and glued.
The next step was to finish both the bottom and the top of the bin -- I did both the same way. First I glued each corner down, after pulling the fabric tight.
Next I worked my way around the bin, starting in the middle of each side and working toward the corners.
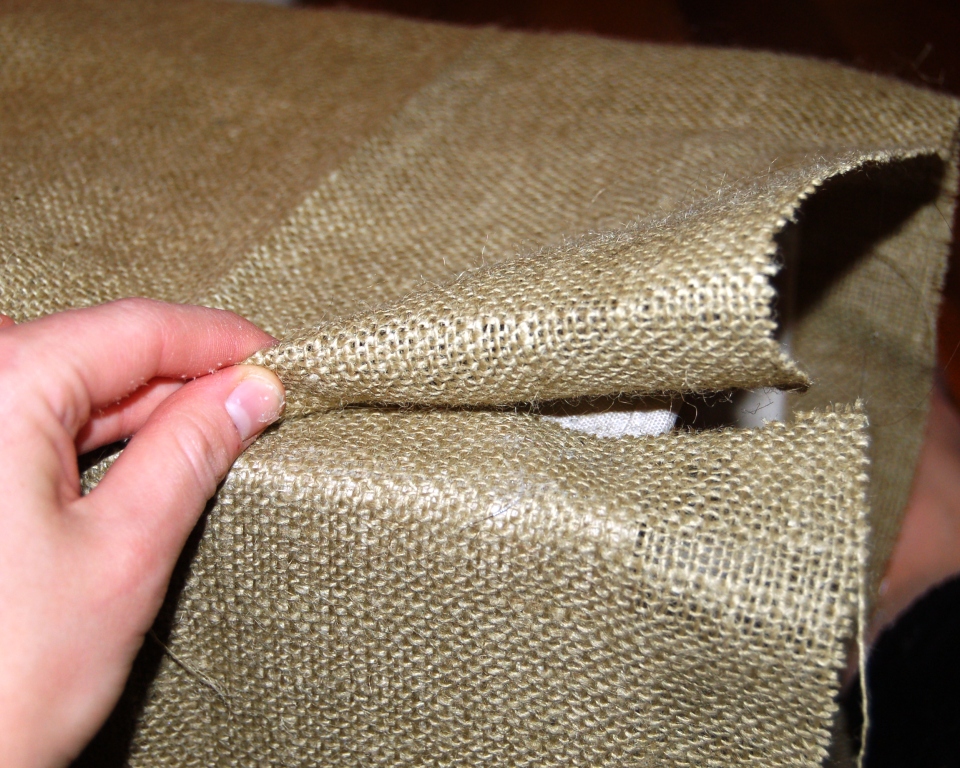
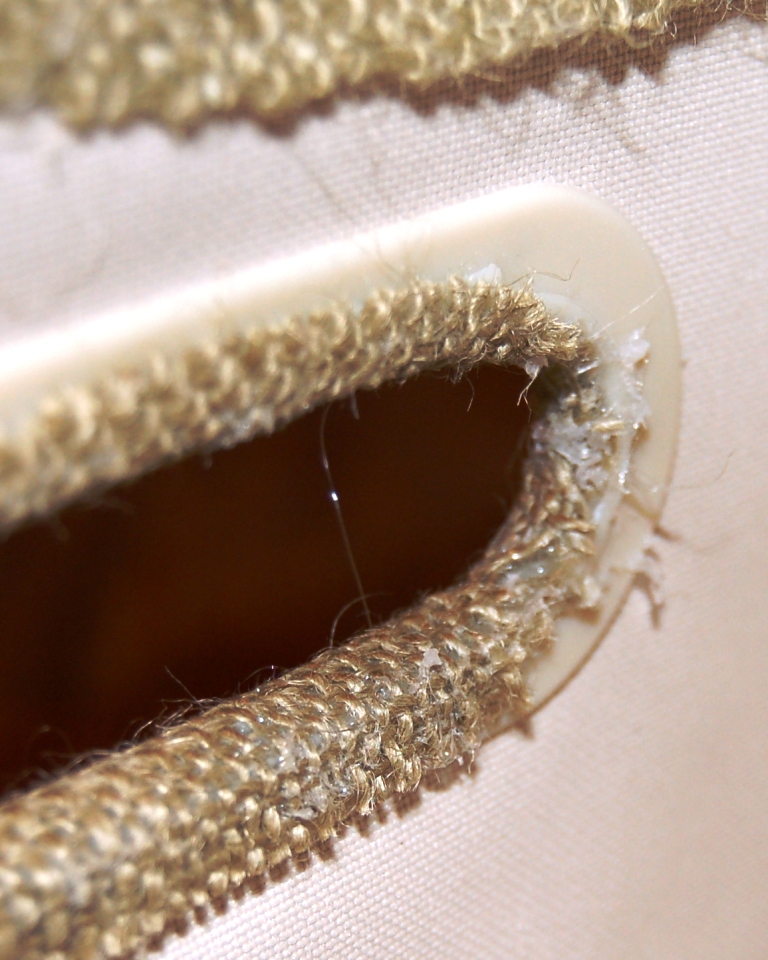
The last thing I needed to do was cut the holes out for the bin's handles.

It might be hard to see, but I cut little V's at each end so that I could more easily pull the fabric tight against the curve of the handle.
Using my skills of a photoshopper, I have enhanced this photo so that you might have an idea of what I'm talking about here:
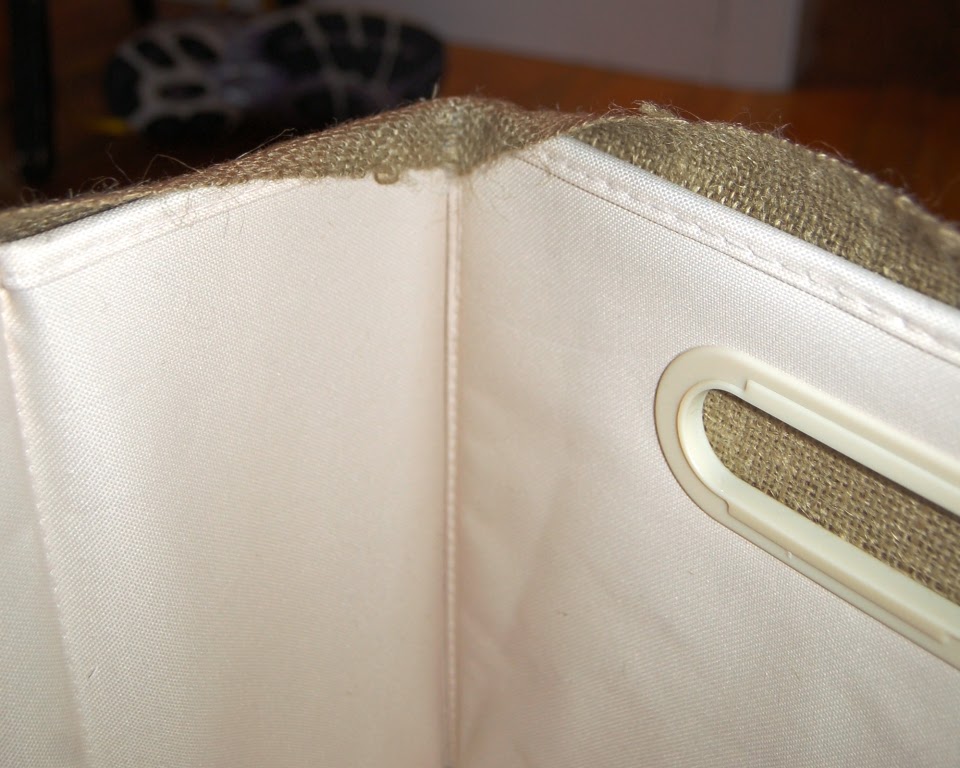
Then I went crazy with the glue gun, peeps. Don't be afraid, glue that sucker down. You definitely don't want it unraveling or peeling off.
Here is a side-by-side: Walmart $6 bin, meet your surgically enhanced twin.
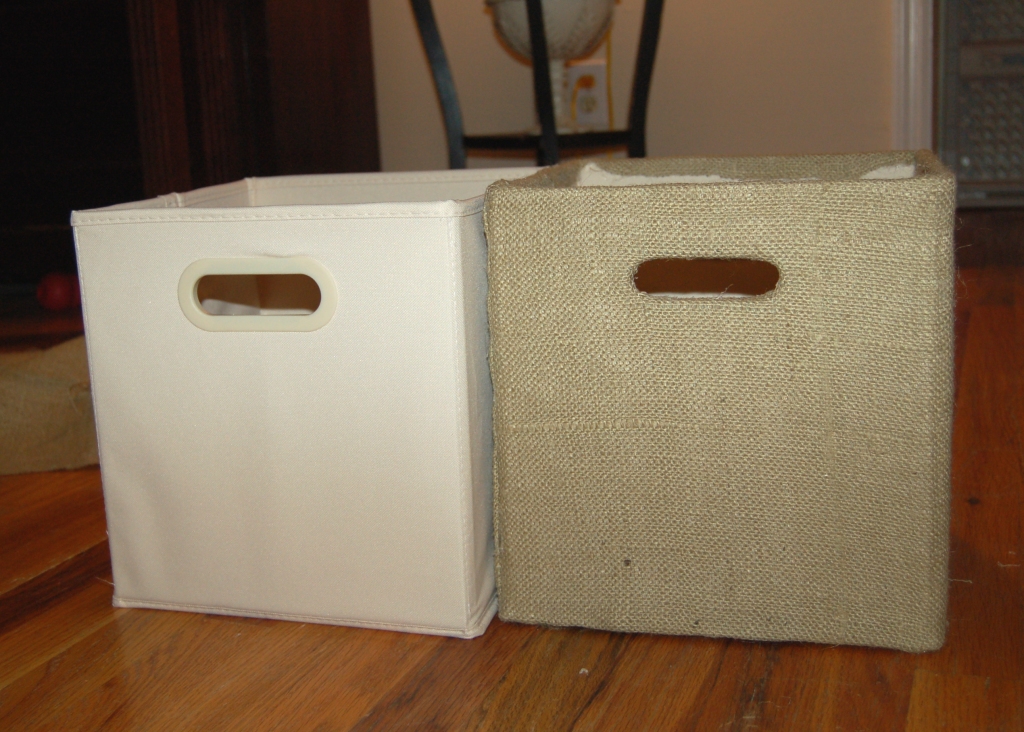
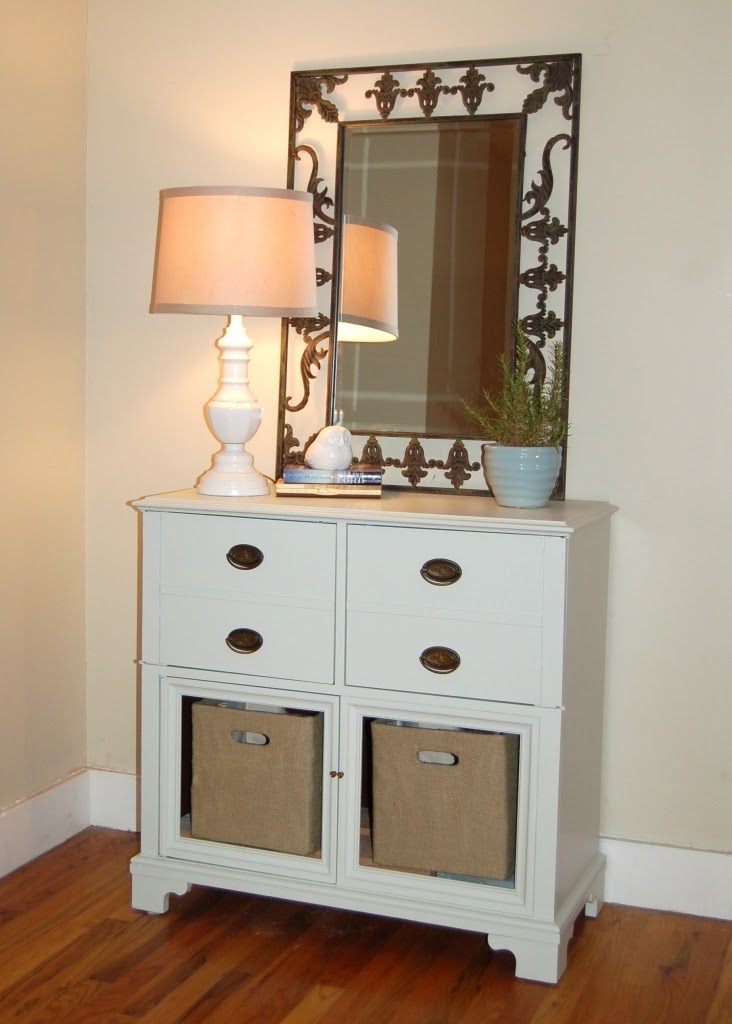
(Did you see that I replaced the large photo with a mirror? Looooooove it!)
And there ya have it. My $0 fix for a $6 bin.
Sharing this at Hope Studios,
The DIY Show Off,
The Girl Creative,
My Uncommon Slice of Suburbia,
Life as Lori,
Under the Table and Dreaming
and The DIY Club
...go check out other projects!


You know....you are one crafty type chicasita. Nice job. this is me, your super dumb seester talking here so bear with me on this next suggestion. I love what you did, but you know there is something that is bugging me right now, I am not going to lie. Those dang raw edges of nasty, fraying burlap. You could always take bias tape or ribbon in a contrasting color and hot glue it over teh edges to give it a more finished look on teh insed too and then smile knowing that your older wrinklier seester is sleeping better at night. :)
ReplyDeleteLoves.
I think it looks really great. Burlap can be so hard to work with, I'm impressed! Have a lovely week.
ReplyDeleteAMAZING! Where do you find the time to do all these cute projects with 2 boys running around the house? You're an inspiration to us all!
ReplyDeleteLove the look! I so need to get painting some of the furnature that I've been hoarding this summer!
ReplyDeleteAdding that burlap made a HUGE difference...love the look!!!
ReplyDeleteBlessings,
Linda
Love the texture of the burlap with your nice side table. fabulous!
ReplyDeleteThey turned out really nice. I know EXACTLY what you mean about trying to find bins that are 12 inches deep. I was trying to find some for a closet redo I was doing for a client and I saw the same ones at Walmart you did after looking EVERYWHERE. Burlap is not easy to work with and the after pics look great. I also like the idea of adding some ribbon to cover the edges although I'd probably add something with a bit more texture.
ReplyDeleteThis is fabulous! I have burlap, and I always see cheap baskets like this either on clearance or at yard sales. Why have I never thought of this?! lol Thanks for sharing! (Found you via Remodelaholic.)
ReplyDeleteMuch better! I love that you used what you had on hand.
ReplyDeleteWOW! Great quick and cheap change. I need some bins for my pantry but all I can find are really bright colors that clash with my kitchen decor. Now I can't wait to buy some to recover.
ReplyDeleteI have a question for you too. Do you have a special trick for placing the links for the parties you are linking up to on your post? I am pretty sure I am going about it the hard way. I would appreciate any advise you can send my way.
Thanks for sharing,
Traci
WOW! Great quick and cheap change. I need some bins for my pantry but all I can find are really bright colors that clash with my kitchen decor. Now I can't wait to buy some to recover.
ReplyDeleteI have a question for you too. Do you have a special trick for placing the links for the parties you are linking up to on your post? I am pretty sure I am going about it the hard way. I would appreciate any advise you can send my way.
Thanks for sharing,
Traci
Oooohhhhhhhhh Seester.....I could not sleep last night. Kepts having dreams of the nightmare variety of fraying burlap. I wole up convinced that you still have not covered those raw edges...I am coming over to inspect, and will bring wine.
ReplyDeleteLove It !!
ReplyDeleteLove the look! it is really great!
ReplyDeletecoach factory outlet
ReplyDeletekate spade handbags
cheap jerseys from china
coach outlet online
cheap nike air max
adidas shoes
toms shoes outlet
sac longchamp pas cher
coach outlet
louis vuitton outlet
mt0706
الحرص كل الحرص نحو تنزيل محتويات المطبخ أو رفعها نحو النقل والوصول للموقع الحديث، ومن الممكن الاستعانة بالرافضة الكهربائية والونش لإعلاء الأجهزة الكهربية وجسم المطبخ.
ReplyDeleteشركة نقل عفش
شركة نقل عفش من الرياض الى الامارات
شركة نقل اثاث من الرياض الى الامارات
شركة نقل عفش بجازان