


Last week, after I added some 2x4s to my deck benches to improve the foundation of awesomeness for the aforementioned party capital of the city-to be, I said to myself, "self, what this zebra deck needs is some pillows."
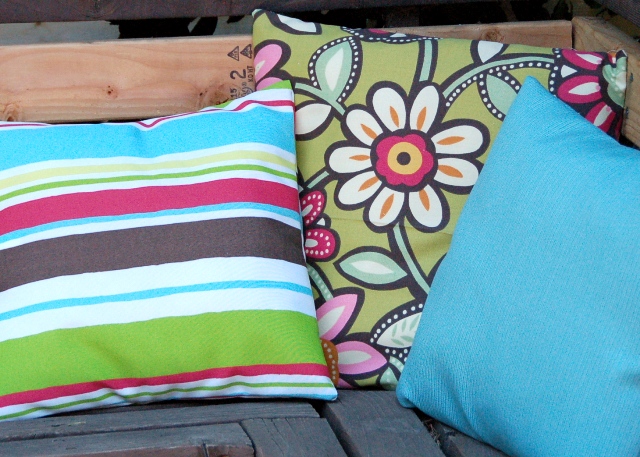
Of course, pillows! Because instead of actually just sanding and staining the deck, I'm much more likely to attempt to distract from the stripes until I can muster the motivation to replace 500 old nails and spend a weekend slapping $75 worth of stain around. Yep, that sounds about right.
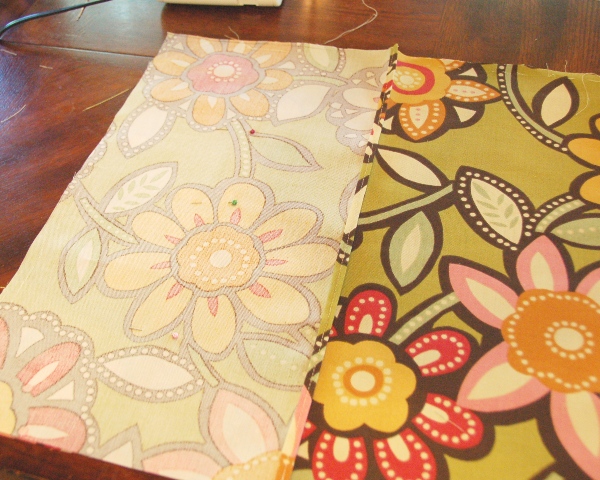
As luck would have it, outdoor fabric was 60% off at the store last weekend so I ran out and bought a bit of it and got to work sewing some envelope pillow covers. Why envelope pillow covers? I like to be able to remove the covers easily for cleaning or if I decide to change things up. Oh, and that's the only type I know how to make... so there you have it!
Are you as clueless as I am when it comes to sewing machines? Well then, look no further!
Today's lesson: "Envelope Pillows for the Home Ec Dropout"
Alternate title: "Most likely the only sewing tutorial you'll ever see on this blog"
(If you know what you're doing, feel free to skip this post, because I'm most definitely writing this for the other sewing machine-challenged people like me in the world!!)
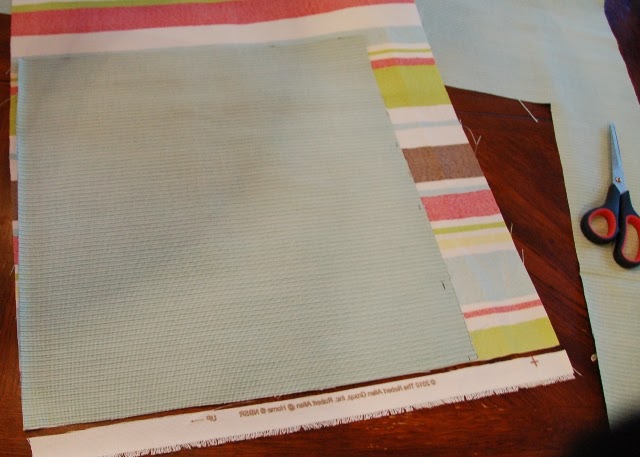
1. Cut your fabric.
I use a quilter's ruler and a pencil on the back side of my fabric, but I'm pretty sure there's a fancier, less pencil lead-filled way of doing that. Oh well. I like my covers to be snug, so if my pillow insert is 18x18 inches, I cut one square that is 18.5x18.5 inches. This means that my finished pillow cover will actually be 17.5 inches square after I sew with a 1/2-inch seam allowance. Wow, that sentence sounded so crafty... did I even use the term 'seam allowance' correctly? I'm already breaking a sweat just writing this tutorial.
The back side of your pillow is actually two pieces that overlap a little to create a... (wait for it) envelope-like opening for easy pillow removal! I use this handy formula to figure out what size these pieces need to be:
(front fabric piece width/2) + 1 (left piece overlap) + 1 (right piece overlap)
For example, if the front of my pillow is going to be that 18.5-inch square piece of fabric...
(18.5/2) + 1 +1 = 11.25 inches
This means I cut out two identical pieces of fabric that are 11.25 x 18.5 inches for the back of my pillow.
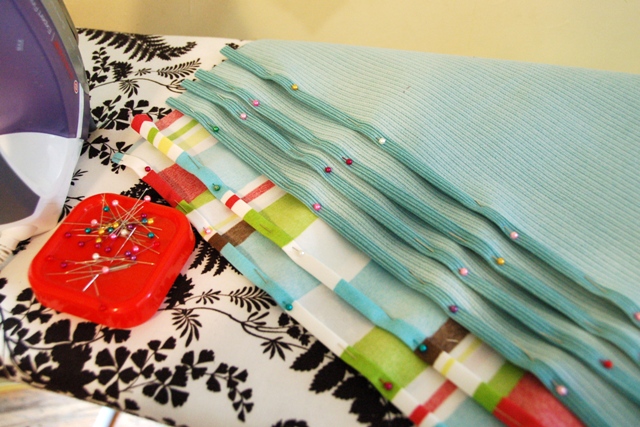
2. Finish one edge on both the back pieces.
Since you'll be seeing one of the edges on both of those smaller pieces (where they overlap), you need to finish them. I fold the raw edge over about 1/4" and press, then fold it again to hide that raw edge, press and pin.
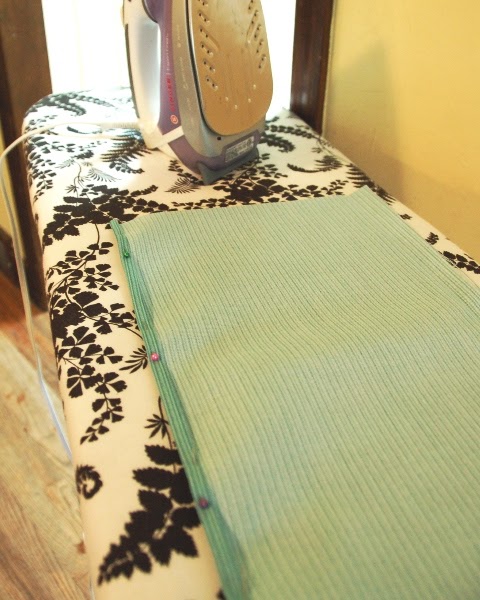
I like to make those folds as small as possible, but if you wanted to make the folds wider, you would just want to make your back pillow pieces a little wider as well to accomodate that and still maintain the overlap on the finished pillow back (instead of 11.25 inches used in the example, maybe make them 11.5 inches instead)
3 Assemble pillow and sew.
Lay the front pillow piece right side up and then add each of the back pieces on top of it right side down, making sure to line up the corners and outside edges. It should resemble a nice little pillow that's inside out.
(one piece of back side fabric is on)
Make sure the wrong side of the fabric is visible on both sides so you don't sew 75% of your pillow only to realize that half of it will be wrong-side out when it's done. That's no fun, I speak from experience.
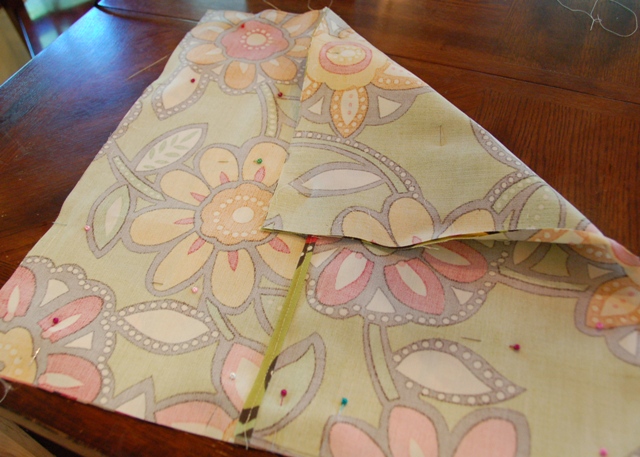
Pin it carefully (notice in the above photo that I have extra pins where the back envelope pieces overlap -- one on either side of each finished edge, and one right in the middle where all three pieces of fabric overlap).
Now sew that sucker up.
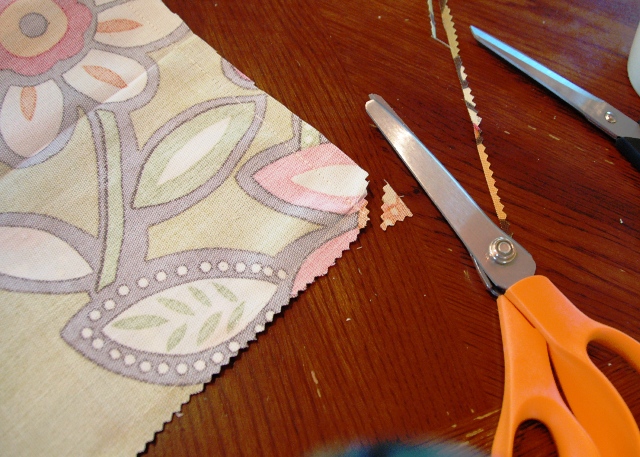
Finally, go over the edges with pinking shears, making sure to cut all the corners on a diagonal close to the seam so they lay better and are more corner-y.
Finally, go over the edges with pinking shears, making sure to cut all the corners on a diagonal close to the seam so they lay better and are more corner-y.
Or something. Just do it, okay? It's important for reasons which I can't explain.
Fourth: flip, stuff, admire.
By far the best step. This is where you get to say: "Oh yeah, I'm awesome. I am woman, hear me roar, I'm a sewing master, maybe I could sew a slipcover..." before you reign yourself in and remind yourself to be happy with your baby sewing successes.
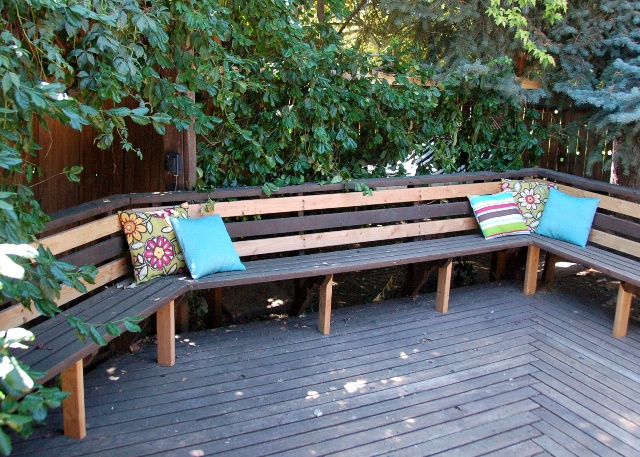
See, you don't even notice the stripes now. Ha.
Sharing at My Uncommon Slice of Suburbia


Love those fun bright colors! I really need to learn how to sew!
ReplyDeleteThese look great! I love your deck!
ReplyDelete