Tuesday, November 30, 2010

My Christmas "mantel"

Hi. My name is Anna, and my house is mantel-less.

Phew, I'm glad we got that out of the way. Am I the only mantel-less lady who has miniature pity parties when confronted with photos of beautifully decorated mantels? I sure hope not.

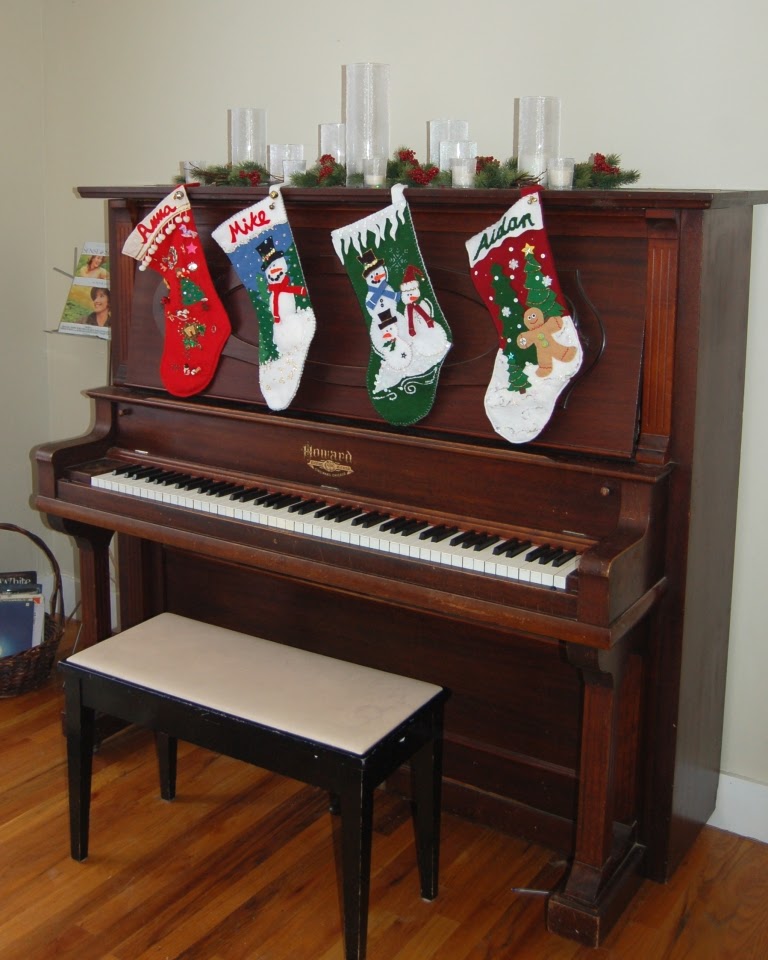
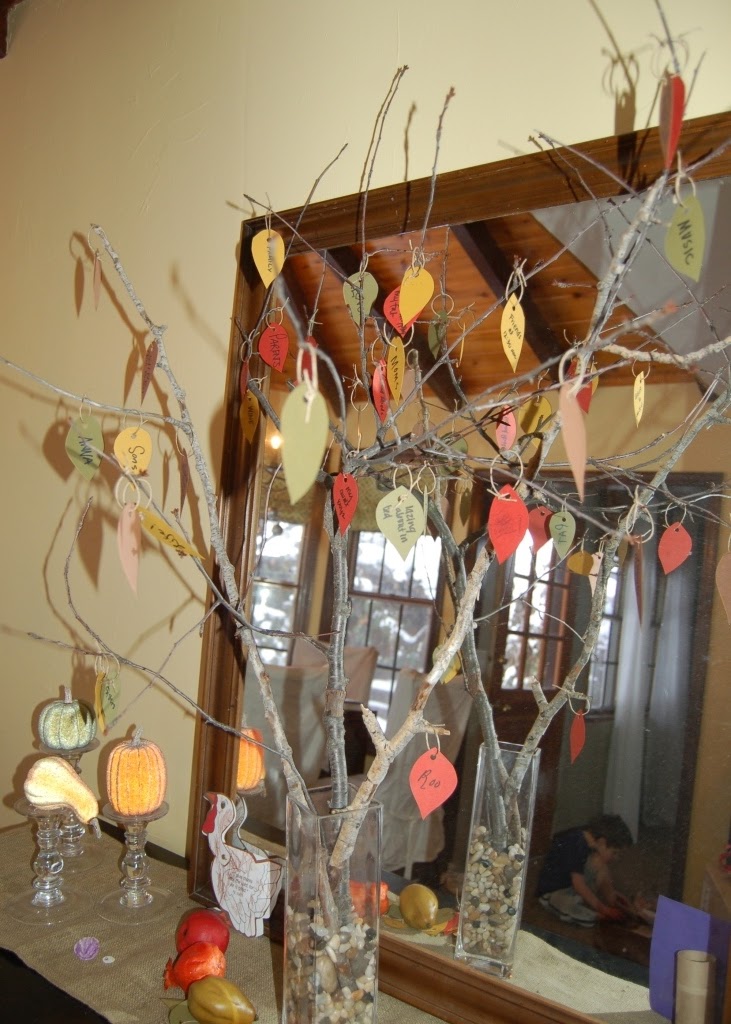
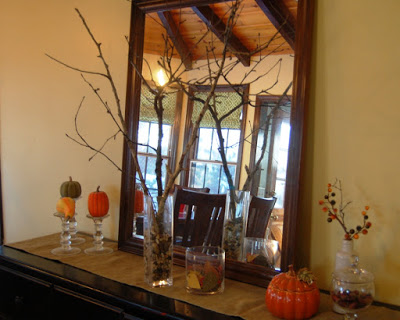
This year I decided to dress up the top of my upright grand piano and make it a mantel. Sort of. See, I don't like a lot of things on top of pianos -- while I was growing up, this very piano had approximately 253 dusty picture frames on top of it, which scarred me for life -- so I knew I wanted something simple.


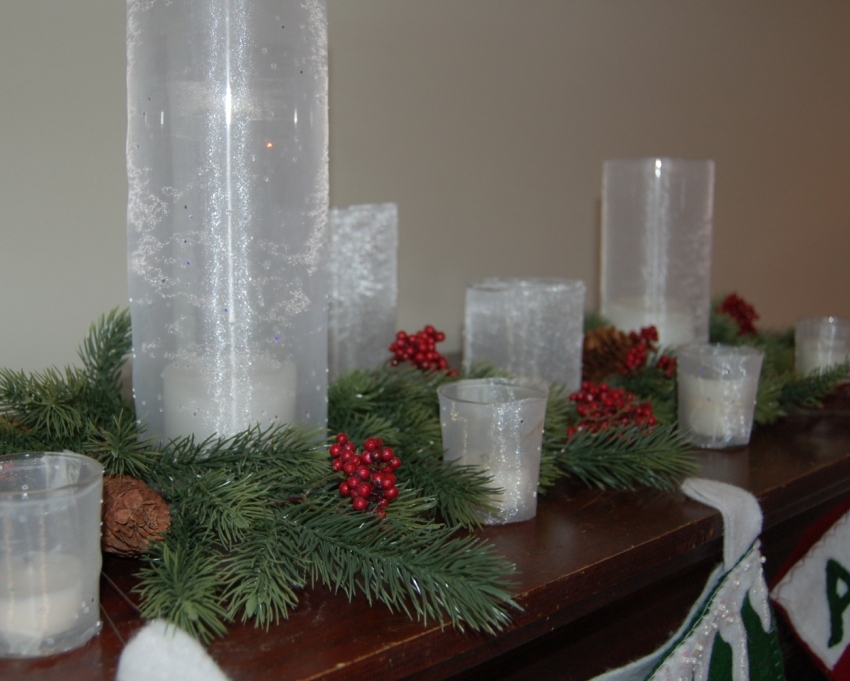
I made the fabric-covered cylinders last year after reading this post at Thrifty Decor Chick. It just took sheer fabric and some double sided tape. And some deep breaths to calm my neurotic self when it didn't turn out perfectly. Pfft. That was so last year. Very overrated, that 'perfect' thing.


They're absolutely beautiful when lit, but since I forgot to take a photo of that, you'll just have to take Thrifty Decor Chick Sarah's word for it:
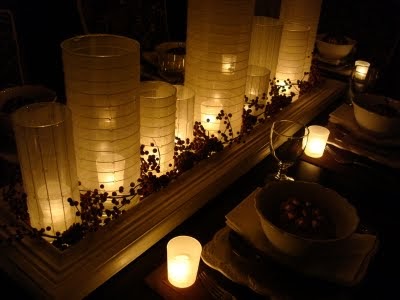

See? Gooooorgeous, hello!

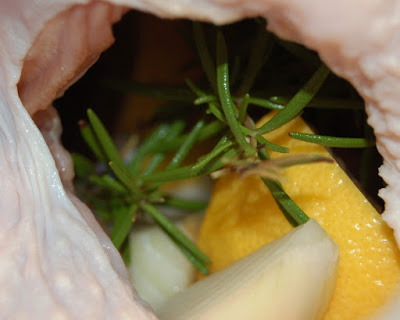
The greenery I found at Michael's last year for a few dollars. I brought it home and hacked it up with a wire cutter so I could stick it into all the little nooks and crannies between cylinders.


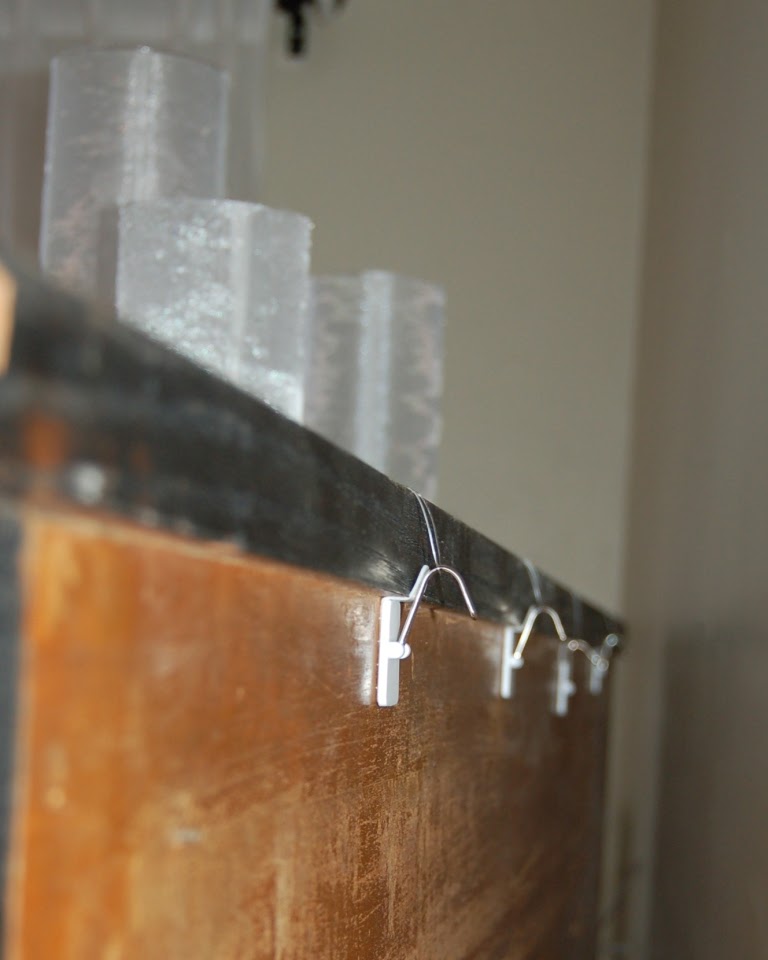
I hung the stockings using fishing line... 


(Can you see the fishing line in the photo above? Gosh I love fishing line in crafts)

I hooked the fishing line onto some 3M Command hooks which were hung upside down on the back of the piano:


I'm pretty happy with the end result, even with our mistmatched stockings!


UPDATE: Check out our new stockings here!

I'll have to swing the stockings out of the way if I put music on the piano, and I'll need to leave Santa a pair of scissors so he can cut them down to fill them... but I'm okay with that. 

Speaking of Santa... if you're reading this, all I want for Christmas is some MDF. Those walls? Board and batten, my friends... coming to a room near me in early 2011.

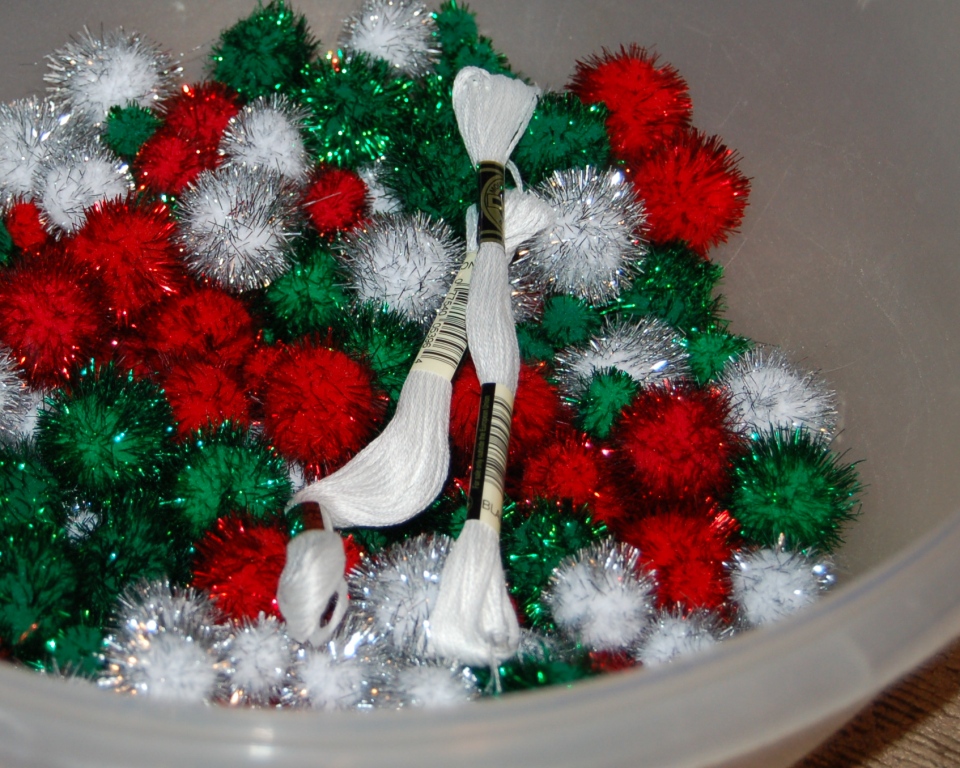
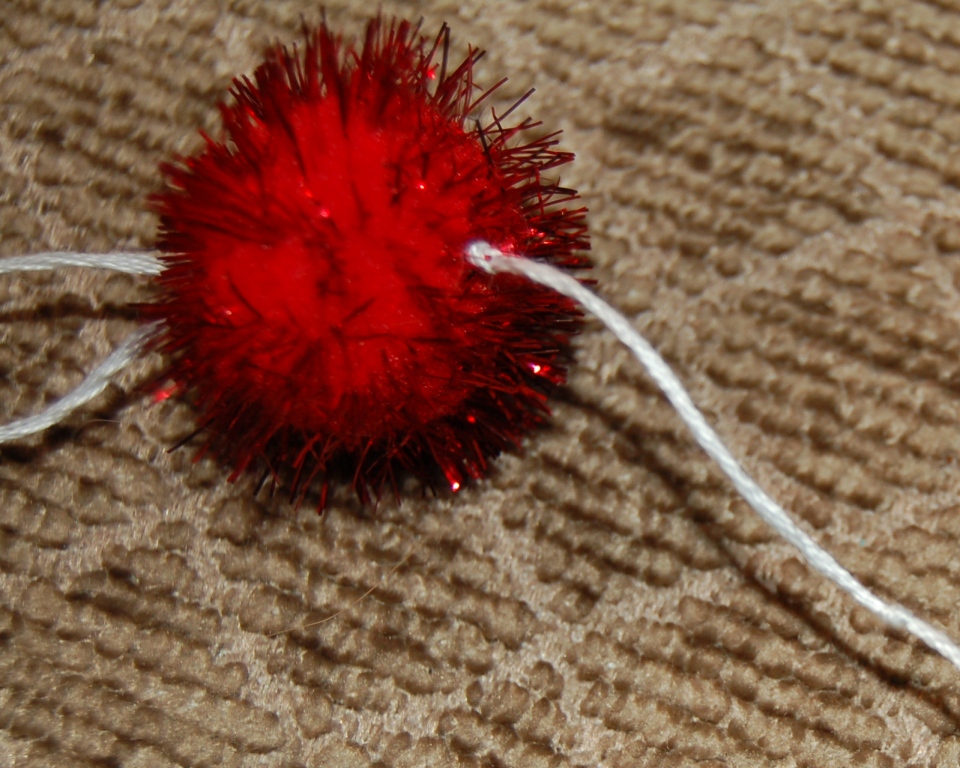
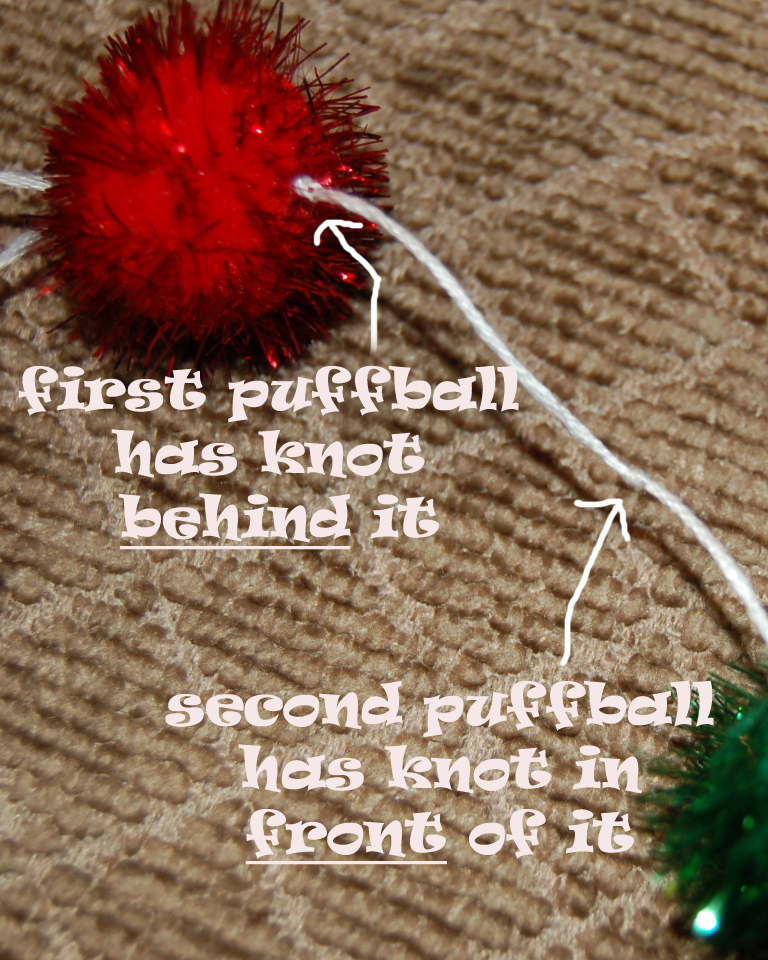
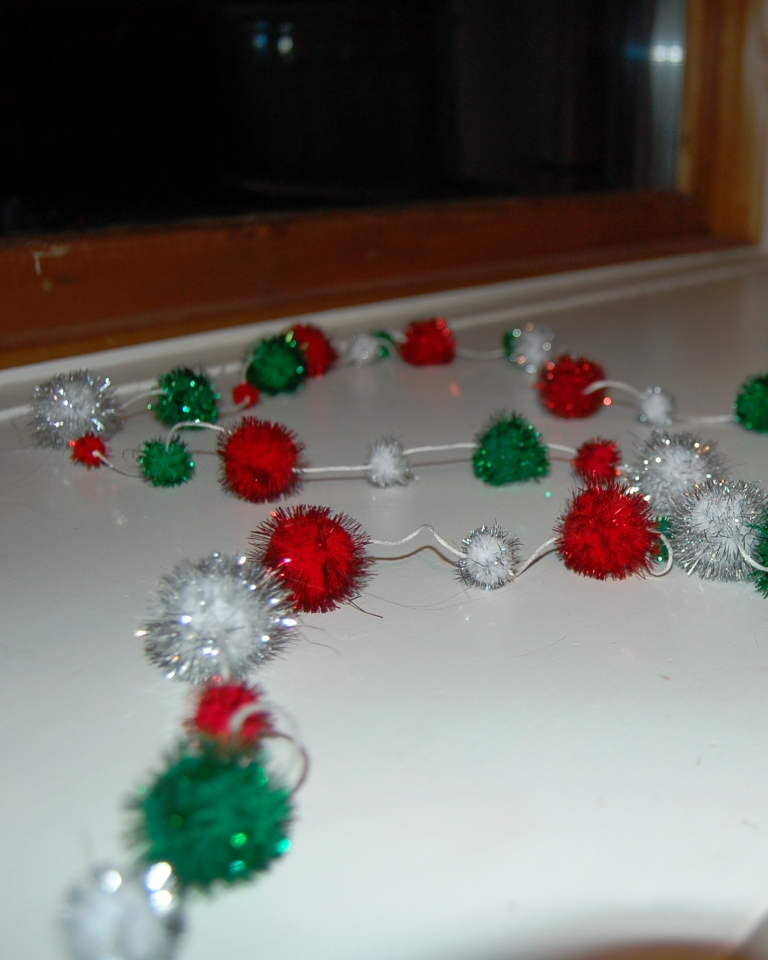
I'd show you my Christmas tree, which is also in that room... except I'm in the process of making eleventy-billion pom-pom garlands and until I finish that monumental task I refuse to decorate. It's the principle of the thing -- there's an order one must adhere to when decorating a tree, am I wrong? ;)

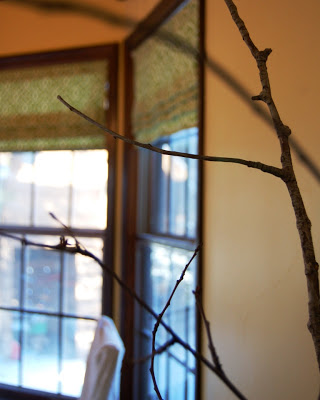
Here's a tiny peak though 'cause I love you:


(PS Giveaway coming later this week... did you like my faux mercury glass tutorial? Then make sure to watch for the post!)

Linking this to The Lettered Cottage's mantel party...

Monday, November 29, 2010

Thanksgiving 2010

We hosted Thanksgiving this year, and most of my family was able to make the trip. There were a few faces everyone missed a whole bunch, but it was fun having a big family Thanksgiving (unlike the year we all got stuck together in a cabin on the beach in horrible weather for a week solid. We wouldn't have survived without the large quantities of wine on hand, thank goodness for disaster preparedness).
 
I even did my best lame-o version of a tablescape for our casual buffet-style dinner.


So. very. proud. Sniff.
 
We had seven adults and nine kids in my teensy house. A few of the older boys escaped to play video games at my sister's house down the road, but my house was pretty packed for most of the day.
 
Oh, by the way... have I ever mentioned how my niece didn't want to speak to me for weeks after she found out each of my kiddos were boys? Here's why:
 
Some of the boy cousins playing Wii...
 
 
And the lone girl cousin, fabulous thing that she is... watching the boy cousins play Wii.
 

 Poor thing. I was her last hope. And I let her down.
 
We did manage to fill up our little thankful tree over the course of the day...
 

We are grateful for so many things...


...including some weird things.


I swear I don't have roaches. And that's not my handwriting.

Can any family members help me out here?


And I'm throwing these in just 'cause my boys are cute:

(that's a turkey hat)
 
Snuggles with Grandma
 
Be back tomorrow with something for Christmas!

lia sophia jewelry giveaway WINNER...

Hi friends! Working on a post, this one was supposed to publish this morning but something went wrong. Tsk.

________________


I hope everybody had a fabulous Thanksgiving, I can't wait to share some photos of our celebration and the chaos that is my house right now as I do the holiday decoration shuffle ... (woohoo, Christmas!)


I won't make you wait any longer for the winner of these fabulous lia sophia earrings though:


Comment #40 belongs to...


Yay, Tabitha!

Email me to claim your goodies and I'll pop them into the mail for you.

Thursday, November 25, 2010

Thanksgiving (and bonus emergency preparedness tip)

Happy Thanksgiving!

Enjoy the day, and please don't do anything silly like stick your hand in a cold, raw turkey and faint.

That's never happened to me, but it sounds like a good warning for a day like today.

I hope all of you have a wonderful, joy-filled holiday surrounded by special people in your life.

And if you do accidentally start to feel faint when your hand is inside a raw bird? Sit down and put your head between your knees. It works.

Not that I know from personal experience or anything. 

Promise.

Wednesday, November 24, 2010

Thanksgiving prep

It's crunch time, friends. I'm going to bet that most everyone is in full on Thanksgiving prep mode today.

I'm actually doing most of my cooking today because this year my family's theme is "Day-After-Turkey-Day" to cut down on the stress and maximize the merriment, especially with the large crowd that's expected in my teensy house. Everything that can be cooked today will be (including turkeys!) and tomorrow we'll gather for leftover style sandwiches on homemade rolls, wine, and games.

The turkey is prepped and in the oven, complete with yumminess on the inside, an herby buttery massage...


...and bacon!


Everything's better with bacon, right? Right. One of my husband's friends attended culinary school and told us this was his favorite way to roast a turkey... and I'm game for anything! I'll be sure to let you know how it turns out. It's going head to head in a turkey battle with my brother-in-law's deep fried bird.

I also have a thankful tree set up and ready to go -- most of you have probably seen similar things all over blogs this year, and I can't wait to try it out.


Instead of writing what we were thankful for over the course of the whole month, I've set out a glass container of "leaves" for the entire extended family to write on and hang on the tree tomorrow. 


I can't wait to see what we're thankful for... this should be interesting.

Also, I just found out that tomorrow is Cutie's birthday. Cutie is one of my oldest son's stuffed animals. He's never been as special to my son as his well-worn cat, Jeff -- so I don't know why Jeff has never had the privilege of a birthday.


We might have to stick a few candles in the pumpkin pie and sing to Cutie, lest we crush the tender spirit of a 5-year-old boy. I for one do not want that on my Thanksgiving conscious.

Family, consider yourself warned.

Tuesday, November 23, 2010

How to soften corn tortillas without a frying pan

Today's post is a quick and easy how-to that, while most likely not useful to you this week, is a nice thing to file away for the future.

I like to cook with corn tortillas, I think they are supremely yummy and rank higher in the deliciousness department than their floury brethern. Don't get me wrong, flour tortillas most definitely have their place and can be fabulous (especially when handmade and wrapped around pork barbacoa), but corn tortillas? I'm a fan.

Corn tortillas can be a giant pain to work with though -- if you use them straight from the bag, they crack and fall apart. Some people microwave them to soften them, but I think the most traditional way of softening corn tortillas is by frying them in a bit of oil for a few seconds. This way tastes wonderful - a big improvement over just microwaving them - but it makes an absolute mess of your kitchen, and it often causes intense bouts of guilt over the fat content in a 6-inch circle of corn. At least it does in my world.

Enter stage left my method. It still uses oil and has the delicious corn tortilla taste I love, but I think it must be healthier. Without consulting my boyfriend Alton Brown I can't be positive (that old episode about the science of frying bewildered me.) but I'm going to go with it, and say that it feels healthier than sticking a tortilla in a pool of oil.

Simply take corn tortillas and give each one a quick spray with cooking spray, both front and back, and lay on a pan. It's okay to overlap a bit, but don't stack 30 tortillas on a pan or anything like that. Give them some room to breathe, y'all.


(Again, I apologize for the horrid lighting in my kitchen. Making it cuter and and better lit is definitely on my to-do list, but in the meantime please take my word that having a skylight in your kitchen will not replace having real light fixtures... I have only 2 can lights and no task lights and it's really quite ridiculous.)

Stick the tortillas in a 325°F oven. Leave them there for 5-8 minutes, checking to make sure they aren't crisping up. Take out of the oven and use in your favorite recipe!


That's a photo of me showing you how floppy and soft and yummy-smelling these tortillas are.

Now you can enjoy a nice corn tortilla without having grease splatters all over your kitchen!

Monday, November 22, 2010

First snow

Yesterday the first real snowstorm of the year began, and it's still coming down this morning.


My boys can't wait to bundle up and venture outside to roll around and turn into popsicles...


...and you can see that the blurry orange piece of fuzz in the photo below is just as excited about the situation:


She's doing celebratory snow laps around the yard.


We'll be enjoying our first day of vacation today, even if I was a bit surprised that the schools gave us the entire week off. I hope you have a great Monday too!

(Don't forget to enter my lia sophia giveaway here!)

Friday, November 19, 2010

lia sophia jewelry giveaway!

I am so totally and completely geeked out that I have 100 followers, y'all. Never in a million years worth of my wildest dreams did I ever think anybody would want to read my blog... and then come back for more.

But I guess some people do, and I'm flattered and so happy to have chatted with so many great ladies (sorry if there are guys out there reading this too... comment once in a while, k?) during my short time here in blogland.

So to celebrate my blog's jump into the triple-digits, I'm having a giveaway! I don't have any fancy sponsors or anything like that, so I'm furnishing this one myself...

I'm giving away this pair of lia sophia earrings!


 Some of you lucky ladies in my circle of trust probably know that I've been a lia sophia Advisor for 4.5 years now... hellooo, I've got jewelry on the brain. I think lia sophia is a fabulous company that makes great jewelry and has an amazing lifetime replacement guarantee that can't be beat.

(Not to mention they offer their amazing hostess benefits... $15 for a $100 piece? That's less than I pay as an Advisor, dang it.)

Anyhoosies. Back to the earrings, they're called "Chime" and lia sophia describes them as: "Paper-thin silver doilies ... minutely textured and linked together." They are also lia sophia's #1 selling piece of jewelry right now... and they are absolutely darling and weightless.
  

 Here I am striking a pose with them: (no cootie worries necessary, they're my own pair!)

I'm a model, you know what I mean...

Okay, okay. Let's get to the nitty gritty.


Everybody in the United States or Canada is eligible. To enter the drawing to win these Chime earrings, just leave a comment on this post! That's all you have to do.

Oh, you want more chances to win? Okay.

Entry 1: Leave a comment on this post. (Bonus points if you tell me how much I'm workin' it in that photo)

Entry 2: Click on the button above to go to my online store, look through the catalogs and leave another comment telling me what piece of lia sophia jewelry you love the very most.

Entry 3: Follow my blog and comment again, sharing that you are now my best friend forever (or if you were one of my first 100 besties just tell me so in this comment and we can make friendship bracelets together)

Entry 4: Tweet or blog about the giveaway and comment a fourth time, letting me know.

Good luck! I'll keep the contest open until Friday, November 26 at 8:00 MST.

Wednesday, November 17, 2010

Glitter Pom-Pom Garland

Recently I've read (and noticed) that mainstream retailers seem to be catching on to the "homemade" bug that's bitten so many people across the country recently, which I think is in no small part due to the huge followings of craft, design, and decor blogs which produce so many amazing ideas. Open up the pages of your favorite catalog and you'll see Christmas 2010 decor includes a sizeable amount of paper garlands, felt wreaths and knit ornaments.

I admit, I loooove a good homemade holiday decoration. It feels so cozy and vintage.

A couple years ago, we spent Christmas with one of my sisters and we decorated our joint Christmas tree with a homemade paper garland. It gave me a serious case of the warm fuzzies, and I was hooked.

.
That crazy tree is a Douglas Fir, by the way. A most fabulously shaped sort of tree if you ask me!

Anyhoosies. I was hooked on the homemade stuff, so this year my sister and I stumbled across glitter pom-poms in a craft store and it was love at first sight.

To make my pom-pom garland, I started with all the necessary tools:  a giant bowl of pom-poms and thread to string them on.


I was going to use upholstery thread but my sister revealed that she had used a strand of embroidery floss (all 6 threads) and I was sold! (Remember how I said fabulous ideas -- and good looks, of course -- ran in my family?)

I cut a piece of embroidery floss that was roughly 9 feet (108 inches) long, made a loop at the end then tied a knot.


I started my garlands this way so that I could string them together on the tree by threading a pom-pom from the next garland through the end of a loop. I'd rather make several shorter garlands than one giant to-the-moon-and-back garland that would inevitably get tangled beyond repair.

Next, I threaded the other end of my string through a needle and stabbed my first pom-pom. It was oddly relaxing, stabbing pom-poms.


I tied a little knot in the floss to keep the pom-pom in place, and then tied another knot a little bit down the string to hold the next pom-pom in place. See my helpful diagram with invisible knots below:


Then the fun began. After ever pom-pom was strung, I would just tie another knot an inch or two down the string and stab another pom-pom.

As an aside, one little knot won't really hold the pom-pom in place if you grabbed it and pulled hard. I considered tying two knots, but realized quickly that it would be too much work... I'm all about cute results quickly, as in yesterday. The thickness of the embroidery floss does help to hold the pom-poms in place, so they're not sliding around or anything... and that's good enough for me!


Umm, cutest thing ever? I think it just might be. My 9 feet of string resulted in a roughly 8-foot finished garland. Can't wait to make a bajillion more of these cuties. I'm putting them on my Christmas tree this year, but they'd be cute anywhere!

Since my tree isn't up yet, take a look at what my sister did with some of her pom-poms:


She made felt mittens for the garland ends, and strung it around her bathroom mirror.

Glitter Pom-poms! The possibilities are endless. Go make a garland.


PS. Squee! So excited to be so *superduper* close to 100 followers... celebratory giveaway coming soon!

Sharing this post at:
Remodelaholic,
The Shabby Nest,
a little lovely,
Under the Table and Dreaming,
Krafty Kat,
The DIY Show off,
Centsational Girl,
 Busy as a Bee in Paris

How to select a hostess gift (and why you should)

With the holiday season upon us, I'm going to venture a guess and say that the majority of you fabulous readers will be guests in another person's home over the next several weeks. It might be for dinner, a holiday party, or even an extended visit. No matter the occasion, I'm going to suggest that you plan ahead and take a hostess gift.

(Yeah, that's me all right. In a ruffled hostess apron. With sneakers and a hoodie. Want to come to dinner at my house?)

I think it's a good rule of thumb to never show up for a visit or a get together empty-handed. If it's casual, like an impromptu neighborhood Christmas party, then a plate of holiday goodies is a fabulous thing to fill your hands with. And if it's a potluck and your last name starts with S so you're bringing an appetizer to share, you're off the hook as well.

Otherwise, consider taking along a token of your appreciation for the hostess with the mostest. There's no recommended budget for hostess gifts, so don't get hung up on a dollar amount. To use an old phrase, "it's the thought that counts."

Here are a few tips to make selecting a hostess gift quick and painless:

1. Consider the host or hostess and their tastes.
If they're vegetarian, don't gift them a smoked sausage and cheese basket. If their kitchen is decorated in whites and blues, don't bring them bright red and black dish towels. Easy peasy, right?

2. Remember, it's a gift.
Don't take a bottle of wine to a party and present it to your host, and then snatch it back so you can open it and start drinking. Since I'm using wine in this example, your hostess may have special wines already selected that match her menu items, and your gift (while thoughtful!) is best saved for when she can enjoy it with the perfect food. Don't be hurt if your gift isn't immediately used; if you gave your friend bodywash for Christmas you wouldn't start to cry if she didn't immediately strip down to jump in the shower, right?

Side note: The hostess in this previous example is pickier than I am, and if you bring me wine we'll open it, k?)

3. Be a little creative.
A pretty box of cookies wrapped up from a local bakery is a much better gift than a plastic bakery container of cookies from a giant chain grocery store. Going back to the wine example (I'm not single-minded or anything), take a moment to find a cute gift bag, or even make your own label with your crazy craftin' skills.

Image from Bloom And Barnacle's awesome etsy shop 


Image from Queen & Co


4. When in doubt, there are always classic fallback options.
Wine, dessert, flowers, jam, kitchen soaps or artisan bread are all great gift ideas.
(But don't be afraid to branch out!)

Image courtesy of stlbites.com


Image courtesy of Salim Virji

Hostess gifts may seem a bit old fashioned, but when you think about it, so are handwritten letters and thank you notes (just ask our ailing US Postal Service). But 'old fashioned' doesn't have to mean outdated -- good manners never go out of style. So start writing those thank you notes and start thinking about making nice gestures toward the people who go out of their way to host you in their home.

Sharing this at Someday Crafts and
Related Posts Plugin for WordPress, Blogger...