


Stair skirts are like baseboard for your stairs. They add a polished touch to staircases and are especially important to have (I think) on wooden staircases. You'll see them running along the wall like classic baseboard and also under the side of the stairs when there's no wall (these are called outer skirts).
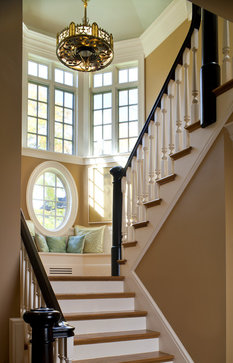
Source: Houzz
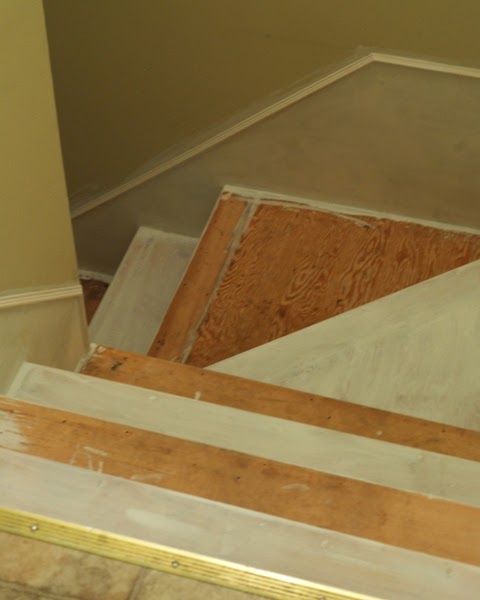
My stairs didn't have any skirt, and I wanted to fix that since I ripped all the carpet off and was trying to pass my stairwell off as a finished space. The problem was, real stair skirt seems sort of complicated and time consuming to make. I prefer to avoid complicated.
Problem solved: create faux stair skirt using a small piece of moulding. Brilliant, I tell you.
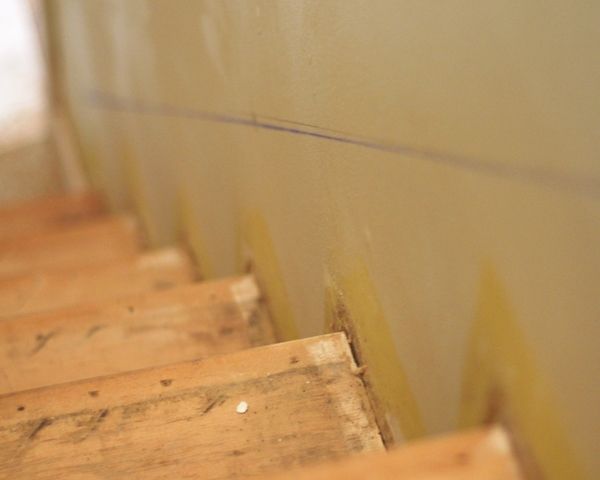
First, decide how how tall you want your "stair skirt" to be; measure this distance from a step near the bottom and a step near the top (making sure to measure at the same location on each step, like the front of the tread's bullnose). Mark these spots and use a chalk line to create a perfectly straight line running the length of the steps.
In the case of corners, get creative. We drew a couple options for the line of trim going around the wonky corner to help us decide what to do.
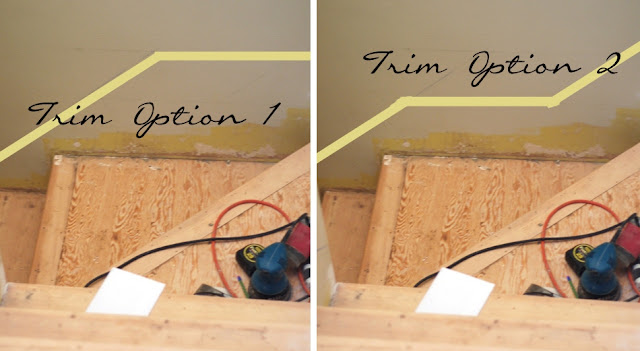
In the end we decided to go with option 1 because we felt that it looked less choppy and broken up when viewed in the space as a whole.
After you've got your chalk lines drawn, cut your moulding and tack it to the wall, then caulk it. The caulk will hold the moulding to the wall securely once it dries.
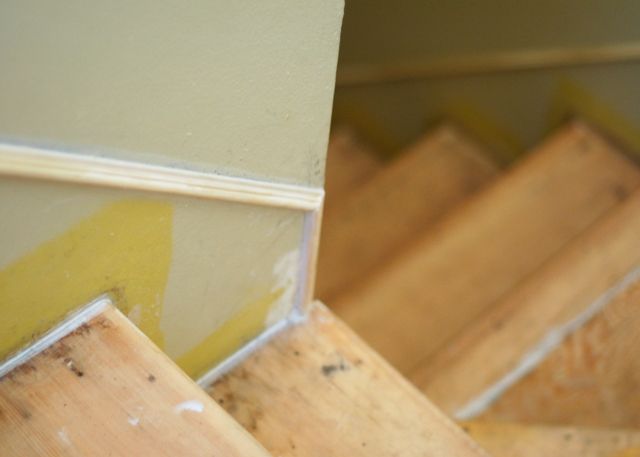
I chose to skim coat the wall underneath the piece of molding with spackle and then sand it smooth to eliminate the wall's texture and help continue the illusion of a solid piece of stair skirt once it's painted.
My stairwell project still isn't complete, so unfortunately I don't have a finished photo to share. In the meantime, here's a shot of the faux stair skirt and stairs while I primed them last night:
Seems easy enough, right? Don't let it fool you, working on staircases sort of sucks my will to live. Just a teensy bit.
Regardless, I'm excited to see how this whole thing turns out... hopefully I'll be sharing some photos of the finished product in a week or so!
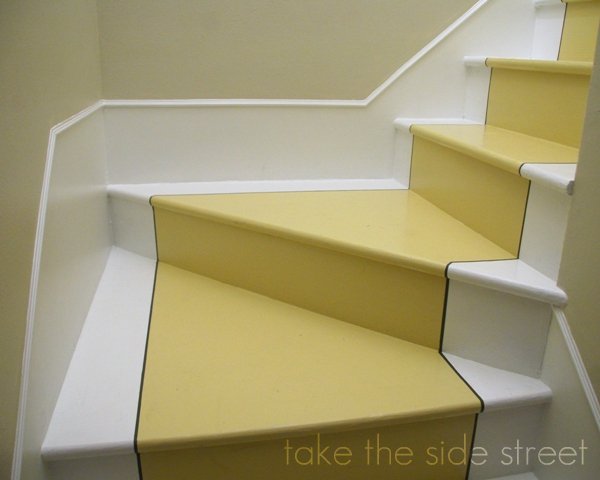
Update: Here's the finished faux stair skirt...
While you're here, go take a look at the big stairwell reveal...


It is looking SO good! I can't wait to see the finished result! :)
ReplyDeleteThis comment has been removed by the author.
ReplyDeleteExcellent idea!!! I started work a few years back for a contractor in Tennessee.. A small group, I was a "clean-up, guinney pig" girl. When the capenter quit, and there were 4 brand new, unfinished condos, my boss let me in, gave me tools, and said "good-luck". Now, I LOVE trimwork. But, skirtboards, when by yourself, can be SO time consuming. I love your idea,it opens up even more creative possibilities.
ReplyDeleteI Think your Blog is so awesome!! Following you on Twitter and here. Hugs Anne
ReplyDeleteHi Anna. Love all of your projects. I've been thinking about painting a couple of lamps blue and I think your post "sealed the deal"!
ReplyDeletelook how awesome it's coming along! ahhh im so excited for you! love the addition of the stair skirt -- i had no idea that was what it was called!
ReplyDeletexoXOxo
Jenn @ Peas & Crayons
Hello Anna. You have shared really very good information about stairs. Stair skirts are base of our stairs specially for wooden stairs.
ReplyDeleteOhhhh....my husband is going to be so sorry I saw this post via your year-end wrap-up. This is JUST what we need for our unfinished-but-better-diy stairwell. I didn't know that was called skirting but knew all those angles and cuts and whatnot was completely out of the question. However, a little mitre box work and trim like yours is very doable. Thank you!!!! Happy New Year!
ReplyDeleteMolly, Happy New Year to you too! Good luck with your stairs, this is waaay easier than doing it the "real" way ;)
ReplyDeleteYou are amazing. I love the mercury glass ad the stairs. Very creative.
ReplyDeleteLOVE this! Could you please share what paint colors were used? I love the 'light olive' with a 'blue ceiling...thank you!
ReplyDeleteVery nice and beautiful!
ReplyDeleteHow did you smooth out all the wood? After removing the carpet and mastic and what-all, it looked pretty thrashed.
ReplyDeleteEnd result is gorgeous!
birkenstock sandals
ReplyDeleteyeezy boost
supra shoes
oakley sunglasses outlet
birkenstock pas cher
louboutin shoes
nike outlet store
oakley sunglasses outlet
mulberry bags
coach outlet
mt0706