Sometimes, life sucks a little. I'm just being honest. If we can't stop bumps in the road from coming, we just have to hope that they make us better, not bitter; right? I'm going with that. Suffice it to say, the past couple years have been a challenge for me personally... the last couple months, even more so. Maybe I'll share one day, maybe not. I've felt like I lacked any control over my life, and if you know me, you're aware that I'm a fan of the control... there's that darn honesty again.
When faced with the grim, humbling, horrible, awful, no good very bad reality that I didn't have control over a lot of the things in my life, I started to fall back into some old, unhealthy patterns of "pretend-control" that I used to practice. Things involving food. Not good, friends. Not good.
So I decided to stop. This time around I've benefited from being older (oy), wiser, and therefore possessed with the ability to recognize "pretend-control" behaviors a little easier, so hopefully it will be easier to redirect them... into home projects! Of course.
Believe it or not, I've missed you, and I've missed toiling away in my little house. If I have to control something, it should be the color of my walls and the alarmingly slow speed at which I execute any sort of carpentry project. Measure forty-seven times, cut once (or three times and then go back to the store) - that's what they say!
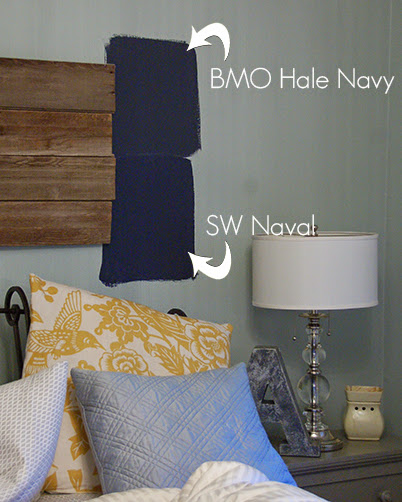
Right now I've decided to tackle my bedroom. I never really finished it and have been living without baseboard and with lots of plans for several years now. It's time to put an end to all of that silliness. So what did I do? I slapped some paint samples on the wall, duh. That's pretty much my solution to most existential crises.
I've been in love with navy for a long while, and decided to take the plunge. On 1/4 of my bedroom walls (I have commitment issues and/or my bedroom lacks in the natural light department).
I'll spare you the suspense, because I totally already chose one, since I'm used to not blogging anymore and I'm learning how to be zen in making design decisions alone. I chose Benjamin Moore's Hale Navy for its delightful greyed out, deliciously pensive self. And then I painted the other three walls white.
And then I forgot how to clean up for blog photos and left my sock monkey pajamas and half of my earthly possessions at the foot of my bed.
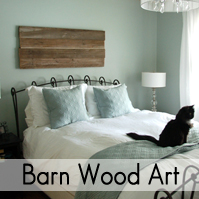
This is where I'm going:
And the next stop, besides replacing all the baseboard and casing that I ripped off this morning, is picking some fabric for some roman shades. I'm thinking something geometric, gray or mushroom maybe? This is what I'm looking at:
As always, hit me up if you have any amazing ideas.
It's good to be back! I can't promise quantity... but I'm just happy there are still people out there who read. xoxo
Showing posts with label DIY. Show all posts
Showing posts with label DIY. Show all posts
Tuesday, November 4, 2014
Monday, March 10, 2014
Kitchen Reveal (Oh, hi there.)
I've been absent for a while, and the longer it's been since I last posted, the harder it's been to make myself sit down and write even when I felt the desire. I've been working on projects, even taking photos... but it's been very difficult to find the time or the motivation to start again (an object at rest tends to stay at rest, right?).
I'm going to try, though! One of my favorite things about writing this blog is that I can fit it around my life; I can post when I have time and projects to share, and remain quiet when I don't or when my "real" life demands more attention. I'm going to work on posting a bit more regularly, especially since (a.) that won't be hard when you look at my recent posting history and (b.) it makes me happy!
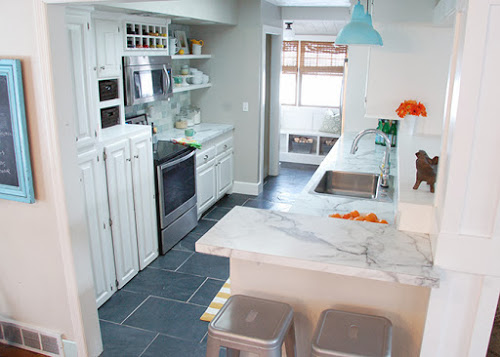
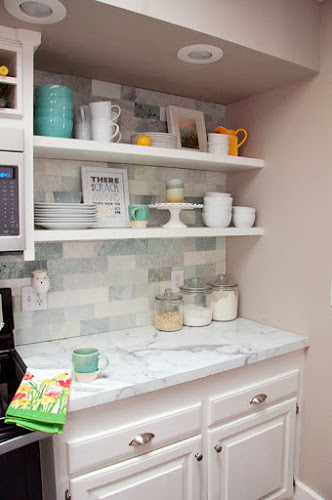
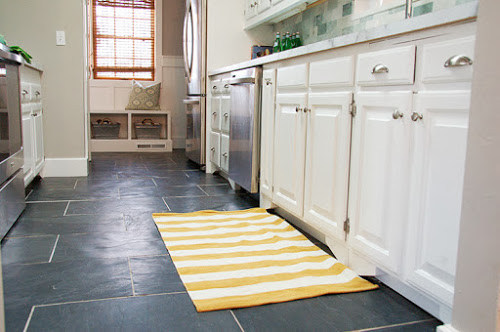
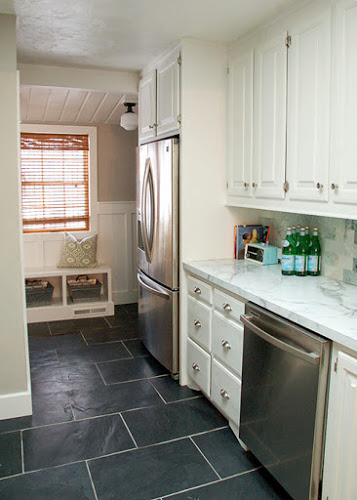
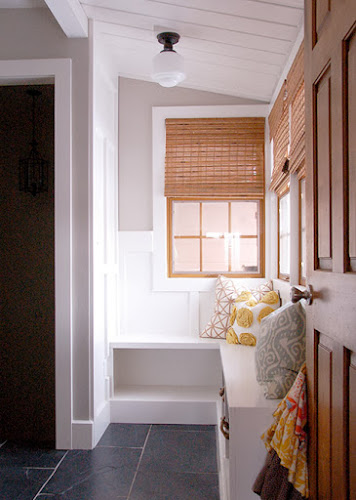
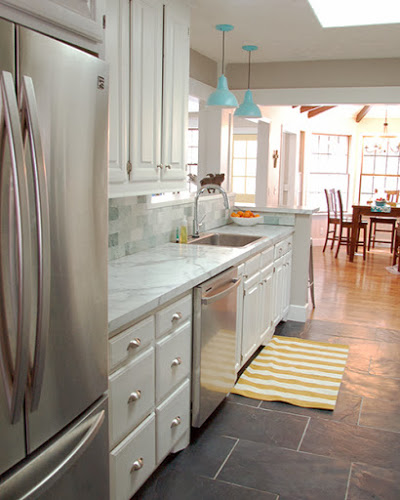
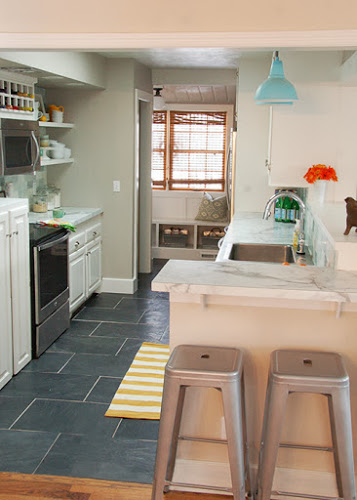
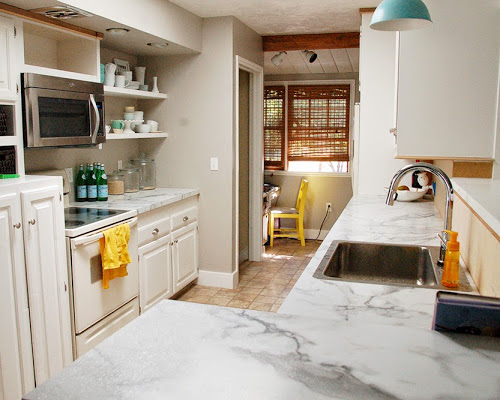
So without further ado, some news about my kitchen. We got it done just in time for Christmas, thanks to our contractor friend Joe who was immensely helpful and The Tile Shop which sent me all the gorgeous tile.
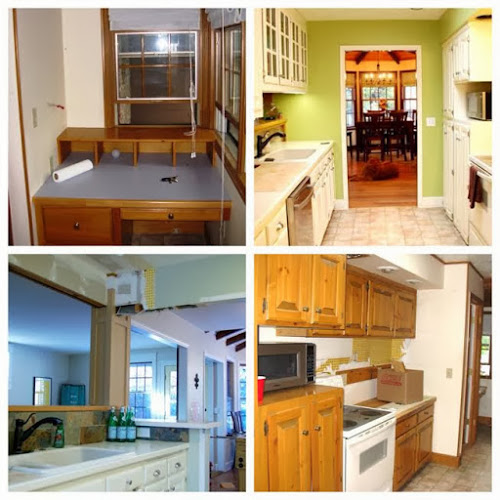
Part of me still can't believe it's done because the kitchen has been an ongoing, never ending project for several years. Let's look back:
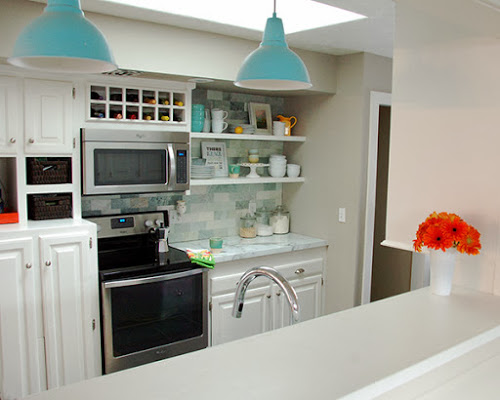
Now back to today...
Such a change, don't you think? I'll be back to share some details in a day or two, promise!
Labels:
before and after,
decorating,
DIY,
flooring,
home,
kitchen,
painting
Monday, August 12, 2013
My New Delta Faucet
Okay, friends... remember this trip?
Delta was such a gracious host to all of us when we were visiting them in Indianapolis for the blogger event.
Well.
While we were there, they took us to an amazing restaurant for dinner one night and presented us all with gifts.
Yeah, I was pretty excited. We got to pick a shower head with Delta's H20 Kinetic Technology and a Touch20 kitchen faucet. So obviously, my facial expression in the above photo makes perfect sense. Talk about perfect timing for this girl who is currently knee-deep in the world's longest kitchen remodel.
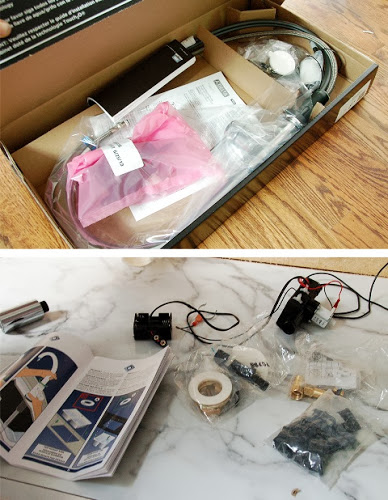
Last month I got this in the mail:
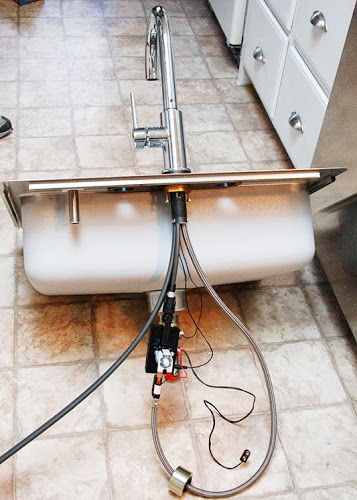
And last week it finally turned into this:
I can tell Delta is working hard to make their faucet installation as simple as possible. I could have done it all by myself if I needed to. There was a full color booklet with step-by-step drawings, and the parts were all in small bags organized by when you needed them during the installation process.
I won't lie, it was also pretty nice to be able to put it together on the kitchen floor instead of under an existing sink! In the above photo, you can see the black box that houses whatever fancy magical parts are responsible for the touch response of the faucet -- the only thing missing is the battery pack that plugs into the end of that wire.
I love the clean lines of this more contemporary faucet paired with the classic look of my new counters, and I'm officially addicted to having a touch faucet. Delta provided the faucet, but I'm being 100% honest when I say that I think their touch technology is second to none.
My five year old loves being able to wash his hands in the kitchen without needing a stool to reach the handle, and I love being able to turn it on by tapping when my hands are dirty.
So now that I've shared my love story with this new favorite toy, tell me: what kitchen product or feature can't YOU live without?
Friday, July 26, 2013
To Build a Table
While I wait on some things that will allow me to finish my kitchen makeover, I decided to tackle a little project for my front room, which is next on my list of rooms that need love. And trust me, that room needs a lot of love.
First up, I needed an entry table. The space has a pretty challenging layout -- both my narrow hallway-style entry and the front room itself. I started looking for narrow console tables but nothing worked; they were either too expensive, too short, or too deep. Most of the time, all three!
Obviously, it was time to build one.
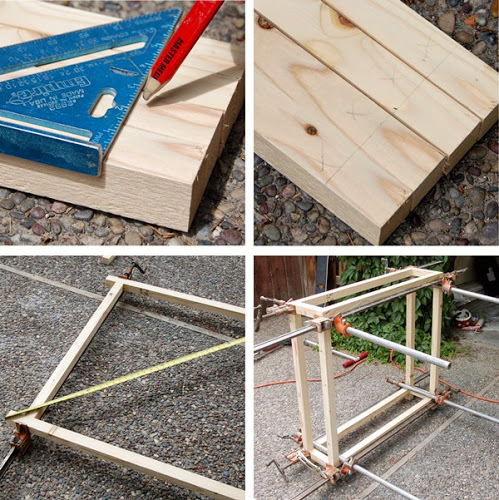
We grabbed some really inexpensive 2x2s and threw this simple table together with wood glue, clamps and screws (placed on undersides of the boards in pocket holes so I don't have to fill anything with wood putty!). It's important to select as straight of 2x2s as possible since it's not high quality lumber.
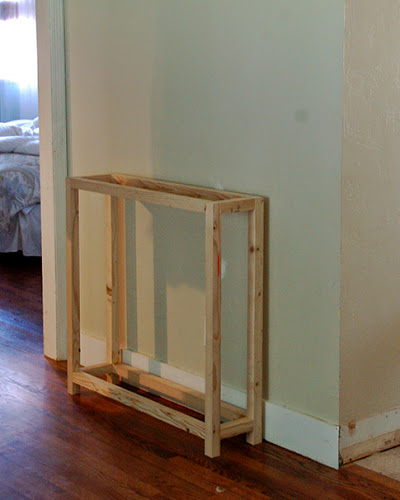
The finished table, with tabletop, will be 36" tall by 33" wide and 9.5" deep. That's about 6" taller than usual for console tables and much shallower, since the wall it will sit against runs right into a doorway and it can't block traffic. Check it out in its new home:
(On a side note, how classy is that unfinished wooden cube in front of the wall without baseboard? Maybe I should have some guests over and really impress 'em with my decorating skills!)
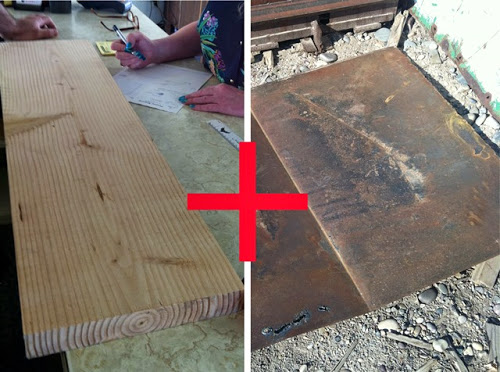
Speaking of tabletops though, maybe you're wondering where it is? I'm glad you asked.
I took a little trip to a local steel yard...
... and saw rows and rows of shiny metal sheets. Not exactly what I was looking for... so they showed me their rusty remnants outside.
Bingo! Today they are bending a piece of steel to fit over a wooden tabletop like a slipcover.
I'm not going to lie, I'm pretty excited to see this come together. Stay tuned!
Labels:
DIY,
front room,
furniture
Friday, June 14, 2013
Easy DIY Chalkboard Table Numbers
Table numbers? Wait, when did this become a wedding blog?
I keed, I keed. While there are no major changes to this blog planned, I've been spending the last several months helping a lovely friend plan and coordinate her wedding. The fabulous event is now just two weeks away which means I'm starting to get a little frazzled trying to tie up loose ends, because that's just how I roll. (Sidenote: if there was a perfume called "frazzle," it might have to be my signature scent.)
There haven't been too many DIY projects for this wedding that I've had to take care of, but I did volunteer to make the table numbers. It was a really easy project that I'm going to share today!
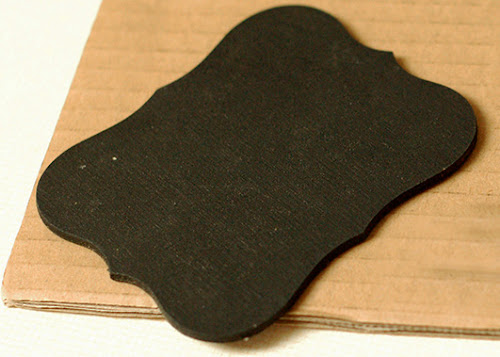
You'll need to find some unfinished wood in the shape of your choice. You can search etsy or look at a local craft store. I found these in an etsy store called ChalkStyle -- they were sold as little chalkboards with one finished side. I'm sure you could save money by finding completely unfinished ones.
Next, I bought several 63-cent dowels at my big orange home store -- I halved each one to make them 2-feet long, and they are thin enough to be cut with flower shears. This means when the big day comes and we're putting them into vases, we can very easily cut them to whatever length looks best.
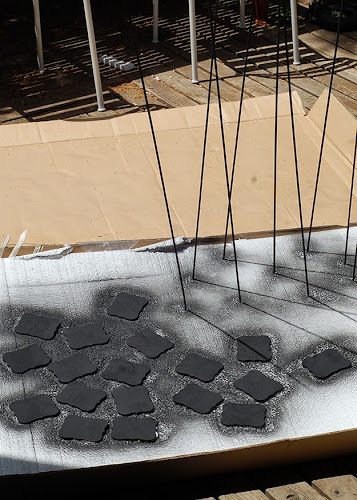
Since they're going to be visible from all sides, I decided to paint the backside of each shape and the dowels black:
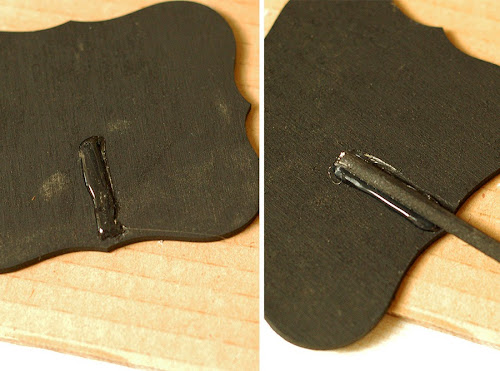
And then I simply hot glued a dowel to the backside of each shape. You could easy give this another quick spray of paint to make the glue a little less noticeable.
Season your chalkboard and get to writing. I spent the most time on this step and ended up writing each number two or three times before I was happy... because I'm just like that.
Note: I think brush-on chalkboard paint achieves a better surface than the spray version, especially on surfaces that aren't perfectly smooth. If my shapes hadn't already come with one side painted as a chalkboard, I would have taken the extra time to brush the chalkboard paint on the side I was going to write on. Just my two cents!
Last, spray each chalkboard with hairspray to help set the design. The lacquer in an inexpensive (read: dollar store) hairspray will help keep the chalk design from smearing or wiping off.
All in all, a very simple DIY with a really nice end result! Chalkboards are great for rustic themed events but they're still so popular I think you could use them for any sort of wedding.
Labels:
DIY,
spray paint
Sunday, April 14, 2013
Kitchen Progress: Shelves! Paint! Counters!
I've been pretending I didn't have a blog or a kitchen that needed paint over the last couple weeks.
Bad news: my kitchen didn't paint itself while I ignored it.
Good news: It's painted now!
More bad news: I spent my entire weekend painting.
Good news: I'm done painting in there!
Even more bad news: I'm lying, I'm not actually done painting.
Good news: I've got at least a week or two of denial to go through before I paint again.
Last week the shelves finally went up...
And this weekend I decided I couldn't put it off any longer, so I gathered my supplies, including my big girl underoos. I filled nail holes, caulked, and primed. I repainted all the trim bright white and painted the walls with the new color.
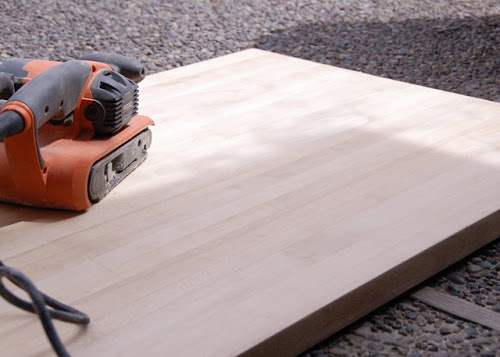
I even dragged the butcher block outside and Mike and I took turns sanding it smooth and pinky promised not to use it as a cutting board anymore.
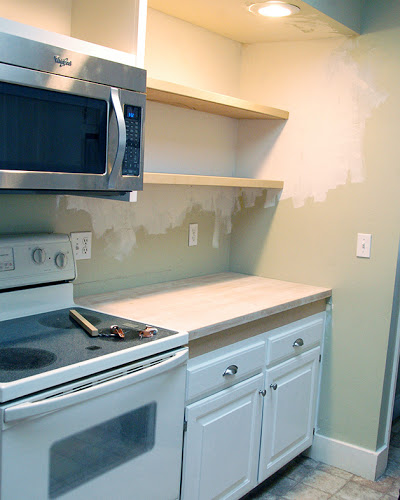
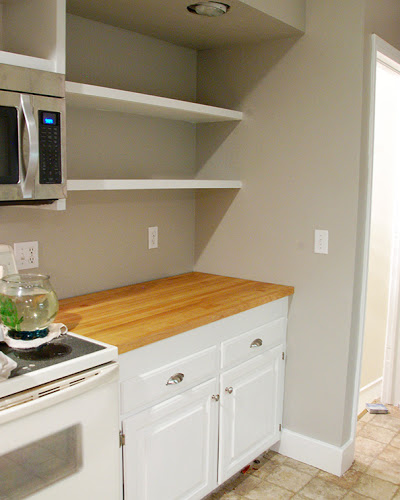
So after all the sanding and painting, plus some mineral oil (on the wood, not the walls), this is what we've got:
Doesn't it look great?? I love the paint color and I can't wait to fill the shelves up and put subway tile on the walls.
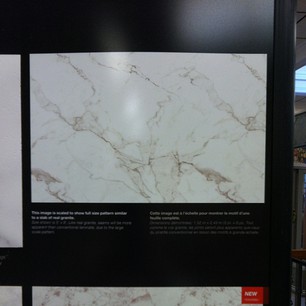
In other kitchen news, I ordered the laminate for my counters last week, too! They're by Formica and made to look like Calacatta Marble. It wouldn't make financial sense to install expensive countertops in our neighborhood, so if I'm going to go with laminate I might as well have fun with it, right?
And in non-kitchen news, I'm less than a month from finishing school and reclaiming my life. That's worth a celebration, right? The count down is on!
Tuesday, February 26, 2013
Kitchen Cabinets: the Paint, the Application & a Review
Painting your own kitchen cabinets is a big, long job. My cabinet doors literally took over my house for a week while they were laying on every available surface! In the end it's definitely worth it, but you want to make sure you do a project like this right the first time -- the idea of doing this again in the next several years is enough to make my stomach turn a little.
Earlier this month I wrote a post about prepping the kitchen cabinets for paint, so feel free to hop over there for a review. Today I want to talk about the paint I chose, how I applied it, and my thoughts on the product now that I've finished.
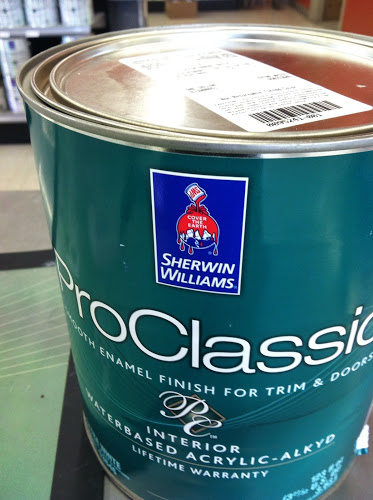
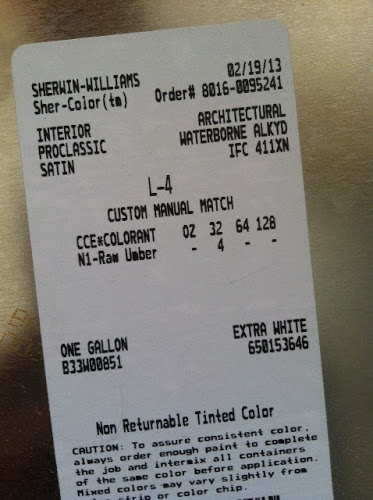
The paint I used for my doors was Sherwin Williams ProClassic Waterbased Acrylic-Alkyd. I chose this relatively new product because I wanted a paint that was self leveling to help eliminate brush strokes, and one that would dry to a really hard finish, both characteristics of oil (alkyd) paints. This paint combines those traits with a water based (acrylic) paint's lower VOC levels, a non-yellowing finish and water cleanup. It sounded too great to pass up!
The color I chose was a custom mix called "L4 white" that my Sherwin Williams mixes for a lot of painters - I don't know if it's a company-wide or a regional thing, but I first heard about it from our contractor friend and have been using it for my trim ever since.
It's regular white paint with just a touch of raw umber to tone it down the tiniest bit. It reads as a true, bright white that goes with everything but doesn't have the glowy, almost flourescent brightness that pure white paint can have. I had zero desire to flip through 50 white paint chips or read blogs about the right white. The right white for me is white. Ha :)
As you can see in the photo above, I went with a satin sheen because I have a sneaking suspicion my cabinet doors were homemade, and they have little warps, dips, and knots in them that I wanted to minimize. The lower the sheen, the more imperfections it hides -- and the Sherwin Williams product webpage says this satin paint is cleanable, so I went with it!
I used a 2" angle sash brush, like this one:
It's my favorite type of brush, and the one I use for my trim projects too.
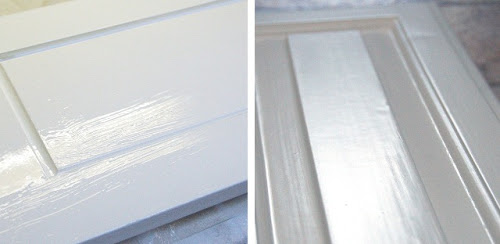
When painting, I started on the edges/details and worked my way toward the center. I painted quickly and put a thick enough layer on that I could smooth it out over the entire door. The goal is to have complete coverage without any little spots, patches, or lines where the paint skimmed or "hopped" over. This allows the paint to level itself smoothly across the entire surface.
However, don't apply it so thickly that it starts dripping off any higher details. (the door may be horizontal when you paint but I will bet that it's not perfectly flat, and if there are height differences the paint can drip or pool!)
I will say that this paint is a bit trickier to apply than wall paint, but not so tricky that it would or should be intimidating. It's a good reason to paint the backs of your doors first, so you can practice your technique!
I'm really pleased with this paint. True to the product description, it did clean up easily with water, there was no oil-based paint smell, and I feel like the finish, when applied carefully, is excellent and smooth. It was a little drippy in places and I can still see minimal brush strokes in a few spots, but I picked up a few tips that I'm sharing with you at the end of this post that I think will make a difference in your experience if you decide to try this paint on your next project.
The satin finish has a nice glow to it that I'm happy with, and the lower sheen hides a lot of the weird cabinet imperfections while still cleaning up nicely from the couple of jam spills we've already had.
I think my cabinet frames (painted with the ProClassic acrylic enamel by mistake) got that hard, finished feeling to them faster than my doors have, but the frame paint didn't have the oil-based component that takes longer to cure. I'm sure I'm going to be happy with the extra strength this paint will bring to my doors and I'm willing to baby them a little for a week or so while they set up!
All in all, it's a win. I'm going to remember this paint!
Earlier this month I wrote a post about prepping the kitchen cabinets for paint, so feel free to hop over there for a review. Today I want to talk about the paint I chose, how I applied it, and my thoughts on the product now that I've finished.
Paint
The paint I used for my doors was Sherwin Williams ProClassic Waterbased Acrylic-Alkyd. I chose this relatively new product because I wanted a paint that was self leveling to help eliminate brush strokes, and one that would dry to a really hard finish, both characteristics of oil (alkyd) paints. This paint combines those traits with a water based (acrylic) paint's lower VOC levels, a non-yellowing finish and water cleanup. It sounded too great to pass up!
The color I chose was a custom mix called "L4 white" that my Sherwin Williams mixes for a lot of painters - I don't know if it's a company-wide or a regional thing, but I first heard about it from our contractor friend and have been using it for my trim ever since.
It's regular white paint with just a touch of raw umber to tone it down the tiniest bit. It reads as a true, bright white that goes with everything but doesn't have the glowy, almost flourescent brightness that pure white paint can have. I had zero desire to flip through 50 white paint chips or read blogs about the right white. The right white for me is white. Ha :)
As you can see in the photo above, I went with a satin sheen because I have a sneaking suspicion my cabinet doors were homemade, and they have little warps, dips, and knots in them that I wanted to minimize. The lower the sheen, the more imperfections it hides -- and the Sherwin Williams product webpage says this satin paint is cleanable, so I went with it!
Application
I used a 2" angle sash brush, like this one:
It's my favorite type of brush, and the one I use for my trim projects too.
When painting, I started on the edges/details and worked my way toward the center. I painted quickly and put a thick enough layer on that I could smooth it out over the entire door. The goal is to have complete coverage without any little spots, patches, or lines where the paint skimmed or "hopped" over. This allows the paint to level itself smoothly across the entire surface.
However, don't apply it so thickly that it starts dripping off any higher details. (the door may be horizontal when you paint but I will bet that it's not perfectly flat, and if there are height differences the paint can drip or pool!)
I will say that this paint is a bit trickier to apply than wall paint, but not so tricky that it would or should be intimidating. It's a good reason to paint the backs of your doors first, so you can practice your technique!
(Left: a cabinet right after application with visible brush strokes; Right: a cabinet after being left to dry for an hour or two.)
My Thoughts
I'm really pleased with this paint. True to the product description, it did clean up easily with water, there was no oil-based paint smell, and I feel like the finish, when applied carefully, is excellent and smooth. It was a little drippy in places and I can still see minimal brush strokes in a few spots, but I picked up a few tips that I'm sharing with you at the end of this post that I think will make a difference in your experience if you decide to try this paint on your next project.
The satin finish has a nice glow to it that I'm happy with, and the lower sheen hides a lot of the weird cabinet imperfections while still cleaning up nicely from the couple of jam spills we've already had.
I think my cabinet frames (painted with the ProClassic acrylic enamel by mistake) got that hard, finished feeling to them faster than my doors have, but the frame paint didn't have the oil-based component that takes longer to cure. I'm sure I'm going to be happy with the extra strength this paint will bring to my doors and I'm willing to baby them a little for a week or so while they set up!
All in all, it's a win. I'm going to remember this paint!
Tips:
- Don't skip sanding if your surface is glossy at all. There were a couple doors where I missed a small spot when sanding down the high gloss paint, and this paint would bead up during application. I'd wipe the wet paint off, let it dry then re-sand. If you want your finish to last, remember: prep, prep, prep.
- Wash your brush each day - I felt like a soft, clean brush made for a much smoother finish, and when I saved the brush and wrapped it up overnight, the stiffer brush left deeper marks in the wet paint that didn't fill in as well when the paint leveled.
- Don't overbrush. You hear it a lot, but apply the paint, smooth it out a little and then walk away.
- Apply thin coats on vertical surfaces. Since this paint is self leveling, it will flow together after application and on a vertical surface this means it's prone to dripping, so be careful with how much you apply and don't forget to watch it.
- Paint the backs of your doors first so you can practice and also so they can have a head start drying and you can carefully re-hang them a day after the fronts are painted. (if you're impatient like me)
- To replace your cabinet hardware soon after painting, just leave the screws loose and keep the cabinets open for a week or so to help prevent sticking while the paint cures (the water may evaporate quickly but the oil-based part of the paint takes a little longer to fully dry and harden.)
(I'm not affiliated with Sherwin Williams and I received no compensation or products from them for this project -- I simply wanted to share my thoughts and experience with this paint!)
Monday, February 25, 2013
Painted Kitchen Cabinets
Last week, after what felt like an eternity, I finished painting my kitchen cabinets. I am so relieved to put this project behind me, especially considering how much more painting I still need to do in this room. Let's not talk about that right now though, I'm still in my happy place.
It looks like a subtle change on the screen, but I swear it's made a big difference in person. The entire room feels so much brighter. It matches the color scheme of my house now, instead of being a big off-white sore thumb of a room and a testimony to thinking paint colors through carefully and in context with the bigger picture of a house's design.
As a reminder, here's a photo of the north wall before we started monkeying with anything:
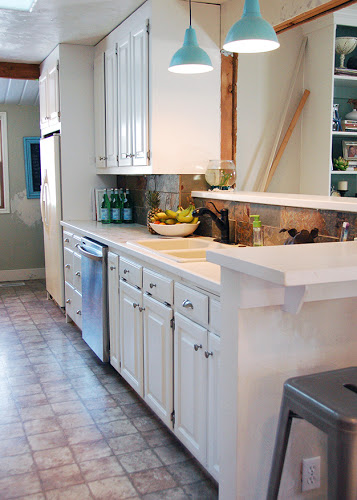
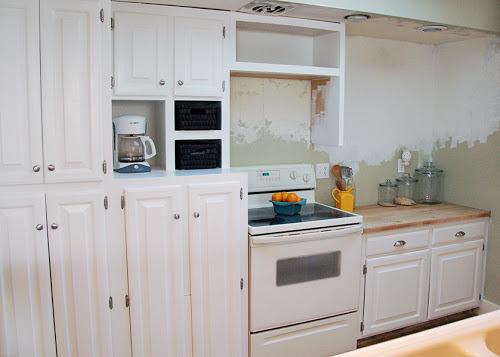
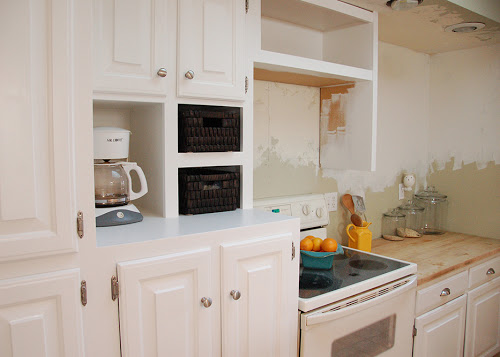
And here it is after we messed with cabinets and the painting was all done:
Some of the difference in color is lost due to different lighting and my poorish skills in photography, so here's a better illustration of the difference:
See? Totally worth painting. The previous color ended up looking dingy and dim when surrounded by all the crisp white trim of the other rooms that my kitchen is now wide open to.
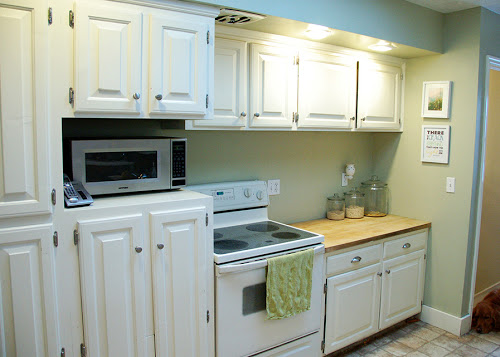
The halfway unpainted box is where our new over-the-range microwave will go and not match my bisque-colored oven.
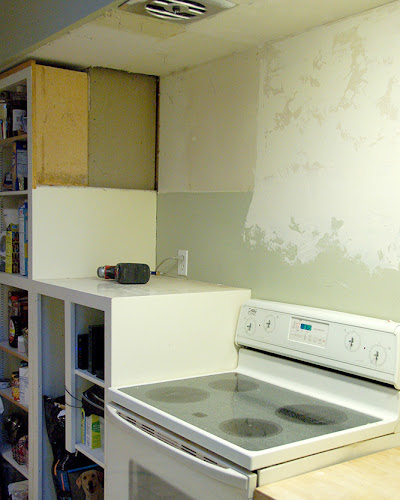
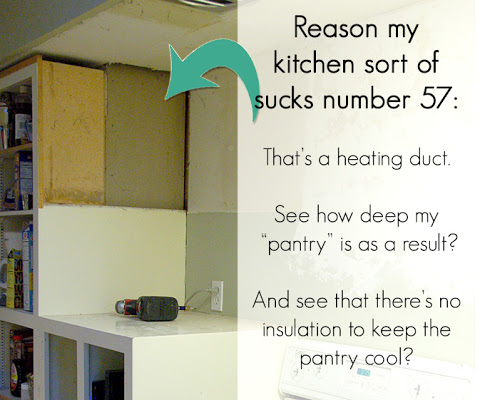
Instead of adding wine storage to the space where the microwave was previously, you can see that we created a sort of coffee nook. Because that space is between my range top and the weird cabinet-covered heating duct, I decided it was too warm for wine storage. Improvise, adapt, overcome. That's what I say... when I'm writing blog posts.
On the plus side, now I get to buy a cuter coffee maker. And then I get to slowly come to terms with having an appliance on display. Wish me luck...
I'll be back tomorrow with details about the paint and the process!
Update: Learn about the paint I used and read my tips for achieving the best finish!
Wednesday, February 20, 2013
Cabinet Painting Worst Case Scenario Survival Guide
Sometimes we need reminders from the universe to do things right the first time, instead of cutting corners. And occasionally, those reminders aren't fun. And maybe those reminders may trigger a panic attack as we imagine our cabinet doors still spread around our dining room floor when our kids graduate high school. This is all purely hypothetical, of course.
On Saturday I took my cabinet doors down, believing that the long weekend would help me get them taken care of quickly. I painted the fronts of them with some porch and floor paint that I had seen someone recommending for cabinets because of the self-leveling characteristics (it was oil based) and its super hard finish.
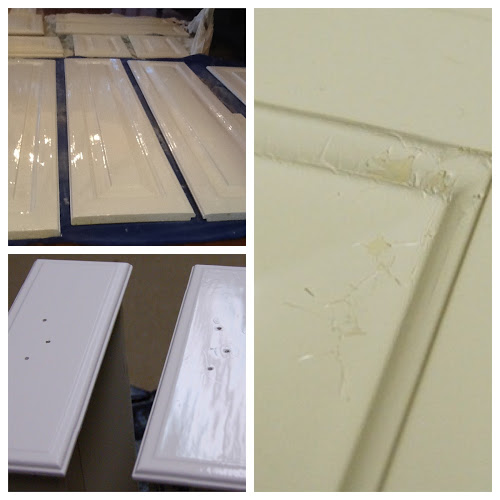
Problem #1: The porch and floor paint dried glossy. Crazy, crazy glossy. I still can't explain how I missed that on the paint can... I think school may be affecting my decision making abilities. Solution? Grab some clear satin spray and tone those babies down...
At first it looked like I was a brilliant problem solver... but then?
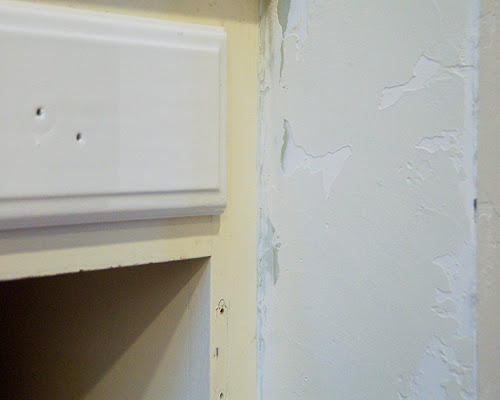
Problem #2: The clear spray made the white paint buckle and crack in places. I checked the temperature, I checked ingredients... the only explanation I can think of is that I didn't allow the oil-based paint to properly cure before applying another product on top of it, which made it go Britney-Spears-shaving-her-head crazy on me. I waited over 24 hours, people... I don't have time for high maintenance paint issues.
Problem #3: At the same time the crackling paint disaster of 2013 was happening, our contractor buddy came over to put a cabinet box above my range to mount the microwave to, and when he got here we realized the cabinet next to it was too deep for the microwave to open... so he had to rip out yet another cabinet, cut it in half and replace it before he was able to even get started.
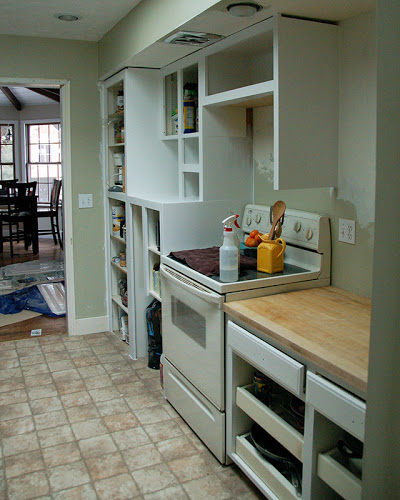
Problem #3 1/2: This doesn't really pertain to the story, but it's a problem nonetheless. Take a look at my ridiculous cabinets:
Anyway, this was the point where I started to panic and thought I was having a heart attack for a good 30 minutes before I realized that I was just freaked out of my gourd. I knew I should have chosen my paint more carefully, so I started doing research to try to fix my mistake.
While searching I discovered a really interesting newer product -- a water based (acrylic) oil (alkyd) paint. This is fancy stuff, y'all... it's non yellowing, lower VOC and cleans up with water... but it's self leveling and super hard like a traditional oil paint. It's pretty much the paint gods' gift to furniture, trim and cabinetry. Sherwin Williams and Benjamin Moore both make one, and so I decided to go pick up a gallon while I kicked myself for not doing it in the first place.
On Monday I bought my new fancy paint and started painting my cabinet frames, since I still couldn't look at my messed up doors without my eyeballs starting to twitch; I needed to make some actual progress before I would be emotionally ready to tackle those again!
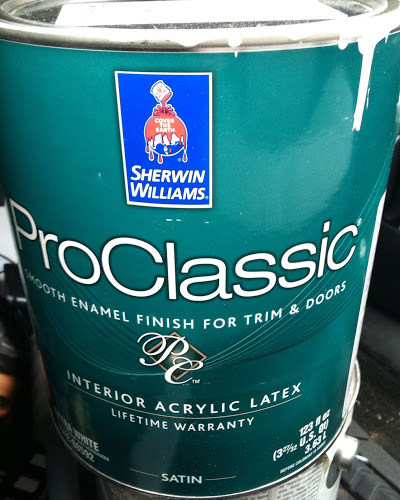
Problem #4: After two coats on my cabinet frames, I looked at the paint can for the first time.
Umm...
The paint guy gave me the wrong paint. Aaaahhhhh!!! This was regular acrylic latex (albeit a bit fancier and harder because it's in their ProClassic line). The chipped stuff all over my cabinets was acrylic latex... I wasn't going down that road again, even if this paint was 10 times nicer than the stuff I had sprayed 3 years ago.
I called the store, they apologized and replaced the wrong paint with the stuff I had asked for:
And that's where I am now. I've decided to leave my frames as is, since the ProClassic Acrylic Latex I received in error is still harder and smoother than a traditional wall paint, and the frames receive less wear than the doors. Plus if I had to repaint the doors and the frames I might literally never paint another thing again.
So today I start painting the doors. Cross your fingers that the can doesn't spontaneously combust? At this point I wouldn't be surprised!
Moral of today's worst case scenario survival story: Cutting corners is not always a good thing! And, you know... maybe look at products salespeople hand you.
Update: See them painted!
On Saturday I took my cabinet doors down, believing that the long weekend would help me get them taken care of quickly. I painted the fronts of them with some porch and floor paint that I had seen someone recommending for cabinets because of the self-leveling characteristics (it was oil based) and its super hard finish.
Problem #1: The porch and floor paint dried glossy. Crazy, crazy glossy. I still can't explain how I missed that on the paint can... I think school may be affecting my decision making abilities. Solution? Grab some clear satin spray and tone those babies down...
At first it looked like I was a brilliant problem solver... but then?
Problem #2: The clear spray made the white paint buckle and crack in places. I checked the temperature, I checked ingredients... the only explanation I can think of is that I didn't allow the oil-based paint to properly cure before applying another product on top of it, which made it go Britney-Spears-shaving-her-head crazy on me. I waited over 24 hours, people... I don't have time for high maintenance paint issues.
Problem #3: At the same time the crackling paint disaster of 2013 was happening, our contractor buddy came over to put a cabinet box above my range to mount the microwave to, and when he got here we realized the cabinet next to it was too deep for the microwave to open... so he had to rip out yet another cabinet, cut it in half and replace it before he was able to even get started.
Problem #3 1/2: This doesn't really pertain to the story, but it's a problem nonetheless. Take a look at my ridiculous cabinets:
Anyway, this was the point where I started to panic and thought I was having a heart attack for a good 30 minutes before I realized that I was just freaked out of my gourd. I knew I should have chosen my paint more carefully, so I started doing research to try to fix my mistake.
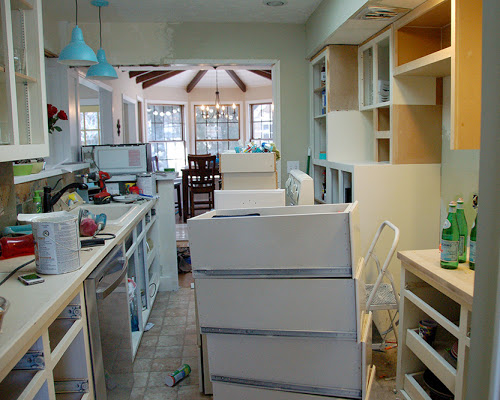
(admit it, if your kitchen looked like that and you realized that you were going to have to repaint... you might have a panic attack too!)
While searching I discovered a really interesting newer product -- a water based (acrylic) oil (alkyd) paint. This is fancy stuff, y'all... it's non yellowing, lower VOC and cleans up with water... but it's self leveling and super hard like a traditional oil paint. It's pretty much the paint gods' gift to furniture, trim and cabinetry. Sherwin Williams and Benjamin Moore both make one, and so I decided to go pick up a gallon while I kicked myself for not doing it in the first place.
On Monday I bought my new fancy paint and started painting my cabinet frames, since I still couldn't look at my messed up doors without my eyeballs starting to twitch; I needed to make some actual progress before I would be emotionally ready to tackle those again!
Problem #4: After two coats on my cabinet frames, I looked at the paint can for the first time.
Umm...
The paint guy gave me the wrong paint. Aaaahhhhh!!! This was regular acrylic latex (albeit a bit fancier and harder because it's in their ProClassic line). The chipped stuff all over my cabinets was acrylic latex... I wasn't going down that road again, even if this paint was 10 times nicer than the stuff I had sprayed 3 years ago.
I called the store, they apologized and replaced the wrong paint with the stuff I had asked for:
And that's where I am now. I've decided to leave my frames as is, since the ProClassic Acrylic Latex I received in error is still harder and smoother than a traditional wall paint, and the frames receive less wear than the doors. Plus if I had to repaint the doors and the frames I might literally never paint another thing again.
So today I start painting the doors. Cross your fingers that the can doesn't spontaneously combust? At this point I wouldn't be surprised!
Moral of today's worst case scenario survival story: Cutting corners is not always a good thing! And, you know... maybe look at products salespeople hand you.
Update: See them painted!
Labels:
DIY,
dumb stuff I do,
kitchen,
paint
Subscribe to:
Posts (Atom)


