Showing posts with label master bedroom. Show all posts

Sunday, January 25, 2015

Form Follows Function (I'm Not Lazy, Swear!)

Most of us have heard the quote "form follows function." Maybe you're better informed, but I was unaware that the original quote (which is technically "form ever follows function" and is attributed to American architect Louis Henry Sullivan)  had more to do with efficiency and construction profit margins than poorly chosen billboard fonts and prohibitively ornamental bathroom faucets.

Regardless of the original spirit, the saying is apropos to any form of design. So that's what we're going to talk about. And specifically, we're going to discuss my bedroom. The blinds. And how I don't want to cover them in fabric anymore.

(Side note: I'm going to make a scientific hypothesis here and say that fabric left at rest stays at rest.)


Okay, yes. I realize that it sounds like I'm just being lazy. But hear me out: my laziness was actually a blessing in disguise, because it allowed me to live with the blinds for a bit. (I hung them before Christmas so that when I covered them I could just pop them right back into their mounting hardware, easy peasy.)

During this past month, I realized that my bedroom window coverings need to both provide privacy and let in natural light; the window is street-facing and it's a darker room. If I cover the blinds with fabric, I will achieve privacy but I will lose the delicious filtered morning light that I find so precious in my east-facing room.

No matter how pretty the fabric is, or how great it would look, I can't sacrifice the function simply for the sake of a beautiful window. That would be foolish. So now I'm not sure what to do. No window coverings at all? A small tailored valance? What are your thoughts?

Tuesday, December 2, 2014

Bedroom Blues

 First, you need to know that I'm always cold. Even inside with my furnace running.

Second, I'm really bad at blogging. Sorry about that.

Third, I'm also sort of lazy.

I can't excuse my blogging laziness, so instead I'm going to blame the slow progress in my bedroom on my perpetual shivers. Y'all don't understand how hard it is to go outside when it's 10°F (especially to do something as dumb as cutting pieces of trim). This whole winter thing is for the birds, and if someone in San Diego wants to trade houses with me, I will throw in my kids chickens to sweeten the deal.

(pretend this is a roman shade. I know I am.)

To sum up, I'm practically incapable of doing anything productive when it's cold. It is one thing to venture into the freezing temperatures for a pair of boots at 50% off on Black Friday. It is another thing entirely to do anything else during the months of December, January, or February (and November, March, and April if you live in Idaho).

Last week it warmed up to a semi-reasonable temperature and I finally got the casing done. Baseboard, not so much.  Paint, not so much. Baby steps.


You can still see all the progress I've made. I really need to turn those blinds into DIY roman shades, and I've realized over the past week that staring at the box and willing it to happen isn't getting the job done.

I'll keep you posted (about if anything new happens while I stare at the box).

Tuesday, November 4, 2014

Some honesty (and a bedroom makeover for good measure)

Sometimes, life sucks a little. I'm just being honest. If we can't stop bumps in the road from coming, we just have to hope that they make us better, not bitter; right? I'm going with that. Suffice it to say, the past couple years have been a challenge for me personally... the last couple months, even more so. Maybe I'll share one day, maybe not. I've felt like I lacked any control over my life, and if you know me, you're aware that I'm a fan of the control... there's that darn honesty again.

When faced with the grim, humbling, horrible, awful, no good very bad reality that I didn't have control over a lot of the things in my life, I started to fall back into some old, unhealthy patterns of "pretend-control" that I used to practice. Things involving food. Not good, friends. Not good.

So I decided to stop. This time around I've benefited from being older (oy), wiser, and therefore possessed with the ability to recognize "pretend-control" behaviors a little easier, so hopefully it will be easier to redirect them... into home projects! Of course. 

Believe it or not, I've missed you, and I've missed toiling away in my little house. If I have to control something, it should be the color of my walls and the alarmingly slow speed at which I execute any sort of carpentry project. Measure forty-seven times, cut once (or three times and then go back to the store) - that's what they say!

Right now I've decided to tackle my bedroom. I never really finished it and have been living without baseboard and with lots of plans for several years now. It's time to put an end to all of that silliness. So what did I do? I slapped some paint samples on the wall, duh. That's pretty much my solution to most existential crises.


I've been in love with navy for a long while, and decided to take the plunge. On 1/4 of my bedroom walls (I have commitment issues and/or my bedroom lacks in the natural light department).

I'll spare you the suspense, because I totally already chose one, since I'm used to not blogging anymore and I'm learning how to be zen in making design decisions alone. I chose Benjamin Moore's Hale Navy for its delightful greyed out, deliciously pensive self. And then I painted the other three walls white.


And then I forgot how to clean up for blog photos and left my sock monkey pajamas and half of my earthly possessions at the foot of my bed.

This is where I'm going:


And the next stop, besides replacing all the baseboard and casing that I ripped off this morning, is picking some fabric for some roman shades. I'm thinking something geometric, gray or mushroom maybe? This is what I'm looking at:
(Source: 1, 2, 3)

As always, hit me up if you have any amazing ideas.

It's good to be back! I can't promise quantity... but I'm just happy there are still people out there who read. xoxo

Thursday, January 19, 2012

IKEA Hack Nightstand Construction Details

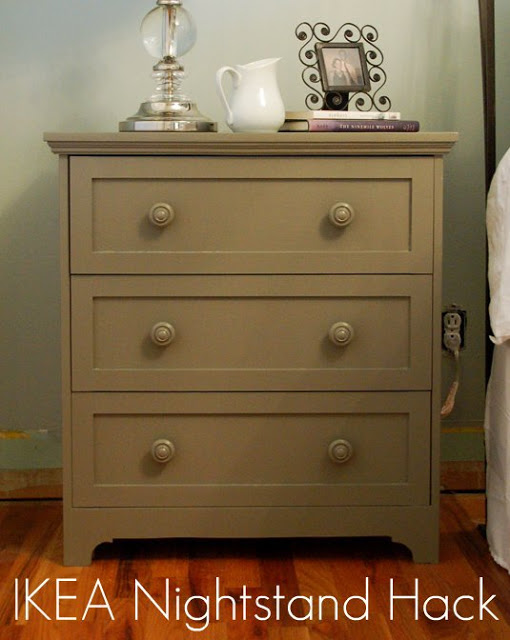
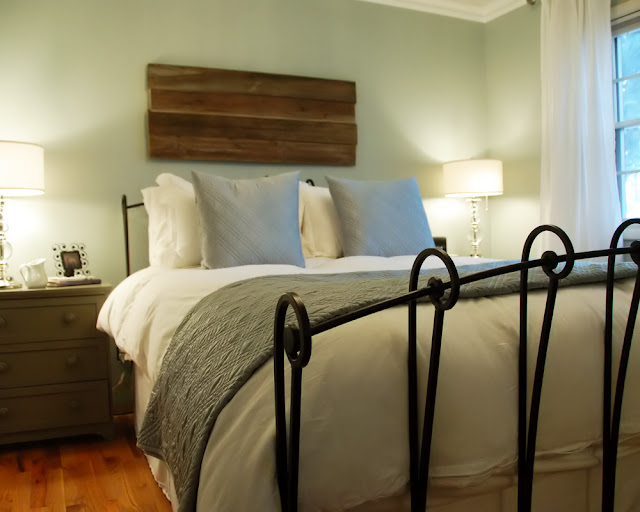
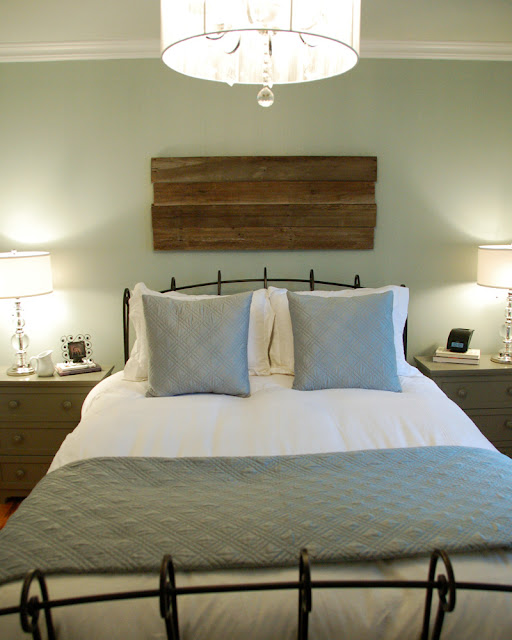
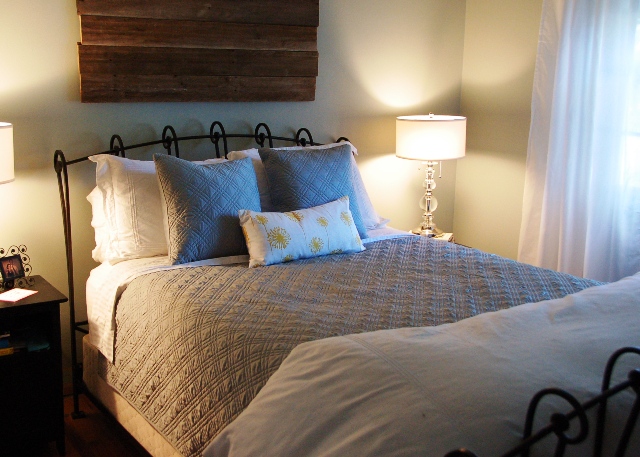
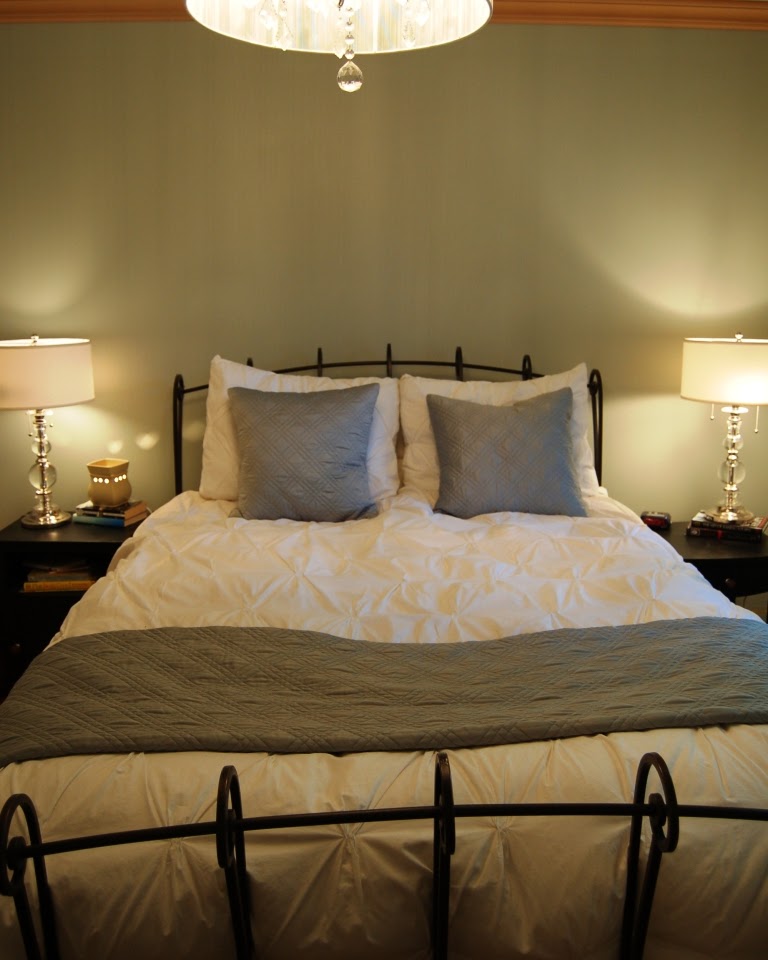
Yesterday I showed you my fancy new nightstands, and today I'm outlining the steps I took to construct and finish them. Buckle up, because here are the steps to make your own!


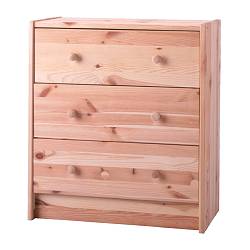
Step 1: Assemble RAST nightstand per included instructions.


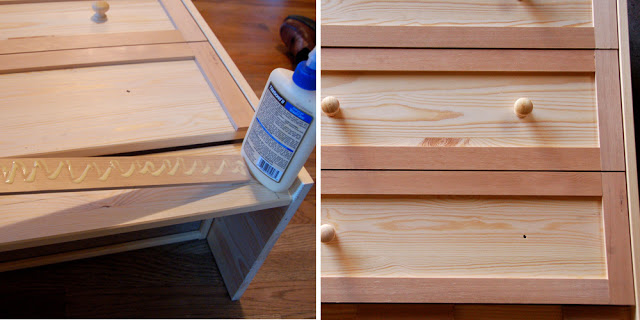
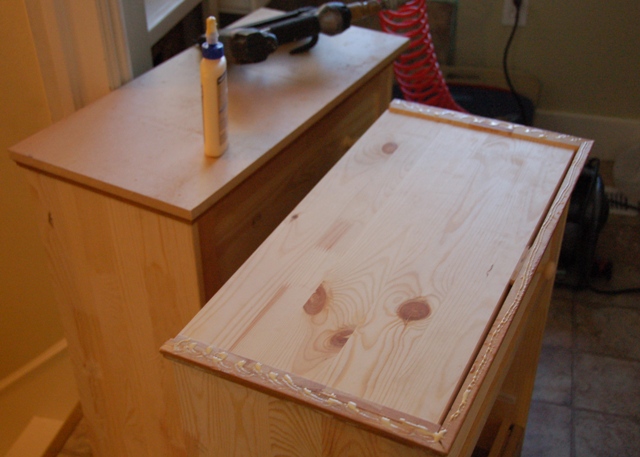
Step 2: Cut and glue lattice on drawer fronts.
I purchased  a few sticks of 1/4" hemlock lattice at my local HD. It's nice and smooth, great for crafts - if you can find it. It took me forever to locate it in my store even though it was just in the regular moulding department... I struggle. I cut it into 7 7/16" lengths and 20 3/16" lengths and attached it with wood glue. Instead of clamps, I used heavy cans of food to hold the lattice in place until it dried - we're super professional over here.


I decided against mitering the corners after looking at several nightstands I liked and noticing this style of joint on their drawer fronts. I'm a total copy cat.

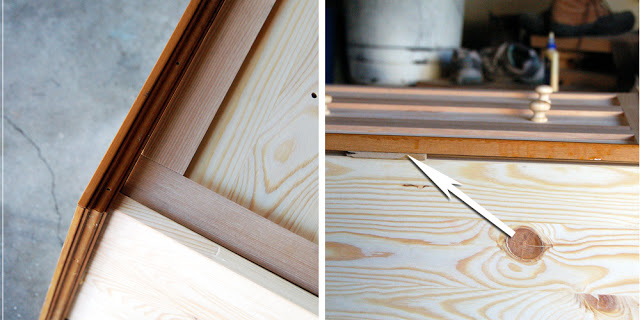
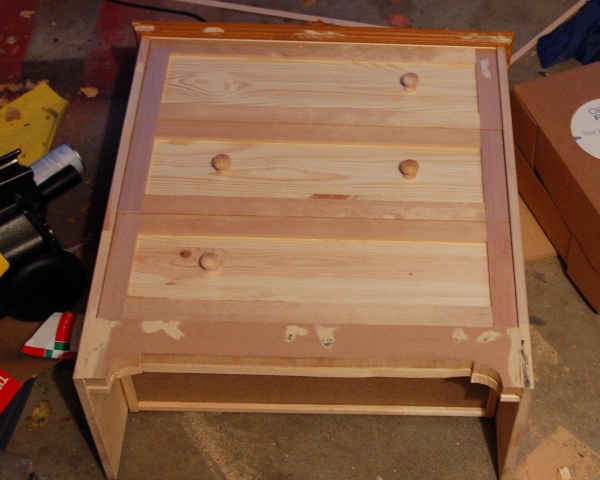
Step 3: Attach decorative moulding to top
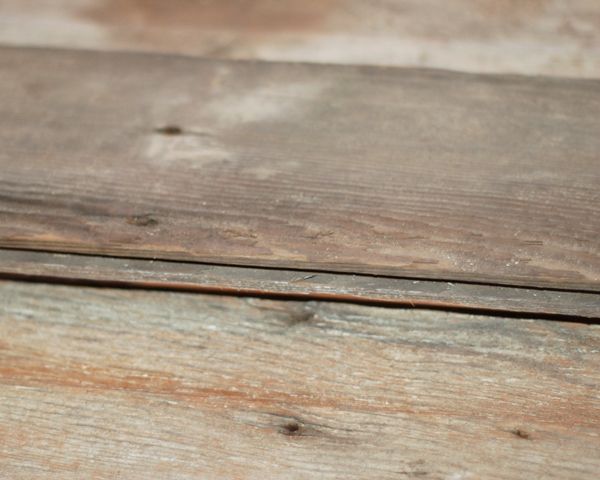
Next I used small moulding (removed from various places in my 1960 house, layers of old yellowed poly included free of charge!) and trimmed out the top of the nightstands. I used a thin piece of scrap lattice to fill and reinforce the gap along the front created by the nightstand's wider side pieces.


Step 4: Details!
- Tighten any visible screws until they suck up into the wood so you can fill them with wood putty and sand them flush.
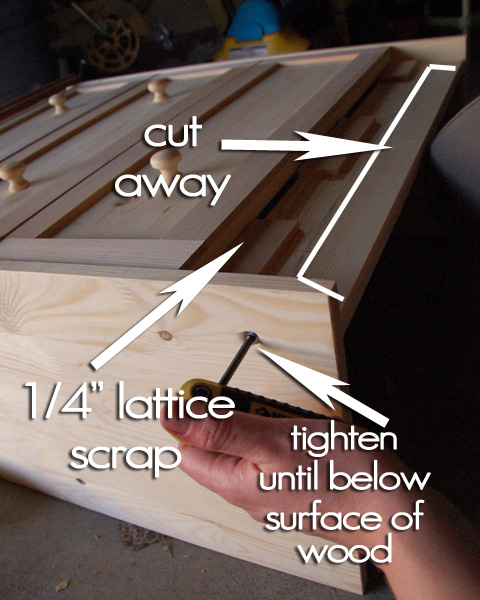
- Cut away a rough opening in the toe kick-thingy with a jig saw.
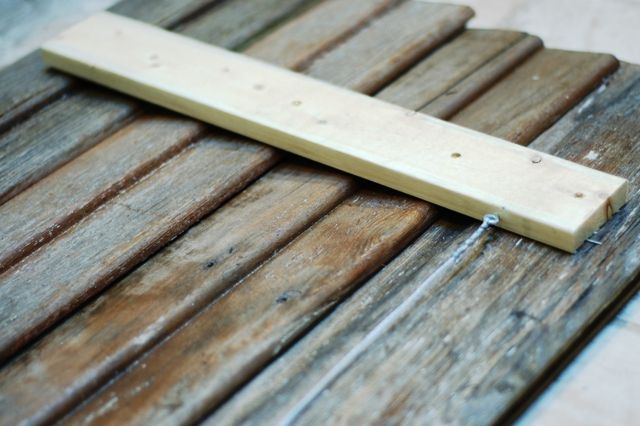
- Add a few pieces of scrap  lattice to the top of the toe kick so that a 3/4" piece of MDF placed on top of them will sit flush with the front of the nightstand.


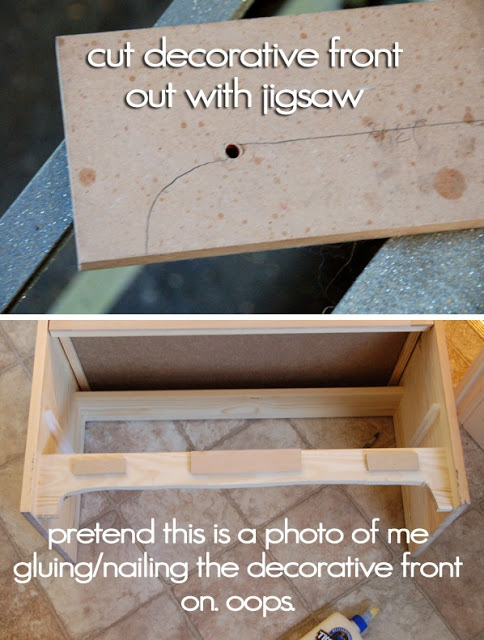
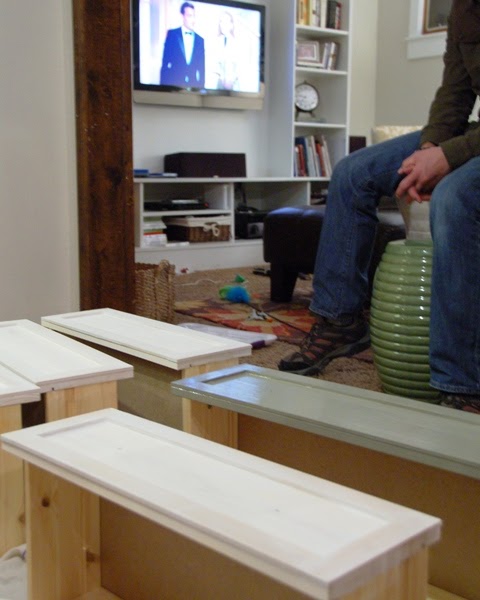
Step 5: Cut out decorative front piece with jig saw
I drew a template, traced it onto two pieces of 3/4" MDF pieces that were each 23 1/8" x 3 13/16" and went at it with a jig saw. Mine has a little twisty knob that helps make sharp corners, and I just tried to get them as close as possible. Mine are definitely not perfect - I used my orbital sander with  rough grit sandpaper to smooth them out and help conceal any boo-boos.  After they're done, attach them to the nightstands with glue and nails through the sides and where the 1/4" lattice scrap is.


One quick tip: I stood the nightstands up when I fit the decorative front piece on to make sure it was flush with the bottom of the nightstand and to help prevent any issues with the bottom drawer opening if it was placed too high.

Step 6: Attach table tops
Cut a piece of MDF a little larger than the size of the nightstand + decorative moulding. My tops were 26" x 12 3/4". Attach them with glue and nails.


Step 7:  Caulk if you want - I only caulked between the table top and the strip of moulding, I purposefully left the tight joints on the drawer fronts as is. Also fill any nail holes and seams with wood putty, then sand smooth.


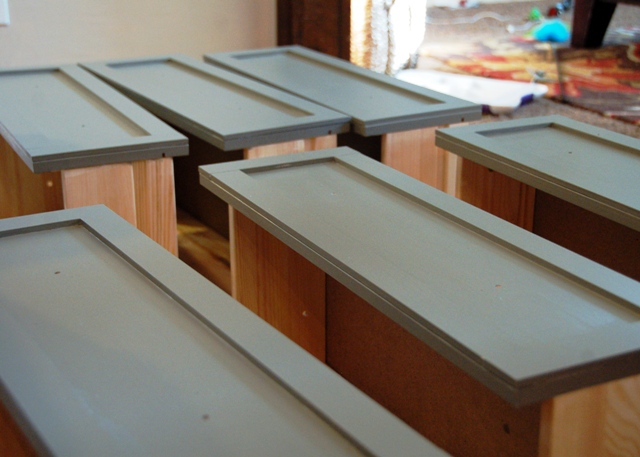
Step 8: Prime with oil-based primer (remember, it's MDF and raw wood. Oil-based!)

Step 9: Finish with paint of your choice.
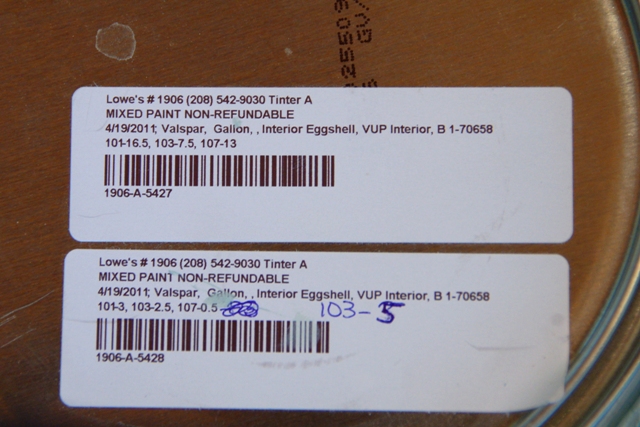
I used Martha Stewart paint in Mushroom (love) and a little bit of Floetrol, an additive that helps minimize paint and roller lines in latex paints (there's also something called Penetrol for oil-based paints, FYI)
I used an angled brush and a small high-density foam roller to apply two coats of paint.


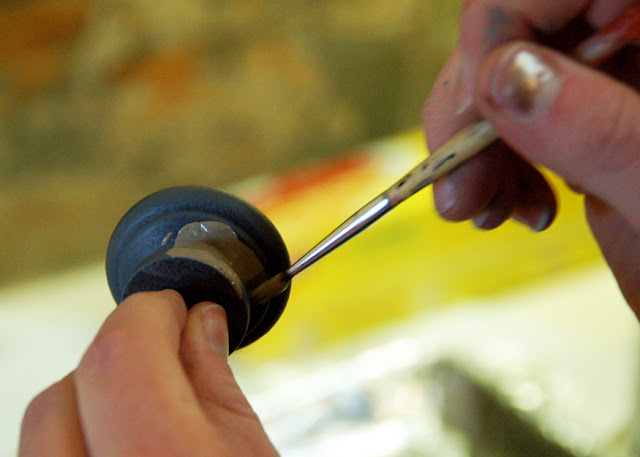
After the paint dried, I applied a non-yellowing water-based poly with a foam craft brush -- do not use a roller as that will result in bubbles. Promise. Coat an area with poly and then work your way back across the entire surface, pulling in one direction to help minimize any lines.

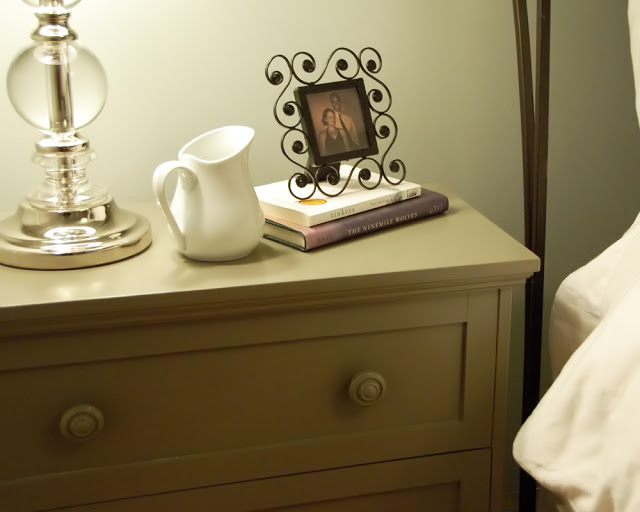
Let that dry, add some knobs and voilà! You have a nightstand. Or two!


Hopefully it doesn't take you 4 months like it took me! I took my time to uh...make sure... everything was perfect. Or something.

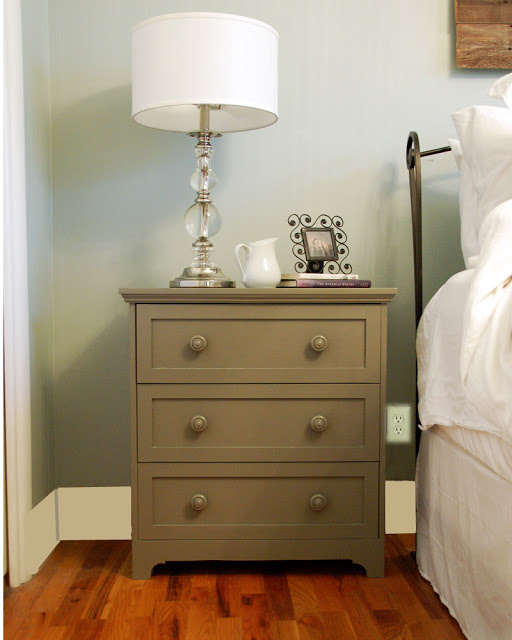
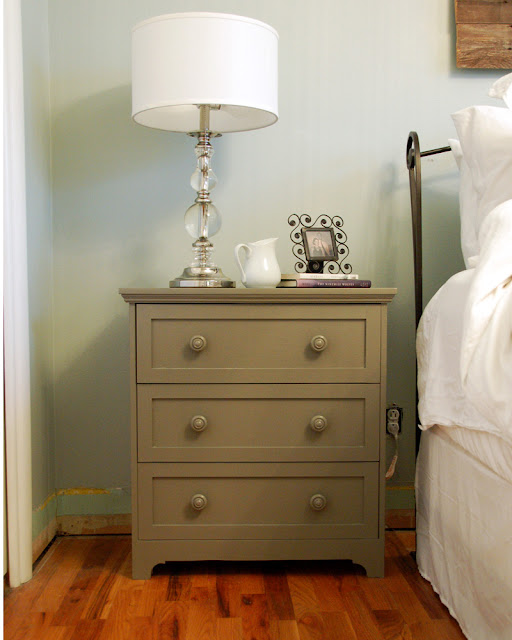
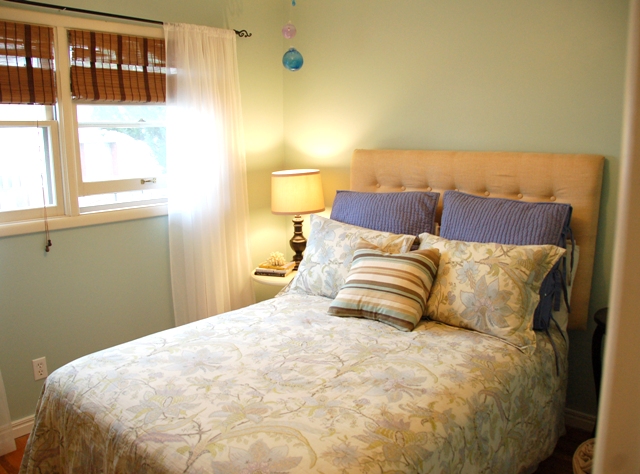
Updated to add: Apartment Therapy already featured these nightstands! A couple observant people over there commented on the lack of baseboard/outlet cover in an otherwise nice photo (y'all know how I struggle with baseboard... le sigh.)  So, for fun, I made up a pretend photo so we can all imagine it's done and everything's pretty-like.


Ahh. Much better, right? If only it was really that easy!

Sharing at My Uncommon Slice of Suburbia, Home Stories A to Z, Thrifty Decor Chick

Wednesday, January 18, 2012

Finished Nightstands {Reveal}

Y'all, I am so excited to share this project. I have wanted nicer nightstands in my bedroom for several years now, but didn't want to pay hundreds of dollars. I'm cheap, I admit it.


I finally finished these (seriously, I'm the biggest slacker ever... I started these in October. The shame.) and got them into the master bedroom. Love them. Weep.
(That was me weeping with joy. What? I'm totally normal. Pfft.)

Would you believe that this....


used to look like this?

Yep, it's an IKEA hack! I had seen a few great hacks of this $35 RAST dresser and I couldn't pass up the chance to have great looking nightstands myself. Love!


Our cat Fig seems a bit suspicious, but she's neurotic.  I love them! I'll post some construction details tomorrow, but I just couldn't wait to share. What do you think?

Monday, January 16, 2012

Finishing What I Start... 3 Months Later

I promise you, I will stay the course and finish my boys' room... I'm actually working on it right now! (Not literally right now right now, since I'm sitting here typing, but you know... right now. Promise)

The thing is, I'm also finishing up a project I started last October -- yep, before Halloween. As in, I'm the slowest DIYer ever? The kind that refuses to work in the garage when the temperature dips and instead wistfully stares at half finished projects occupying the space where her car should be. The same car she does battle with daily as she attempts to scrape frost from the windshield in order to drive children to school, all the while cursing the stupid project sitting frost-free (and probably under a layer of lazy-dust) on the other side of the garage door.

I'm finishing a pair of nightstands for the master bedroom, and then I'll get back to the bedroom. There's only so much stink eye this girl can handle. My husband was getting less and less impressed with my "awesome nightstand idea!!!" so I had to do something quick. I've really been busting this one out, which usually means I end up taking over the entire house for a few days while laundry piles up and the kids eat Cheetos and juice boxes. Not really. (except maybe really, sort of)

I started in the entry, since nobody needs to use the front door or anything. Pfft.


Then I moved over to the dining room, since the Golden Globes were on. (hellooo, priorities!)


Now I just need to put a top coat on them...


...and finish painstakingly painting the knobs by hand...


(that part sort of sucks)

...and we'll be all set. Can't wait to show you the finished nightstands!
Better late than never, right?

Thursday, August 25, 2011

More Bedroom Shennanigans

Nah, don't worry. You don't need to cover your eyes... nothin' to see here, people.

Nothing... except my bedding switcheroo!


Here's a reminder of how my bedding usually looks:

Down comforter in a duvet on the bed, coverlet folded at the bottom; elegant, clean, simple... 195°F in the summer nights. Vom. (That's my new slang for 'blah.' It's so hip, it's so now.)

So while switching the duvet and the coverlet made practical sense, I think it's a great fresh look for the room. I used to be a serial rearranger so it's nice for me to be able to change things up even if the furniture stays in one boring spot.


Plus the new accent pillow introduces a bright pop of color to the otherwise calm room. Every time I see it I can't help but feel happy. Yellow is so fun. It's so hip and so now.

And sleeping the last few nights has been so much more pleasant. I hate to be hot at night, and I admit that I'm a foot-sticker-outer. I just wish I had thought of changing the bedding oh, say... two months ago!


What small changes have you made lately to bring new life into your space?

P.S. Speaking of changes... should I get bangs? They're so hip and so now. I think we can all tell how I feel about hip and now things.

P.P.S. Are you a foot-sticker-outer too? We should be friends.

Sharing at My Uncommon Slice of Suburbia, Thrifty Decor Chick, Home Stories A to Z

Tuesday, August 23, 2011

Monumental Changes

Today I took a step forward on my bedroom project; one small step for a project, one giant leap for lazy people everywhere.

Remember this?

 
Yeah, you may recall that my bedroom has had sa-weet unpainted crown moulding for over a year because I've been too busy (lazy? distracted?) to prime and paint.
 
I always have an excuse -- oil-based primer is stinky, so I wanted to wait until the weather was better and I could open my window to air it out. Then I didn't have any brushes in the house. (I use them once for oil-based paints and toss them. Did I mention that I'm lazy?) Then I had the brushes, but it was a Tuesday. Then my horoscope told me not to make any drastic changes. All completely legitimate excuses, right?

No longer, friends!

Check out my progress:
 
Oh... you thought I had painted? Or even primed? Nah -- it's a Tuesday again, guys. Also, I've put this project off for so long that if I rushed it by being too on task, I might disturb the balance of the universe. Or something. Anyway I caulked, and that has to count for something.
 
And while I caulked, I realized a few very important things:
 
  1. I waited way too long to start this project -- holy procrastination, Batman.
  2. This summer has been almost entirely unproductive, unless you're counting iced tea consumption and books read. I hope you've enjoyed a similarly lazy summer.
  3. I really need to dust my chandelier.
 
But I'm pretty sure I can't dust on Tuesdays either. Darn.

Wednesday, June 8, 2011

Paint Color Details

On Monday I addressed a question I've been getting pretty often over the last couple months and posted a step-by-step tutorial for creating crisp lines and pinstripes with paint.

Today, continuing in the Dear Abby vein, I'm going to talk about two paint colors that I get asked about!

An aside: Maybe we should start an "Ask Anna" feature here on Take the Side Street. You could ask me anything, bonus points for crazy questions! I'm a sharer, and I have an opinion about pretty much everything. Just saying, we should consider it. Feel free to overwhelm me with earth-shatteringly important questions about your love life, carpet color, pet guinea pigs or baked goods. If I don't know the answer, rest assured I won't rest until I track it down! Unless your question is about politics or religion, and then I'll probably pretend I lost the email. Guffaw.

How do people actually guffaw? Is it unladylike? Maybe I should ask myself, hardy har har.

Anyway, moving on to paint colors.

I've been asked for quite some time about the paint color in my master bedroom, and I've answered it in emails and I think comments, but I wanted to put it out there for the universe.


The color in my master bedroom is 'Comfort Gray' by Sherwin Williams. Except it's actually not identical, because I get my paint made at Lowes or Home Depot and their computers aren't so hot at matching Sherwin Williams and Benjamin Moore colors, in my experience and opinion. So, to be specific, it's a color match of "Comfort Gray" in Valspar paint.


I've also gotten a lot of questions about the new paint color in my guest room. This one is a bit more complicated. I wanted 'Rainwashed' by Sherwin Williams, but I had learned my lesson about colormatching so I had the friendly employees at Lowe's do it manually after a seriously unsatisfactory attempt by their computers.

It took two different bases and a couple hours (and a husband telling me I was nutty for being this much of a perfectionist), but I really wanted that blue-green shade that I loved. I was so worried that it wouldn't be close, I actually bought a $5 sample of 'Rainwashed' at Sherwin Williams and painted it next to my custom color, and they were almost identical but mine had maybe half a smidge more green and I actually liked it better. Mwahaha. Success.

Here's a photo of the top of the can,  you have to add the two labels together plus the handwritten addition at the end (that was me asking for more green from a second, slightly crabbier employee):


The paint is Valspar Eggshell Base 1 (#70658), by the way... just in case it doesn't say that in fancy paint-speak on the label.

And to deciper, here's the sum of the colors for a final formula for my custom Valspar 'Rainwashed' knockoff:
101-19.5   103-10   107-13.5   103-5

Happy painting!

Friday, February 25, 2011

Something New For My Bedroom Walls

Recently I took a little break from my stairwell project to DIY myself some bedroom wall art.


I'm a bit embarrassed to admit this, but my husband and I have never had anything decorative above our bed; I've never been able to find something I loved for that space. I like meaningful art as a general rule anyway, but especially in a bedroom it somehow feels like it should be more personal, and certainly not just thrown up to fill the space.

Maybe this is just me, and maybe I'm overanalyzing things (surprised?) but that's just how I work. I'm complicated, people!

A month or two ago I started to form a plan...I love the look of weathered wood signs, so I decided to create one for my bedroom. Before I had to start searching too hard for old wood, some family friends kindly volunteered some of their weathered wood siding. Lucky me!


One side of the siding had some old white paint which was most likely lead-based. I (carefully) scraped the offending paint off, cut all the pieces to similar lengths and liberally coated the previously painted side with both a clear spray and polycrylic. 'Cause I'm nervous about lead paint, and if a little bit of poly is good to seal any stubborn bits of possible dangerousness into the wood grain, a whole bunch of poly is even better.

I laid the pieces of siding out on my kitchen floor (newly glossy side to the back!) and used screws and leftover wood from another project to secure them to each other.  I also added screw eyes and wire from a picture hanging kit.


At that point, my excitement got the best of me and I had to hang my new project above my bed to see if I liked it well enough to continue.


 And... I just about died.

I love it. It's unexpected, definitely not boring above-the-bed-hotel-art. My favorite part is the juxtaposition of the rustic, weathered wood sign and the glossy chrome and crystal light fixtures and the crisp bedding. Did I mention that I LOVE it? L.O.V.E.

And it's not even done. My plan is to paint one of my favorite quotes onto the sign to finish the project, but I love how it looks even by itself and I was just too excited to keep these photos to myself. Honestly, I'm starting to wonder if I want to paint it at all... no matter how random it might be to have a big blank wood rectangle hanging above my bed. I'm going to have to give this some thought.

 I think this sort of sign, left as is, would also be fabulous as a backdrop for pretty much anything -- how great would a display of mirrors or framed photos look layered over this? Gorgeous!


Sharing this post at:
The DIY Show Off
House of Grace
The Shabby Nest
Findng Fabulous
Krafty Kat
Centsational Girl

Visit thecsiproject.com

Wednesday, February 16, 2011

A Change In Bedding

For the last year or so, the cute hubster and I have had West Elm's pintucked duvet and shams on our bed.


Cute, right?

 If only it were all about looks. Le. sigh.

Bear with me for a moment while I explain why I decided to make a change, since I will surely be tarred and feathered for being the only person in the world who doesn't unconditionally love and adore the pintucked bedding trend that's happening right now.

Ahem.

There are lots of things that the pintucked bedding had going for it: it was pretty and white, it added great texture to the room, and the bed looked nice when it was made. I wanted oh so badly to love it with all my heart.

There was one major con though, and it was a big enough deal that it ruined the whole pintucked-bedding-experience for both me and my husband. This duvet cover was so delicate, almost every time one of us would try to pull it up or move it around, I would hear a 'riiiiip' as one of the stitches either popped or ripped through the cotton.

Admittedly, our footboard may have contributed to this problem since the comforter and duvet cover would work their way down and get wedged between the mattress and footboard, which would make it more difficult to pull up. But even at night, something as simple as pulling the duvet cover back over me would, more often than not, result in more tearing. And since I live with a blanket hog, I was pullin' on that duvet cover all the time!

I want to be able to live in my bed. Not literally, of course; having people bring me breakfast in bed every.single.day. would be a total drag, don't cha think? HA. I kid. But really folks, I want a soft, inviting, livable bed, not one that I'm afraid to flop down on with a book. The pintuck bedding is beautiful, and I think it would work great in a guest room, but it just wasn't right for our bedroom.


And that? Is why I bought new bedding. It's still white, and though it's not as texturally interesting or forgiving when the bed is made, it does have a nice little embroidered detailing.


The best part of the new bedding is definitely how it fits into our life. I can climb into bed with a book or relax with my kids without worrying about the structural integrity of a pintuck. 

What do you think? Are you lining up to tar and feather me now? Have I committed a major offense against the pintuck bedding lovers of the world? Or are you a fan of bedding that's (gasp) comfortable and soft too?

Friday, October 22, 2010

Home tour: Master bedroom

Y'all should be so proud of me today.

I'm sharing photos of my master bedroom even though it's not done, and there are a few parts of the room that actually give me the hives. Look at me, stepping out of my comfort zone. (I even made the bed -- and I admit, I'm not a bed maker... I shoot for 50% of the time and call it good)

You know what? I'm willing to bet that most of us live in works-in-progress, not perfect model homes. Perfect doesn't exist in my little world!

So...um... sorry about the picture heavy post. I wanted to establish a baseline for cuteness so any future projects and reveals would be greeted with appropriate awe.

One last warning: I might have the smallest master bedroom... on the planet.


See the dent at the foot of the bed where the cat has assumed permanent residence?

Yeah, me too.


Yeah, that's right, those are paint chips! Oy, I have an illness.


Can't. Stop. Painting. Go...get...help.

Ahem.

It's not my fault that Sherwin Williams "Comfort Gray" reads completely blue in that room. And I do not want frosty blue walls in my dark little bedroom.

And it's also not my fault that I went ahead and painted the ceiling a coordinating lighter shade so my (one-day-it-will-be) white crown would pop.

Well, okay... that last one was sort of my fault. I guess I didn't have to paint the ceiling if I wasn't sold on the wall color. But it was shiney, people! Anything's better than a high gloss 1960's ceiling, right??


You may have noticed that I have unpainted crown molding, no baseboards, zero cuteness happening on my nightstands (aside from my most-awesome-lamps-ever-that-I-lurve) and the worst thing of all...


OH. So very ugly. Makes me so very sad.

Want to know what makes me even more sad? How small the closet behind those ugly doors is -- and no, you don't get a picture. Just take my word for it.

So what do you think?

I'm linking this up to Just a Girl,
Finding Fabulous,
Chic on a Shoestring Decorating,
Tatertots and Jello,
Under the Table and Dreaming,
It's So Very Cheri,
The DIY Club,
House of Thrifty Decor,
My Uncommon Slice of Suburbia,
Frugal & Fabulous,
The Shabby Nest
and Remodelaholic... go check out the other projects!
Related Posts Plugin for WordPress, Blogger...