


I don't get a ton of questions from readers, but one that I have heard several times is "How did you actually paint the stripes on your stairs?" or "What do you mean, leave the tape on and paint over it?" And several variations on those themes.
When I painted the pinstripes on my stair project, I mentioned it in a general sense but I didn't take step-by-step photos to really illustrate the process. And judging from the comments that the stair project receives, I think people thought it was a much bigger undertaking than it was.
So I put together a "how to" for your painting pleasure and to demistify the pinstripe process.
I started with a leftover piece of 2x6 from my kids' bunkbed project from last summer (I've gotten some serious mileage from the scrap from that project, let me tell you).
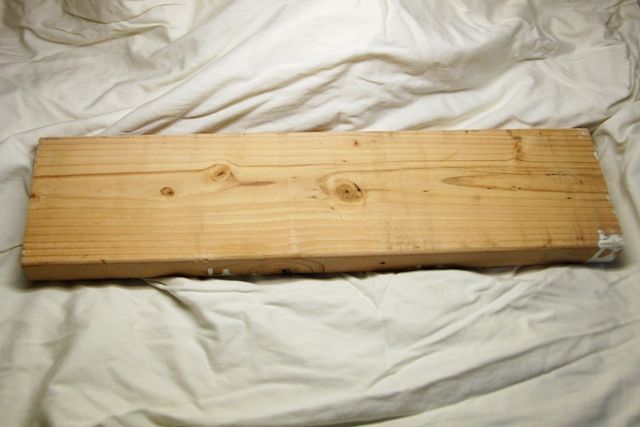
But you can start with whatever you like, stairs perhaps?
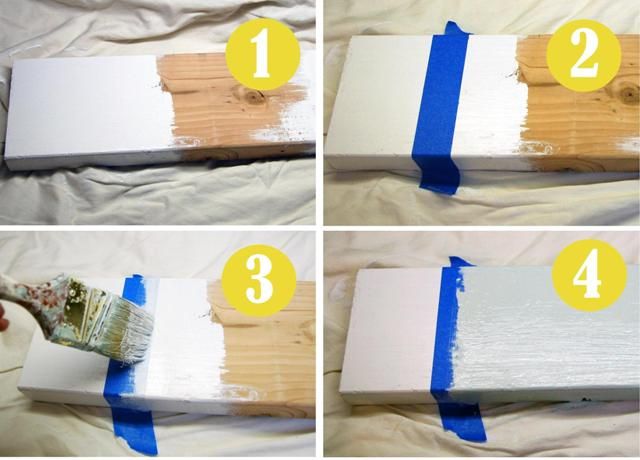
Step 1 - Paint the base color! You've got to start somewhere, right?
Step 2 - Measure and tape off for your stripes.
Step 3 - Paint the original base color over the edge of the tape. This essentially seals the tape so the new color cannot leak under that line. Brilliant!
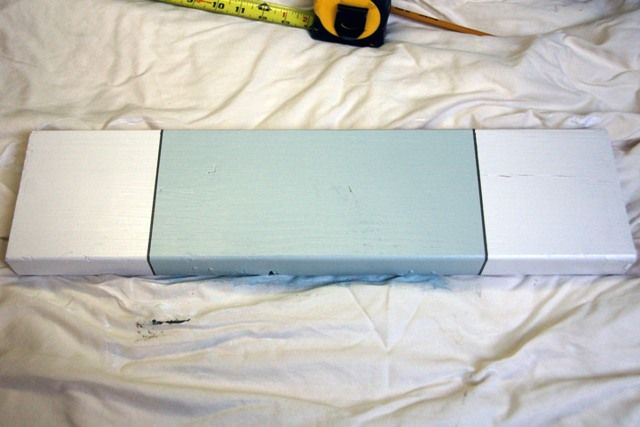
Step 4 - Paint your second color (blue).
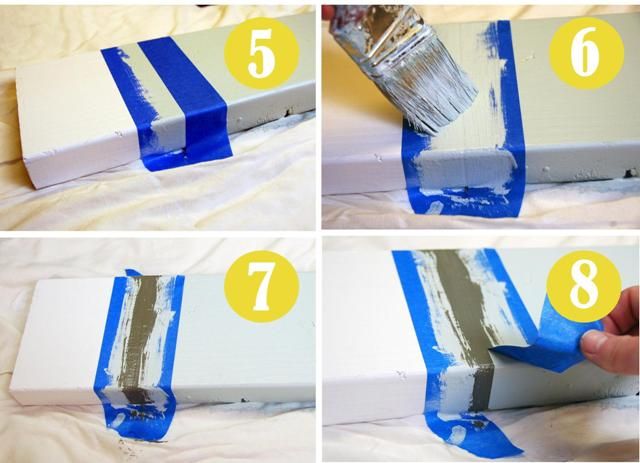
Step 5 - Lay a second piece of tape over the second color (blue) for your pinstripe (you'll be able to see the outline of the first piece of tape under the paint to use as a guide). Take your time on this step, I just eyeball it to keep the stripe thickness consistent.
Step 6 - Paint the second color (blue) over the new tape, sealing its edge -- remember, this second piece of tape is laid over your second color (blue) so if any paint seeps under it will match the existing color (blue!) Translation: no bleeding!
Step 7 - Paint your pinstripe color between the two pieces of tape.
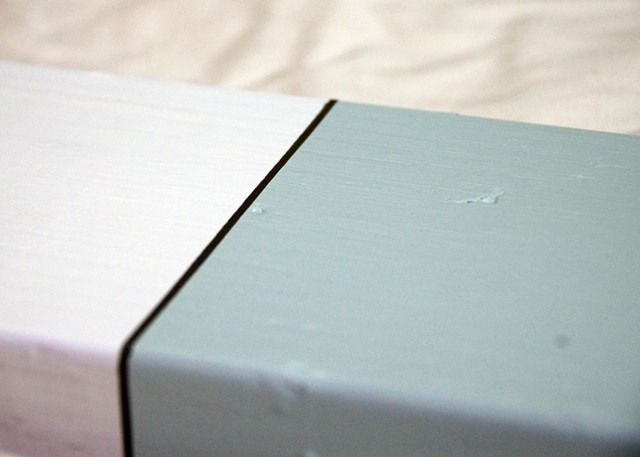
Step 8 - Remove the tape.
Voila!
I like to remove my tape when it's still wet, but has sat for long enough that it's tacky and won't run. I give it 5-10 minutes to set up and then I pull the tape at a nice moderate-to-slow speed, almost doubled back onto itself at a 135-degree angle. (Tell me if that doesn't make sense and I'll draw a diagram or something fancy to illustrate),
If you're careful, you'll have a nice line with maybe just a couple of 'oops' spots like this:
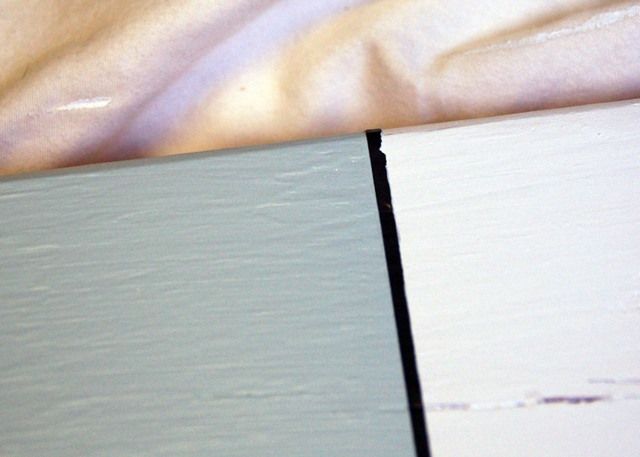
But you should only have a few if you don't let the paint dry too long and are gentle while pulling the tape off, and you'll make short work of those spots with a fine paintbrush.
See? Not as difficult as it looks, and I think the pinstripe gives it a nice finished look. Is anyone itching to paint some stripes yet?
Sharing at Just A Girl


So simple, so clever. I just finished painting a huge Quilt Block to put on my studio for our Arts & Heritage Trail...the 'first coat on tape should be base coat' would have been good to know..sigh, and yes I feel unwise..HaHa.
ReplyDeletegreat tips! i'll have to bookmark this page for my next DIY at home. xoxo jillian:: enter in TWO GIVEAWAYS over at cornflake dreams
ReplyDeleteHi Anna!!
ReplyDeleteThis is AWESOME!! What a great tutorial!!
Thank you so much for sharing!!
I am having my very first link party and this would be PERFECT!!!
It's called Show Me How!!! ~ Friday ~ Tips, Tricks, & Tutorials ~ No. 1 ~
It's going on RIGHT NOW :))
I would love for you to join the party!!
And feel free to link up as many as you want :))
LOVE FROM TEXAS!!
~~Michella~~
www.michellamarie.com
~~~~~~~~~~~~~~~~~~~~~
Pinned it! Thank you for sharing this technique!
ReplyDelete