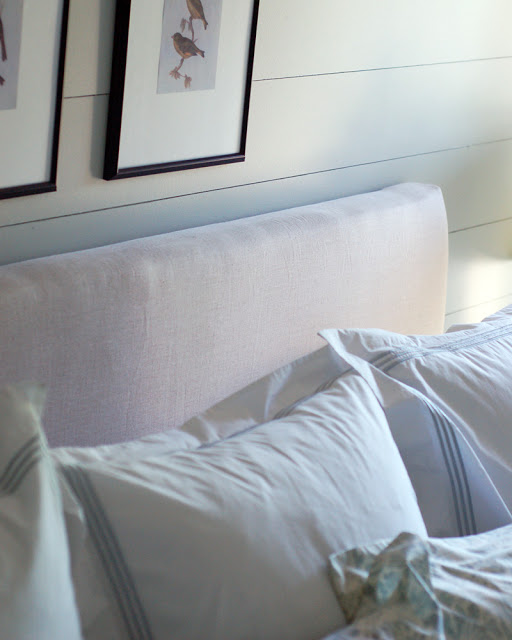
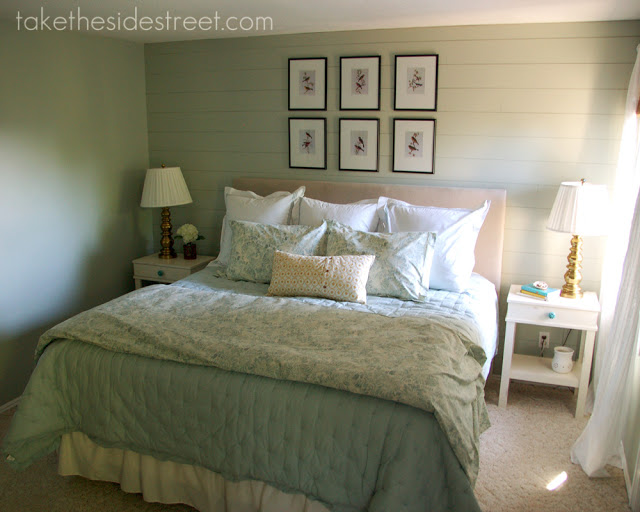
One of the projects that went into my mother's room makeover was the creation of a simple upholstered headboard. I would have loved to have put a metal headboard into her room, but that wasn't in the cards (or the budget) so I had to figure out how to make an easy headboard so the room would still have a nice, finished look.
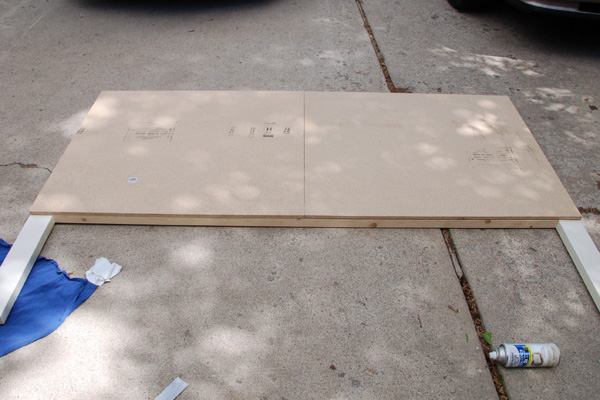
My mom's bed is king sized, so the headboard is large but it was still pretty simple and quick to put together. I went to Lowe's after I got into town and bought a sheet of 3/4" particle board then had the store employees cut it down to a piece 36" x 80" -- then because it wouldn't fit in my car like that I had them cut it in half so I ended up with two pieces that were both right around 36" x 40" (the saw blade through the middle took off a negligible amount of width).
Note: If you can get a 36" x 80" piece home, don't cut it! The board will be much stronger if you don't have to piece it back together. Having said that, I think my finished headboard is plenty strong.
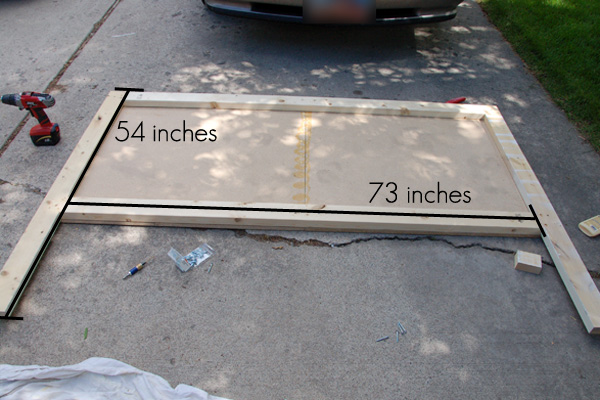
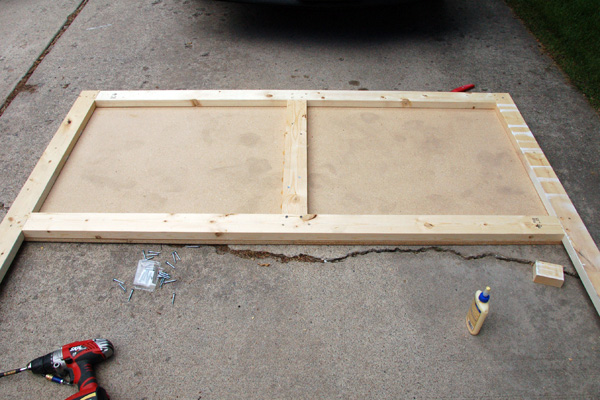
I also bought a few 2x4's and primed then painted the bottom section of two of them (that will become the visible legs of the headboard). I cut the leg pieces to 54" which will be the overall height of the board, and I glued then screwed them onto the particleboard base. Next I cut two more 2x4's to 73" and ran them between the legs as horizontal supports to help secure the two pieces of particleboard. I secured them with glue and screws.
Last I added a center piece of 2x4 along the particleboard seam to fit. More glue, more screws.
I flipped the entire headboard over and then added a few more screws through the 2x4's from the front side -- of course, no photos of that! I'm a fan of making things secure.
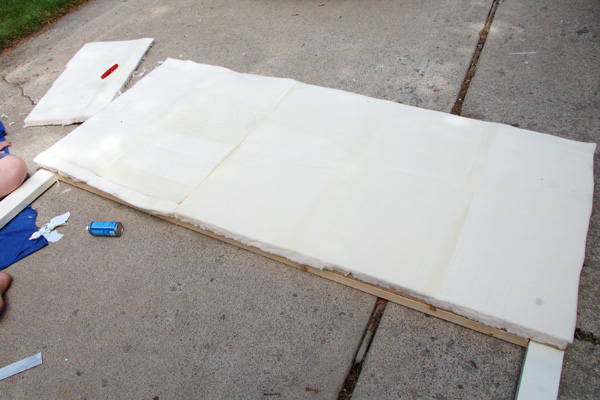
Next I used spray adhesive to adhere a layer of foam to the board. To save money I purchased a full sized memory foam topper from Walmart for $30 and cut it up. Some people use electric knives to cut through foam but I carefully used a utility knife and it worked fine -- I would probably advise against cutting with regular scissors as the edge will look very ragged and that will be noticeable under the fabric.
Another tip to achieve a smooth edge is to put the factory edge of the foam on the top of the headboard and the cut side on the bottom -- the upholstered part of this headboard goes almost to the box springs so it won't be visible if it's not perfect.
At this point I carried the headboard inside to finish the job.
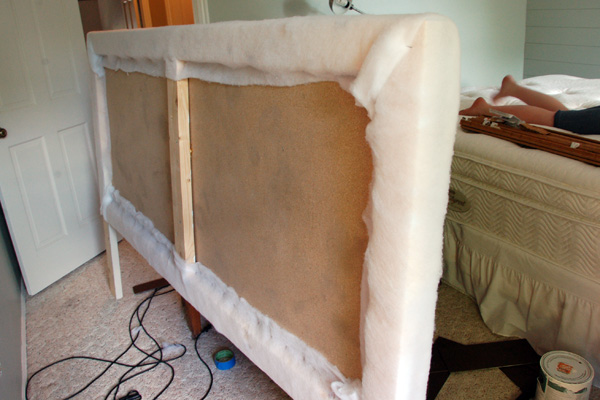
After the foam was on the next step was to wrap it with batting and adhere with staples This added a bit more softness and will also keep the foam from shifting.
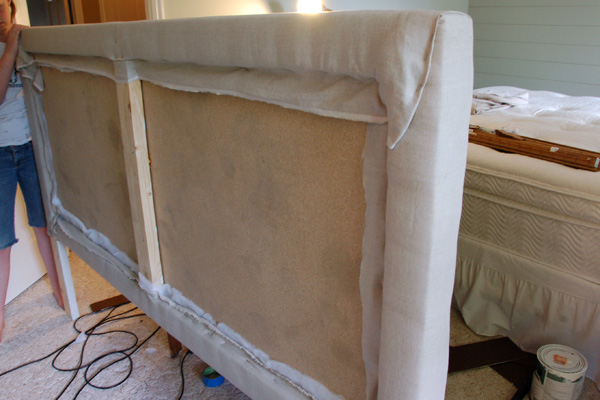
After the batting was securely stapled on, it was time to pull out the fabric. I bought a few yards of linen from JoAnn with a 40% off coupon (plus a 20% off total purchase coupon from a competitor, scoooore!) and had my sister iron it for me since she was a captive helper and I hate ironing.
I carefully draped the fabric over the headboard and lined it up so that the weave was nice and straight across.
I stapled the fabric in the center of each side first to hold it in place and then started working my way
around slowly with the stapler.
Whenever I upholster I tend to go side to side, top to bottom, pulling the fabric tight
and stapling in a symmetrical pattern as I work my way around until it's nice and secure. I save the corners for last because they're dumb. I'm also a fan of using lots of staples. If you pull it tight and then skip 4 inches before you put the next staple in, the foam will bulge between the staples and you'll have a scalloped headboard (which sounds better than it would look simply because the word scalloped sounds so fancy and crafty. It would look bad, I promise!)
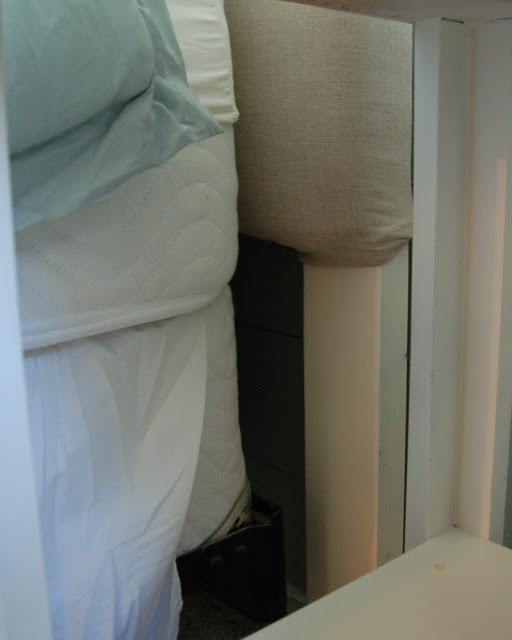
After the headboard was complete I just moved it behind the bed and used the gargantuan weight and height of the bed to hold it in place. It's not going anywhere. However, if you have a less obscenely heavy bed or the headboard doesn't go down as far behind the mattress as this one does, you can attach it to the wall if you prefer. I used a french cleat to hang my guest room tufted headboard and they're wonderful for hanging heavy objects.
And there you have it, voila! All in all the entire
headboard probably took a couple hours to build... definitely doable!
Headboards for everyone!
Wednesday, June 27, 2012
Subscribe to:
Post Comments (Atom)












looks great!
ReplyDeleteThis whole room looks great - love it!
ReplyDeleteLove this! Thanks for the details
ReplyDeleteLooks great! I have yet to tackle one of these but when I do I hope it turns out as good as yours did.
ReplyDeleteJennifer