Friday, April 27, 2012

My Nerves and Your Comments

I just lost this entire, completed post when my computer spazzed out and shut itself off and I realized that this new Blogger 'upgrade' doesn't seem to auto-save posts...  so. not. okay. with. that. Re-wrote the whole thing while I imagined punching the designer of the new Blogger dashboard in the nose.
_________________________________

Today I wanted to share something a little personal with you and then also get your feedback on an important aspect of my blog...

First off, I'm preparing for a performance on Sunday evening -- I'm singing a solo in Vivaldi's Gloria in northern Utah, and I'm feeling a bit nervous. I love singing, but fell into it fairly recently; I never studied it in school and so I don't have a lot of vocal performance experience. My pre-performance anxiety levels have moved from debilitating to a more normal level, but I still can't get away from that little voice inside my head; we all have one.  I know I'm no professional, I just want to perform to the best of my abilities, so I'm just having to work on putting a muzzle on my little voice. Any positive thoughts you could send my way would be appreciated!

 
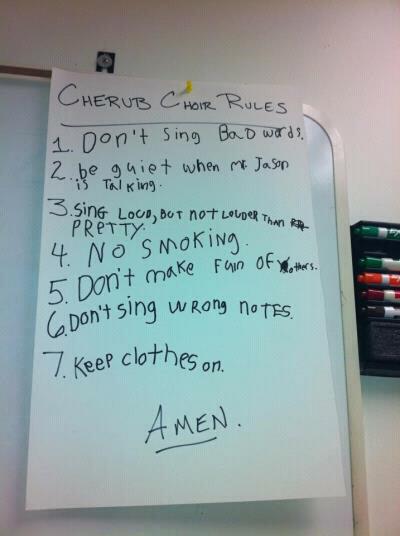
 (via ChoralNet - I just thought it was funny!)

I think it's funny that I have zero anxiety about speaking in public (except for the normal adrenaline) but I get so nervous about singing. I spent so long secretly wanting to sing, but afraid to share that part of myself with others in case it would lead to a Simon Cowell-tender-little-spirit-crushing moment. It can be pretty scary to put ourselves out there in front of others, right?

The other thing I wanted to write about today is about the overall direction to take one aspect of my blog: replying to comments.

I'd love your thoughts so that I can make the best decision. One of my favorite parts of blogging is the connections I make with other bloggers and readers, and engaging with people through comments and emails. As I've read more blogs my opinion of the best way to accomplish this has evolved a bit, and I feel like I need to stop wavering and set a policy (for lack of a better term) for Take the Side Street.

My question is, should I reply through emails or through the comments section under each post? 

I've primarily been an email replier but I've grown less satisfied with it over time. First, you have that entire subset of commenters whose email addresses aren't linked to their accounts and so can't receive a reply. Second, I believe a blog author should be very present in their comments and email replies can make a blog author seem absent and aloof when you scan the comments and she's nowhere to be seen; I like blogs where the comments can be read like a conversation and people can engage with each other and the author can engage with his or her readers. Last, if someone asks a question on a post and others might be interested in the answer, if you email the replier, no one else benefits! I just don't have the time to email and comment on the post for all the questions... even as relatively small as this blog is, I know I couldn't possibly commit to something like that.

My only concern is this: do people come back and look for replies or answers to their questions? I don't want people thinking they're being ignored if they don't receive an email response.

How do you feel about it? If I did switch to replying primarily through the comments section, I would of course send replies via email for personal questions or comments that needed some extra attention and follow-up. But for day to day, regular commenters... could the comment sections be a conversation?

That is, after all, what this blog is about. Chatting with each other, ignoring stuffy grammatical rules about overuse of italics and hyphens (I'm speaking for myself here). Sitting with our pretend nonfat cinnamon dolce lattes and a maple bar or two (imaginary = no calories, so scratch that. A maple bar or six, y'all) and connecting. 

(Image from AllPosters.com)

P.S. The designer of blogger's new non-auto-saving dashboard is not invited to our maple bar party.

Thursday, April 26, 2012

A Colorful Corner Makeover

Yesterday I talked about painting my DIY Parsons Desk a glossy white, and I finished the chair last night so today I get to share the corner's mini makeover with you!


Here's a sort of before, back from a while ago:

(aren't unstyled, awful "befores" the best? I swear I should throw some dirty laundry in all my before photos and then give all my "afters" a spray tan...)

You can see I changed the art on the wall and moved the desk back to the corner instead of against the window (I go back and forth on this one...). Some paint and the simple addition of the coolest rusty tailgate ever and it's done.


Well, except for the lamp. The base is old but I changed the shade out yesterday - can you see it's still in cellophane? Yeah, I'm probably going to return it -- I tried something fun but I think I might be a boring white lamp shade kind of girl.


I painted the chair with Rustoleum's Sun Yellow and distressed it lightly, then recovered the seat with some West Elm fabric I found at a local fabric discount warehouse months ago.

 
I love all the fun colors together... blues and greens and yellows really do make this girl happy. Can't wait to get to work!!

... not really. :)

Sharing at Thrifty Decor Chick, Home Stories A to Z, The Shabby Creek Cottage

Wednesday, April 25, 2012

Painting Myself Into A Corner

When I got home from SNAP! I relaxed for about a day before I had to do something. The chicken coop (that's sort of almost done) has taken up so much time, energy, and money for the last little while that I've been getting increasingly antsy to get back inside my own house. I needed to do something that had nothing to do with poultry... 

So I decided to paint some stuff! Ah, paint; that good old standby. I start brushing or spraying and I feel myself relax a little -- I'm sure it's because I love working on my house and making progress, but frankly it's also because I'm a little crazy and paint is one of my favorite things. Honesty is always best, y'all. Rows and rows of color chips or spray cans... it's beautiful. Sniff.

I decided to tackle this little corner of my living room, in the awkward space between my couch and the back door: 


The desk is my very first building project from a few years ago -- I modified a parsons desk plan from Ana-White.com to make it smaller. It's okay... but I can tell that it was my first project! However, I don't have something else for that space and I'm a believer in making the best of what you have.

I originally painted the desk a really pale green, one of those barely there colors, and I hated it but never bothered to repaint it. It read as a dingy old off white color so yesterday I went and bought glossy white spray paint and gave it a good paint job on my back deck.


It's hard to capture in a photo, but it's a pretty subtle change... it just looks clean and bright instead of blah now. Mission accomplished.

Next up? This $5 chair:


It feels good to get back to my normal routine, and I can't wait to see the difference a little paint can make in this awkward little space!

Monday, April 23, 2012

SNAP! 2012 Recap

You know how boring it is when you go over to someone's house and they think it'll be fun to pull out albums and make you look through three hundred vacation photos, 200 of which are random scenery shots? 

This post is nothing like that, because (1) I forgot my camera in my hotel room 90% of the weekend so you don't have to sit through a whole bunch and (2) there were no bizarre rock formations at SNAP! Oh and (3) I'm the opposite of boring, helloooo. So there you go, let's talk photos and my experience this past weekend.


Okay. Personal confession time: I am afraid of doing things alone. I don't eat at restaurants alone and I certainly don't go to movies alone. I don't like to be the person who runs out of the car to read the miniature sign on business doors with their operating hours to see if they're open yet (seriously stores, how hard would it be to make that readable from a vehicle?) and I about had a panic attack the first time I had to pump gas on my own without someone to talk me through it (okay! You can do this! Lift the handle... don't hyperventilate...calm down and look like you know what you're doing!)

Basically, I have this deep seated anxiety about looking like a big dork. Surprising, right? Considering that when I want to look like a dork, I'm all over it like butter on toast, much to my husband's chagrin. Anyhow, my point is that registering for SNAP! took me so long because I'm a giant wuss. I don't have any good bloggy friends who would be there to hold my hand and make sure I didn't accidentally fill my car with Supreme. I had to be a big girl and go to a conference... with hundreds of women... alone. Blerg. I am so melodramatic.


I share my ridiculous issues mostly because I know I'm not the only one out there intimidated by the idea of going to a conference, and I wanted to say that I'm so very glad I went. Don't get me wrong, the opening dinner was terrifying and I felt like everyone else knew each other and I wanted to call my mother and beg her to pick me up from sleepaway camp.  But by the next day when I started going to sessions and meeting smaller groups of women and I forced myself to introduce myself... it got easier. 
 
  (Emily, me, Beth)

It got a lot easier, and it started becoming fun. And I was learning things like how to get noticed by people in TV or print media, how to decipher legalese in blogger contracts, and how to make people look hotter by using Photoshop Elements -- all very important things, especially the last one and especially for pictures of moi.

(A morning light photography walk with Kristen Duke)

Everyone was so nice, and I met so many fabulous ladies. My roommates, who I had never met before, were both such great ladies and I was so glad to spend time with them, especially since one of them had wine, in her infinite conferencing wisdom).

(Roomies: Patty from Deep Space Sparkle, me, and Marcie the wine bearer from Celebrating Moments with Marcie)

 I was so surprised that some people even recognized me (like Mandi from Vintage Revivals and Beth from Home Stories A to Z) and one person, the fabulous Margo from Blue Family Scene, even wanted a picture. With me. HA, I love it. Ohh, and I love her and had to have some fun with the moment:


I had a wonderful time, met a ton of great ladies, exchanged a billion business cards, ate a lot of yummy food, brought home some serious swag, learned some good stuff and bought some crazy cute earrings (an important fact that bears mentioning). I will definitely be going to more conferences, and I imagine it will get easier and easier, even for an introvert like myself!

(me and Cassity)

 P.S. I am a big dork. Please don't hate me! :)


Sunday, April 22, 2012

What's Up Chicken Butt: Q&A;

I'm back home from SNAP! and I can't wait to share a few photos with you in the next day or two, but for now I wanted to tackle the overdue chicken update and answer a few questions I've gotten from readers...

First off, if you follow me on Facebook or twitter you may have seen that I failed miserably in my attempt to get the chickens out of the house before I left for the conference -- I was so, so close but it was not to be. Sadness factor 10. My hands looked like they belonged to an old man lumberjack because gloves are for sissies (or people who remember to put them on -- a group that I do not belong to) and my tender little spirit was crushed. 

Happily though, my rockstar husband finished it all up and moved the poultry outside to their new home the first day I was gone, and so I came home to a happy new world. Chickens, outside! Where they belong! Today was a beautiful day.

Please understand, the coop is not complete -- heavens no. There are several finishing touches like trim we need to add before I spring for a fancy reveal of our chicken cottage... so in the meantime let's tackle some questions. I'm like a less experienced, less read, less human-centered version of Dear Abby.

Q: Did you use plans or did you just wing it [the coop]? Are you going to share/sell the plans? 
 A: We didn't use plans, but we did use a couple coop posts we found as inspiration. Probably the biggest inspiration for a lot of the details was this post I found on Backyard Chickens. So no plans to sell a plan as we made it up as we went along, but I'd be happy to share general measurements or any details like that if anybody is interested!

Q: I'm wondering how much of a pain they [the chickens] will be to take care of in the winter?
A: Well I can't speak from experience yet, but we chose to leave food in the coop at all times with a feeder than can hold 11 pounds of food at a time so we won't have to slog out in the snow twice a day to feed the birds, which sounds like a recipe for chicken soup if there ever was on in my little world.

As far as water, the coop post I link to in the last question also has a smart little idea for keeping water from freezing in the winter that we might try -- it involves bricks and a light bulb and we'll see... if you can avoid running electricity to a coop it seems safer, as it's a fire risk, but this set up seemed pretty smart and safe.

Lastly, as far as snow and cold weather goes, the coop is insulated (yes, we took that extra step) because the chickens are like pets (sort of) and I wanted them to be as comfortable as possible in the winter even though they're cold hardy breeds. The run also has a roof over it and it's in an area that's well protected from wind so there shouldn't be snow accumulations in there and if they feel up to it, they can have a place to run around if they venture out... but I'm not sure how much they will. We'll just have to see!

Q: I'm thinking about raising chickens now! Do you have any advice for me?
 A: Yes; read up! We checked out several books from the library on raising chicks and bought Storey's Guide to Raising Chickens which has a ton of useful information in it. The biggest help though has probably been Backyard Chickens and their forums, the library of amazing coop photos and the fabulous articles. I've spent way more time on that site stalking old forums and searching for answers than I care to admit!

I'm now pretty much a chicken expert.

Okay, that's not true at all; but I'm at least semi-confident that we've done a good job providing for our chickens' basic needs and that we can handle what crazy chicken antics are still to come, now that I know that insane creatures like chicken snakes don't live in Idaho. Seriously, if I lived on the other side of the US I would not be raising chickens. I am the world's biggest wuss and snakes send me over the edge.


(I love this photo - you're supposed to provide about 10-inches of roosting space for each bird, and not only did I have to pick each of the birds up to show them the roost existed tonight, but when I went out to check on them all five of them were crammed on top of each other in about 20 inches of space -- aww, birdie snuggling.)

Q: Are you going to turn your blog into a chicken blog??
A: Ha. No -- I like 'em, but I don't like 'em that much!

Any other questions?

Tuesday, April 17, 2012

{Quick Tip} Keeping Felt Pads Adhered to Furniture Legs

If you have wood floors, you're probably intimately familiar with felt pads. They're easy to apply, serve an important function to keep your floors scratch-free, and unfortunately they never stay on chair legs, at least at my house. It's because of the constant moving around and sliding, I'm sure... but it doesn't make it any less bothersome.

(via Amazon)

Next time, try this little tip to adhere pads to pieces of furniture that get moved around a bunch:

First, get a bottle of 2-part epoxy. You can find this at regular stores in the glue section, and it has two separate components that when mixed together are super duper ultra-mega strong. Ultra-mega, guys. The stuff I used for this post is Loctite brand, and I found it at my friendly neighborhood grocery store.


I used a disposable plate and a toothpick to mix the two parts together -- once they're mixed you need to move fairly quickly, so do a few chairs at a time and mix the epoxy in small batches.

Next, flip your furniture over and clean the place where the felt pad will go with rubbing alcohol. Let it dry for a moment, then apply some epoxy with the toothpick. Some brands (like Loctite) suggest applying the epoxy to both surfaces, so I also added a bit to the back of the pads. 


Then stick the pad on, and make sure the chair stays upside down and relatively level so the pads don't slide off while the epoxy sets up. 

 
It should set up in a few minutes and should be cured within 24 hours. Easy peasy, and this quick tip will help the felt pads stay on the furniture, where they belong.

Sunday, April 15, 2012

What's Up Chicken Butt 04.15.2012

(I've gotten some questions about chickens and coop building and so I'm going to do my best to tackle them later this week -- if you want to know anything about my experience so far (since I'm practically a poultry expert and a master farmer at this point) shoot me a question via the comments section or an email and I'll do my best to get it into the post) 

Mark my words, these birds will be out of my house when I leave for Snap! later this week, even if my kids have to eat PB&J's for every single meal until then because I'm outside working on the coop. The birds are big and feathery, kicking up dust in my basement and frankly they're starting to smell a little. I they need fresh air and space and bugs.

 (Look, it's a real chicken butt! I'm not juvenile at all.)

When I get stressed out I tend to get sick, and this coop has been weighing heavily on my mind and consuming most of our weekends for a while -- so color me stressed out. Between the giant chickens needing a home, several recent musical commitments that I'm wading through and some other craziness in my personal life, I wasn't surprised when this weekend I woke up with a cold. I've spent the last couple of days on autopilot, screwing on cedar siding while I daydreamed about naps.


This weekend we finished putting the siding over the insulation, we hung the large door into the coop, we built and installed the ramp into the run, built the track for their little coop door and finished building the nesting boxes.You can see that in my determination to get this coop done quickly, I nixed painting it - sadness, I know. Maybe I'll go back and make it a fun color later this year, but for now I just need it to be done

The cedar matches my kids' clubhouse though, and I am liking how it camouflages the coop when you're standing on the back deck... so who knows, maybe I won't paint it!

Hopefully I'll be on the mend this week and I can finish up the few things to make the coop liveable (not to be confused with finished) before I head out for the weekend...
  • Build roosts
  • Hang egg collection door
  • Staple wire to window in big coop door and add interior trim to cover sharp ends
  • Add trim to cover any interior cracks and caulk with weatherproof silicone
  • Install locks on all exterior access doors 
  • Staple wire around entire run & cover any sharp ends with trim
  • Build 2x4 door to run
  • Install roof

I can totally do it, right?

Right... ?

Wednesday, April 11, 2012

5 Tips for Great Outdoor Spaces

I love spending time outdoors in the warmer months, and I'm sure a lot of you do as well. Spending evenings in the backyard with my family and a big glass of iced tea may be one of the best parts of the season for me. If you want to make your backyard more inviting for backyard living, or if you just want a few ideas for adding some character to your space, then read on for five great tips for an inviting space that encourages outdoor living! 

{If you like any of these inspiration photos, please click through to the original link before pinning!}


 Design*Sponge

1. Make it comfortable. Chairs, benches, hammocks are all things that help people linger outside. Throw on some colorful cushions, make sure there are surfaces for people to put food or drink on, and you're all set! And remember, it doesn't matter if your chairs match... in fact, an eclectic assortment would look just as great outdoors as it would in your living room -- let's work on letting go of that 'matched set' mentality for our outdoor spaces too. Look at garage sales (the season is almost upon us!) and places like craigslist to score some great deals.

LakBDesign via Apartment Therapy

 
 Mr. Goodwill Hunting

Another part of making an outdoor space comfortable in the summer months is planning for pests; mosquitoes can ruin a party faster than just about anything else! If you live in an area with lots of mosquitoes, make sure to eliminate standing water that is perfect for mosquito breeding, like birdbaths or gutters that need to be cleaned.

Some plants and herbs have been shown to deter mosquitoes, so you could plant things like catnip, rosemary, lavender, lemon balm or marigolds in your yard. A classic fix is to light Citronella candles when you're outdoors in the evening, and I've also heard that spraying Listerine around the area can help. (Anyone know anything more about that technique?)

2. Add lighting. There are lots of options when it comes to lighting! Most everyone probably has a hardwired porch light or two, but you shouldn't stop there... lighting can make or break a space inside, and it's the same for a backyard space; you want to transition from daytime to evening gracefully and without your guests (or your family) squinting to see who on earth they're talking to or where the porch steps are. 


Pick up some solar lights to line a pathway with, string mini lights above your porch or DIY some mason jar lanterns and hang them in your trees. Not only is lighting important for boring practical reasons like avoiding party-pooping incidents like twisted ankles or skinned knees, but they can also create a beautiful evening atmosphere that make people want to stay and hang out. In short, mini lights = party central, fo sho.

3. Build a fire.  Don't worry, I'm not unstable. It's just that people are attracted to fires... it's the moth inside all of us or something. Fires bring warmth when it starts to cool off in the evening, and people like to gather around them. Parties can last well into the evening hours when everyone is sitting around a fire, chatting. Or roast some hot dogs and marshmallows with your fam when you camp in your backyard because mom is terrified of camping in bear country and you live in bear country (oh, does that one just apply to me?).


You can always purchase a fancy fire bowl or a chiminea, but there are also lots of instructions for making affordable fire pits yourself online. Just make sure to check your local ordinances regarding fire pits beforehand!

4. Add landscaping. You don't need to break the bank and have a backyard worthy of a magazine spread to make it an inviting space to spend time in, but a few basic ideas will help. Keep the space tidy, the lawn mowed, and remove any trash or dead plants. If you don't like to maintain a full garden, consider adding plants in containers around your porch for color and texture.

If you have a small backyard space, maybe you live someplace urban and it's mostly patio, take advantage of vertical spaces like fences and add climbing plants or flowers, or create vertical plantings.

Happiness Is...

Another landscaping idea is to add paths or walkways to different areas; people like to follow paths, and it will get people moving around and taking advantage of all your outdoor space has to offer.  Gravel paths can look beautiful and I love the look of pavers set apart at wide spaces in the grass. Flagstones can get expensive, so get creative and use recycled concrete that's been broken up to mimic the look.

Sunset


5. Bring in some fun details. Now that you've got all the basics covered, you can start getting creative and letting your personality really shine through in your space with details. I'm partial to backyard chickens running around myself right now, and they can certainly be an effective conversation starter! Lots of people enjoy water features -- and if a larger project like that is in your budget, they can certainly add to the atmosphere in an outdoor space. I want to convert my back door to a brightly colored dutch door, which will also bring some charm to my backyard space.

Apartment Therapy

What are some of your favorite details in an outdoor space?
Do you have any tips to keep mosquitoes away? 
What are your outdoor plans for 2012?

Friday, April 6, 2012

What's Up Chicken Butt 04.06.12

I didn't post about the chickens last week because I was out of town, so don't be surprised that the chickens are like... chickens now. They're practically ready to go to college. When I came home and saw how much they had grown, I kicked and cried because I missed their formative years days. How dare they keep growing?


We take them outside as often as we can now, so they can get used to kids running around and also so they can soak up the sunshine and spend some time leisurely picking at the dirt like pros. I can't wait to sic them on our nasty spider population. Go chickens, go!


That's me and Rosie, having some bonding time. She's sort of bossy, so we get along.


Because the birds are almost 7 weeks old (ish) I am anxious to get the coop finished and get them the heck out of my basement. Work has been progressing a bit slower than I'd like, but since I last posted we finished framing and putting the interior walls and ceiling in.

(that's my nephew acting like a chicken, making sure it's suitable for Posie, who technically 'belongs' to him.)

And yesterday while I was singing at a Maundy Thursday service at our church, Mike also insulated the coop and wrapped it with Tyvek for a vapor barrier because he's fabulous. We were going to use cheap plastic but we discovered a big roll of Tyvek in the shelves above our garage, and who am I to turn down free building materials? Thanks, previous owners!


Unfortunately, this is what we woke up to this morning...


Yuck. Not really good coop building weather. Cross your fingers that it melts fast... I've got a plan and this snowy day really cramps my style.

Thursday, April 5, 2012

My Favorite Salmon Recipe

 As promised, I'm back today with my most loved way to cook salmon ever. This may actually be in my top 3 favorite meals on the planet Earth - even if you're not salmon's #1 fan, you might like this... it's crazy delicious. 

I've been requesting it for special occasions for years now, but it's pretty simple and could be thrown on your menu any old day. It is the perfect light, fresh dinner for spring or summer (or Easter!). My mom was nice enough to make it for me when we were visiting last week, so I took photos to share!


First, we (meaning my mom) prepared the glaze for the salmon.

Well actually, first my mom insisted upon an ingredients shot a la The Pioneer Woman (she's a fan). She's cooking though so I'll let her call the shots:


Secretly I think she just wanted to see her and my dad's backyard honey label on my blog. That stuff is amazing though, so I'll allow it.

Okay, back to the glaze. Mix balsamic vinegar with honey, Worcestershire sauce, Dijon mustard, and chile powder. Try to ignore the red-capped mystery bottle in the above photo...


Grab some salmon fillets, season them with salt and pepper, then brush them with the glaze you just made and throw them on the grill.


While that's happening, it's time to quickly prepare my favorite part: the spicy tomato relish. It's a mixture of onion, tomato, flat leaf parsley, red pepper flakes, red wine vinegar and olive oil. Mix it up well and let it sit and get fabulous... so, so, so fabulous.


And that's all there is to it -- once the salmon is done, plate it up and add a nice bit of the relish on top. It's so simple and so delicious! My mom served it with a salad of baby greens and avocado tossed in a homemade vinaigrette, with cous cous and fresh chives. Oh, and red wine... can't forget that! Thanks for taking care of me, Mom!


Needless to say I was a happy camper. 

Grilled Salmon with Spicy Tomato Relish (slightly adapted from a Bobby Flay recipe)

Glaze:
1/4 c. balsamic vinegar
1/4 c. honey
2 Tbs. Dijon mustard
1 Tbs. Worcestershire sauce
1 Tbs. chile powder

4 salmon fillet portions seasoned with salt & pepper

Relish:
2 medium-sized tomatoes, diced
2 Tbs. finely diced onion (I've had it with both red or yellow, it's good either way)
2 Tbs. flat-leaf parsley, chopped
1 tsp. red pepper flakes
1/4 c. red wine vinegar
1/4 c. olive oil
salt and pepper to taste

Combine glaze ingredients, brush onto salmon and grill until cooked. While salmon is cooking, mix together all the relish ingredients. Serve spicy relish on top of fish.

Related Posts Plugin for WordPress, Blogger...