Tuesday, November 29, 2011

Holiday Comforts - My Love List

This post is sponsored by Tempur-Pedic, the brand millions of owners trust to deliver their best night’s sleep every night. Enjoy our Buy 2, get 1 free pillow offer now and give the gift of custom comfort to someone you love.
  __________________________________

When I heard that Tempur-Pedic was looking for bloggers to write about the little comforts that make this season special, I jumped all over it since I am, perhaps, comfort's #1 fan.  I'd say that comfort is one of my top ten goals in life, and we're all lucky that dignity is on that list too (or my daily uniform would consist of a Hawaiian print muumuu and Crocs).

When it comes to the holiday season specifically, there are definitely a few things that I simply can't do without. Let's share! 

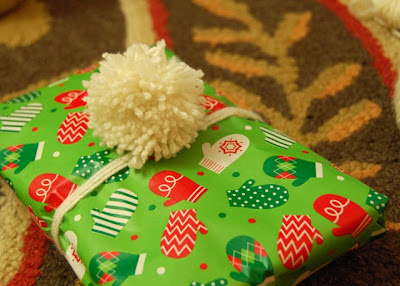
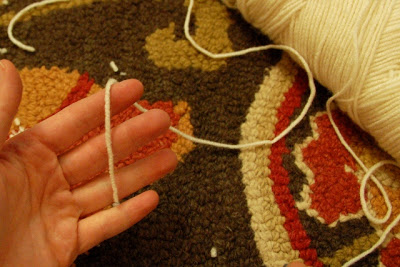
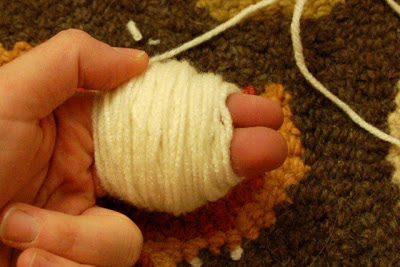
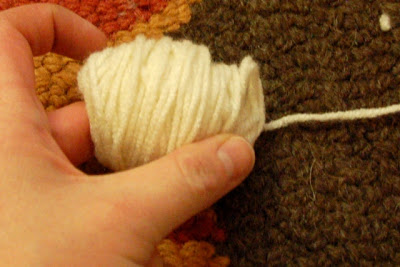
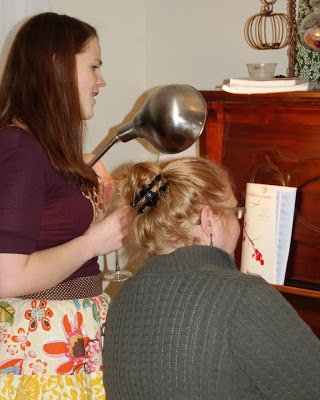
Knit/Crocheted Accessories
Why is it that if it's soft, fuzzy, and possibly even cabled, I go crazy over it? If somebody could knit mini bottles of ketchup or baby ducks my head might explode from the cuteness. I'll wear hats, scarfs, hand warmers, leg warmers, even eyebrow warmers, and I'll probably wear them all at the same time. With my muumuu and Crocs. I'll be smokin' hot.

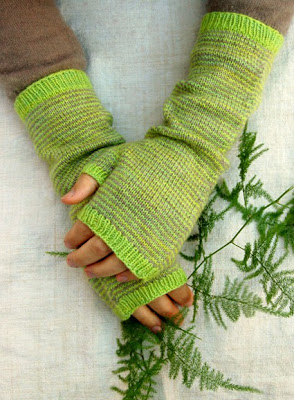
(source: the Purl bee)
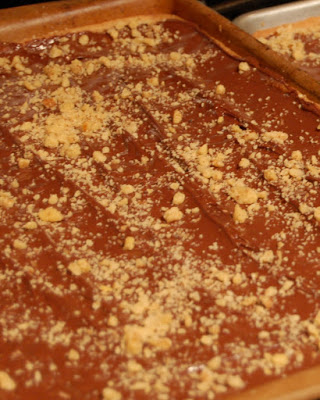
Hot Toddies
This may or may not be the reason that I'm so willing to mix multiple knit accessories with Crocs. But can you blame me? How delicious are these drinks when it's cold outside and you(r husband) just came in from shoveling the walks and your (his) face and hands are like ice? They're also wonderful when you're sick, or when you're caroling, or when it's Tuesday. And if alcohol isn't your speed, I'll make sure to have spiced cider on hand too. Yumm-o.

 (Photo and recipe at Verses from my Kitchen)
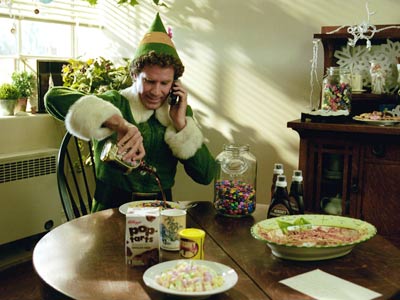

Christmas Movies
What is better when it's cold out than snuggling up with your fam and watching a classic? And by classic I mean something goofy, like "Elf" or "National Lampoon's Christmas Vacation." There are some movies that must be watched in December, or it's just not Christmas time. "A Christmas Story," anyone? "It, it was... soap poisoning!" (Oooh, I also adore "Love Actually" but then I'm a sucker for a good love story!)


Caroling
I love to sing all year round, but the moment that first bottle of wine is opened on Thanksgiving Day, it. is. on. Want to carol in your living room after dinner? Sure! On a train? In the rain? With a brain? Oh yeah, I'm there, and I'm bringing my A game.


Baking
I enjoy heating my house by running the oven constantly. Making cookies, breads, candies... it's one of the perks of this time of year, and one I very much look forward to. I love giving neighbors and friends things I created in my kitchen. I love wearing my frilly apron and listening to Christmas music while I butcher cookie recipes (and succeed at others, 'cause I am not completely hopeless y'all)


Warm Feet
This can be accomplished most effectively by sticking your cold, cold feet on your spouse or significant other's warm, bare back. And cackling. That's the most important part.

Ding Dong Merrily On High, booyah. What are your favorite comforts this time of year? Spill, y'all!
__________________________________
Comfort is the perfect gift for everyone on your holiday gift list, so be sure to take advantage of Tempur-Pedic's Buy 2, get 1 free pillow offer! I was selected for this sponsorship by the Clever Girls Collective.

Embellish Gifts with Pom Poms

When I grew up, my parents would wrap gifts under the cover of darkness, hidden away in locked rooms for fear of discovery. However they also made the error of hiding unwrapped gifts under their bed. (seriously? rookie mistake.)

I, on the other hand, employ much trickier gift hiding tactics, and also refuse to let gift wrapping cramp my style and good times. I prefer to wrap (or sew, or craft) in the middle of my living room where I can watch a movie with my husband while creating a temporary mess tornado.

I also like crazy things. Like pom poms. And now, with my patented "easy-puff" system, you too can enjoy hours of homemade pom pom fun for just 3 easy payments of $29.95! 

Just  kidding.*

(*unless you were okay with that... 'cause I am totally taking donations** for my kitchen overhaul which my husband is firmly against.)

**(except I'm not really. No donations accepted or needed***. Just send me good kitchen-convincing vibes)

***(wah.)


Anyway... here's how you do it. It's crazy easy, you don't even need any fancy tools.

1. Wind yarn around your fingers. The more fingers you use, the larger your pom pom.

2. Keep winding. I counted about 100 yarn wraps for these - a sparse pom pom is no fun at all. Think about keeping your fingers slightly parted so the pom pom is easier to remove and your fingers don't turn purple. (See? I'm lookin' out for you.)

3. Ease the yarn off your fingers being careful to keep the future pom pom intact.

4. Carefully place on another piece of yarn laying opposite the direction of your yarn wrappings. Wrap length of yarn around entire pom pom and tie a knot in the middle. Pull tight - and use your foot to hold down the yarn on one end if you have to hold a camera to take photos (but please, crop your toes out of the finished photo!)
5. (optional) Leave the strands of  your knotted yarn long so you'll be able to tie your pom pom onto whatever needs bedazzling before you trim it.

6. Cut through all the loops on either side of the pom pom, being careful not to cut the knotted strand in the middle that's holding the whole enchilada together.

7. Join the pom pom war. To trim or not to trim?

8. Bedazzle. Your friends will be amazed! Or at least mildly amused.

Wednesday, November 23, 2011

Vanilla Extract {Update & Printable Labels}

In October I wrote about homemade Christmas gifts, and shared that I was making homemade vanilla this year. It's been a little over a month so I thought I'd share the progress and some labels I made...


They're getting there - they look a lot darker when light isn't shining through them like that.

And here's a finished bottle:


I printed the labels on regular paper, cut them out (by hand, since I discovered that my cutter has mysteriously relocated to my husband's office... um, we're gonna have to fix that.) and lightly sprayed the back with adhesive before quickly attaching them to the bottles. The bottom reads "contains vodka & vanilla beans" and "refill by adding more of either."

There's still time to throw this fun giftie together this year! There are plenty of labels available on blogs everywhere, and of course you could always make your own... but you're welcome to download these ones if they make your skirt fly up!

Vanilla Extract Label

Tuesday, November 22, 2011

Shabby Apple's Looking Glass Necklace {winner!}

Congratulations to the winner of the Looking Glass necklace...


... Katy B!

I'll send you an email to get your information!

Thanks to everyone who entered and to Shabby Apple! Don't forget about the 10% off coupon code SIDESTREET10OFF - it's valid for 30 days.

Sunday, November 20, 2011

My Thanksgiving Table {DailyBuzz Moms 9x9}

Earlier this month I had the opportunity to submit a proposal to the editors of DailyBuzz Moms, a publishing community I belong to - they were looking for 9 bloggers to put together Thanksgiving table decor over a 9 hour time period and then share their fabulous creations (hence the title "9x9").  

Never you mind that I am not even hosting Thanksgiving this year... I had already been mulling over an idea in my head, and this was just the opportunity I needed to drop everything "important" and focus on something fun and pretty.


Lucky for me, I was selected as one of the nine bloggers! I was raring to go, but had to spend a couple weeks twiddling my thumbs and resisting every urge to start on my table decor until yesterday. Finally though, the big day arrived, and I attacked it full force; by which I mean I sat around and pondered Christmas gifts, shoe styles and the meaning of life, wasting several of my allotted nine hours.
 
I work well on a deadline, okay? Blame my journalist mother.

My initial inspiration for the entire table was this photo I stumbled across on Pinterest:

(Original source unknown, via Pinterest)

I wanted to capture a combination of rustic and chic (y'all know I love those juxtapositions in design), and my goal was a design that was elegant, but also very simple. You see, I'm not usually a ruffles or 7-different-glasses kind of a girl and I wanted to create a table that I could see myself actually sitting at for Thanksgiving with my family. I wanted an earthy, limited palette so I chose white, colors of brown and green as an accent.

It's impossible and/or expensive to find a tablecloth for my large square table, so I ended up making one from a full-sized flat sheet I bought for $10. The burlap I bought at JoAnn, and cut to length since I really liked the way it looked as an extra-wide runner. 


 The champagne-colored chargers and faux greenery I bought at Michaels, and everything else on the table I already had, even the wood. Yet another use for scraps from the removal of three old aspen trees last month!


I love the combination of the rough burlap and bark with the crisp white cloth, satin ribbon, and shimmery chargers. Though I think the candles might be my favorite part! I think it turned out beautifully, and I'm a little sad we won't get to eat Thanksgiving here (although Mike did ask that I leave the centerpiece up because he liked it so much).

What do you think?

P.S. Fig is my cat. Ha!

Sharing a Not Just A Housewife

Thursday, November 17, 2011

Shabby Apple Giveaway: "Through the Looking Glass" Necklace

I first became familiar with Shabby Apple when I still lived in Salt Lake and would go to boutiques for my lia sophia jewelry business; I would wander around and end up spending too much time looking at dresses and not enough time at my own table. Oops!


So when Shabby Apple contacted me about having a giveaway, I was over the moon! They have a ton of amazing dresses, lots of them inspired by vintage designs...

{1. Ingrid Dress; 2. Bonheur Dress; 3. Gondola Dress}

And they also have lots of unique, gorgeous jewelry and accessories:

{1. Small Silver Pendant Necklace; 2. Go Green Ring; 3. Honey Bee Necklace}

Speaking of awesome jewelry...


Enter Shabby Apple's Through the Looking Glass necklace -- I was able to pick which piece of jewelry to offer today, and I'm pretty much 7 shades of jealous over here now. This necklace is so fabulous! It's 24" long which is such a great length, and I love that it's a crazy glass pendant that has a "fish-eye magnifying effect."

... I sort of want it. And by sort of, I mean really...

Plus, as a bonus, the folks a Shabby Apple are also offering everyone a 10% off coupon code if you see something you can't live without! When you check out, just enter the code SIDESTREET10OFF and watch your total magically decrease -- love that!

Here's how to enter to win Shabby Apple's Looking Glass necklace:
(3 possible entries per person - each comment counts as an entry, so make sure to leave separate comments each time you do one of the following:)
  • Hop over to Shabby Apple's Facebook page and 'Like' them, then come back and leave a comment saying you did.
  • Become a follower of Take the Side Street or a fan on facebook if you're not already, and comment saying so!
  • Tweet or post about this giveaway and comment with the link to the tweet/post.
And here are the important nitty gritty details:
  • Winner must have a US shipping address.
  • There will be no exchanges for the winning piece of jewelry.
  • Giveaway is now closed.
  • Don't forget about the 10% off coupon code! SIDESTREET10OFF is good for 30 days... just in time to order Christmas presents -- if you need my address or wish list, just email me. Haha!

Wednesday, November 16, 2011

Mercury Glass FAQ {video}

Gulp. A video, y'all... featuring... me.
(Still trying to decide how I feel about it!)

I get a lot of questions about my faux mercury glass tutorial, so I decided to answer some of them on video because I thought showing might be easier than just describing.

Unfortunately, my laptop's camera decided to stop working so I had to pull an older plug-in model out -- any future videos should be much higher quality, so I'm saving any real technique-related questions for then. Consider this a trial run.

Tell me though, would you be interested in more videos about the mercury glass? 

Tuesday, November 15, 2011

Make Your Own Chandelier Rings

About a year ago, my boys literally swung from the chandelier in my bedroom one afternoon while "napping," and pulled off the main crystal drop from the chandelier's center.

I was not pleased with them, and I couldn't figure out how to fix it because all the little silver rings between crystals had been stretched open -- and they were made of thin wire anyway, so even if I tried to reshape them they had lost their strength and they would gradually open from the weight of the crystal hanging below. 

 Sadness.


None of the stores I visited carried this particular chandelier accessory (even specialty stores), and the cheap and stubborn frugal and resourceful parts of me refused to pay $5.99 or more on ebay for 200 or more rings, when I needed fewer than 10.

What to do, what to do... then someone suggested split rings for jewelry making. I went and bought a pack only to discover that they didn't fit through the chandelier crystals' holes. I was discouraged. I threw the pack of split rings into a cupboard and forgot about them for a year.

I stumbled across them again recently, and this time I had an epiphany. 


The reason the split rings didn't fit through the crystals was because the wire was too thick; a split ring has only one small spot where the wire isn't doubled (like a key ring) and that wire is thick and strong:


If I used wire snips, though, and cut off some of the overlapping wire resulting in a circle where only one small spot had wire that was doubled, the jump ring would fit through the hole in the crystals perfectly.

Confused yet?

I very carefully cut each ring in two places, making sure to only cut one of the doubled wires. You can see the half circle that I cut away in the bottom of the photo below:

Ta da!


Then I simply strung up those crystals up...
(I did use needle-nosed pliers to help with this step since the split rings are less pliable than a real chandelier ring)


...and finally, over a year later... I have my chandelier back. Better late than never, right?


Lesson learned: Sometimes taking a break from a frustrating problem is all you need in order to finally solve it. (although I bet you wouldn't have to wait a year like I did!).

Monday, November 14, 2011

Living Room Progress and Paint

After eleventy billion hours of caulking and filling, I finished painting the trim in my living room last week and I suddenly understood why people hire professionals -- prepping and painting trim isn't going to make it to my list of favorite things (girls in white dresses with blue satin sashes everywhere are heaving a collective sigh, I'm sure).


 First off, let me say that I love this color. Edgecomb Gray is like a super neutral - it's not cold or drab, it's not boring, and it looks different in every single light (but it never looks bad). I'm a big fan.

Since I don't have a Benjamin Moore in town, I had the paint matched at Sherwin Williams (during their 40% off sale, holla!) and it was perfect. I've complained about the big box stores and their inability to match Sherwin Williams or Benjamin Moore colors in the past, but consider this my official, unsolicited ringing endorsement for Sherwin Williams.


Spot on, out of the computer, first try.

All of the windows in my home are dark wood, so I just paint the trim while leaving the moving parts and the grid that creates the look of multiple panes, and I actually dig the way it looks. I am a-ok with a little trim quirkiness in my world.


(See how much better my door looks without green paint, or even a stripe of beige paint, next to it?)

In other news, I am delighted to announce that (hopefully) tomorrow I will have baseboard in here. Squee. It's been sitting out in my garage, painted and ready to go... and now I think it's actually happening. Super, super excited about that.

I hope no one sat around all weekend biting their nails and waiting for photos of my living room; I couldn't post those pictures Friday when I finished because I was a girl trip with my two sisters and our mom in Park City.


Two things: I need adult supervision in World Market, and I thought we were making silly faces when this picture was taken -- can someone please tell me next time so I don't end up looking like that while everyone else looks fabulously normal? 

Thursday, November 10, 2011

Where the Magic Happens...

Yep, the magic. It's a-happenin'.

That is... if by "magic" you mean, "shoving everything to the center of the room while you stop washing dishes in order to devote all your waking hours to caulking, filling, sanding, taping, priming, painting, and grumbling." 
 

That's what magic means in my world. Especially when you get paint on your bra -- that's how you know you're a legit DIY addict. Word, y'all.

Wednesday, November 9, 2011

Kitchen/Dining Master Plan

This post has been a long time coming, mostly because diagramming the space was an exercise in ridiculousness since I apparently lack skills of a computer floor plan artist. I've been putting this off for month

Here's the situation now, complete with obnoxious walls and crazy colors.

All three of those rooms can be seen in my house tour, if you're wondering what on earth this diagram is referring to. I'll also share more detailed photos in the future.

And here's my master plan:  
(insert trumpet fanfare here)

Here are the deets:
  • Paint, paint, paint. Living/dining areas will be BM  Edgecomb Gray, kitchen may eventually become BM Revere Pewter for a bit more contrast against the white kitchen cabinets. We'll see. Trim and ceiling panels in the dining room will be painted white, beams will (most likely) be left dark.
  • Entrance between dining room and rest of house (that I was too lazy to diagram) will be widened as it is a major traffic flow area.
  • Walls between kitchen and both other rooms removed to accommodate an 'L' shaped lower cabinet addition with bar area and stools. (Can't wait to have a more open kitchen!)
  • Remove kitchen cabinets near garage entrance and replace with cubbies/benches - Shazam! Instant mudroom.
  • Replace entire kitchen with a more fabulous updated version that includes standard sized cabinets... this will be a treat for me.
  • Remove bizarre 2.5' wall section (that's in the worst possible place as far as traffic flow goes) between dining and living rooms (see photo below)

What do you think of my master plan? Do you think the trumpet fanfare was a bit much?

How old will my children be when my husband finally allows me to rip into my kitchen - what if they're in college??

Will I ever have a good picture taken of me while singing? How cute is that necklace?

These are just some of the important questions you should be pondering today.
Related Posts Plugin for WordPress, Blogger...