Wednesday, June 29, 2011

Road Trippin'

Traveling with kids, although not technically DIY, is still a learned skill that many people struggle with. So I'm blogging about it. Ha. 

Translation: I'm leaving on my first real road trip with children tomorrow and I'm scared stupid.

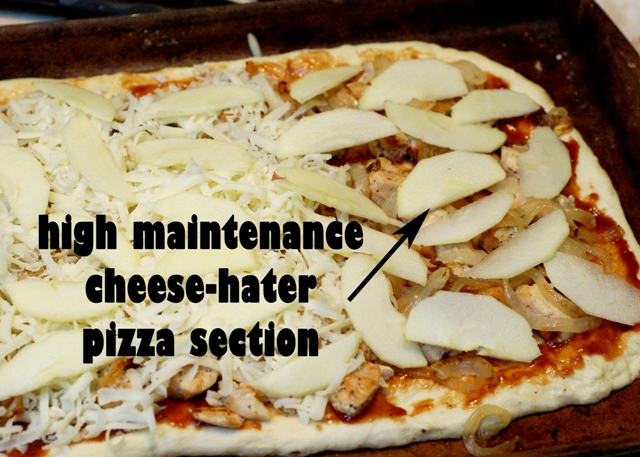
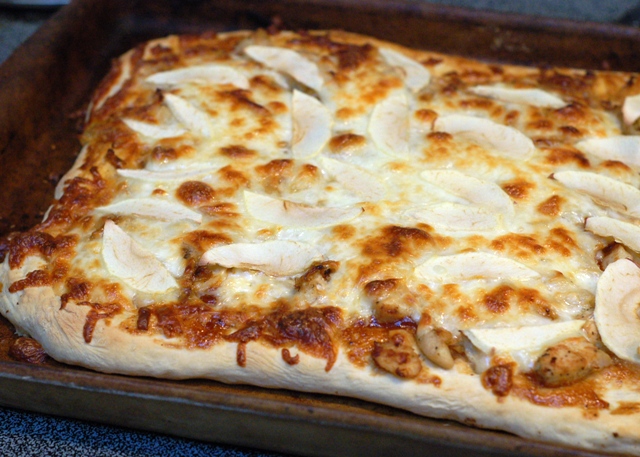
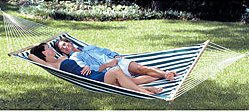
{click on photo to be taken to pin}

In honor of this momentous occasion, I decided to share some traveling tips I picked up while googling in a blind car ride-induced panic researching like a calm, collected individual. 
  1. Service your car. We've seen enough movie sequences where cars die in the desert and hilarity ensues. It's only funny when it happens on the big screen, I promise.
  2. Make the journey just as much a part of the trip as the destination -- play road games, stop and smell the roses while checking out the world's largest ball of string, and go to the hotel pool as a family. This means the vacation starts the moment you pull out of your driveway, so have some fun.
  3. Conversely, if you're against breaking up the trip into multiple days and turn your nose up at hotel stays, be prepared to leave in the cover of darkness so the kiddos can spend the first part of the trip in blissful sleepy silence. You'll be so glad they did.
  4.  Play games!  This site called Momsminivan has a large list of road games for kids, and here's a list of 10 kid friendly apps for your smartphone. That is, if you can wrestle it away from your technology-loving husband who insists on having the GPS up and running during a 400-mile stretch of straight road.
  5. Check out a book on tape from your local library and listen as a family.
  6. Stop every 2-3 hours. I'm sure it will be tempting to just drive on through, but this will help avoid potty emergencies in the back seat and even a quick stretch here and there will help break up the monotony and time spent in the car for your kids, which will make your life 117% easier. That number, by the way, is a totally legitimate statistic. Yep.
  7. (Pillows + Blankets)Road vibrations = Naps. Memorize that equation, or at the very least write it on your hand.
  8. Schedule snacks and meal time instead of indulging in mindless munching. You'll save yourself lots of travel induced caloric guilt, and it will also give the backseat hostages yet another thing to look forward to.
  9. Pack a cooler with things like sub sandwiches, grapes and pudding cups and find a place to have a picnic. It will save you some money on restaurants, and give you a chance to stretch and relax. I still remember stopping at state parks in pretty areas as a child; I loved having picnics on the road and they were a special part of the trip experience.
  10. If you do eat out, consider finding a local spot and sitting down at a real restaurant instead of driving through a fast food joint. This will help break up the drive time again, plus it gives everyone some time to decompress and helps keep your car from filling up with cold french fry bits.
  11. For hotel stays, pack a separate small bag with everything you'll need for the next morning. It's like carry on luggage for the car trip, and you won't have to haul everything into your hotel room.
  12. Keep crayons in a ziploc bag. I've seen this tip just about everywhere, so I'd listen.
  13. Pack a health kit for the car - bandaids, wipes (or a clean washcloth in its own ziploc, my mother swears by this) and sanitizer. One site I found suggested a plastic bag throw up kit. Hey, airplanes do it -- and getting carsick is zero fun.
  14. Wait to pull out movies or video games until you've been on the road at least a few hours. Make your kids amuse themselves for the first bit of the trip when they're fresh and the novelty of the drive hasn't worn off. When they start getting frazzled, that's when you start pulling things from your sleeves to keep them entertained.
  15. Put together a car surprise bag for the kids -- coloring books, a new toy, a treat. Every couple of hours let them pick something from the bag. This doesn't have to cost a lot of money, in fact I'm a fan of doing things on the cheap. I bought things like sour gummi worms, sticky hands (the kind you would get in a 25-cent vending machine at the front of a store), whoopi cushions, activity books, dinosaur figures, and gum (I might regret that one though!).
Let me know in the comments section if you have any other fabulous tips!

This is our last trip of this marathon three week crazy fest, so I can't wait to get back and start doing normal things again, like painting things and digging holes for fence posts.

I get antsy when I can't tear stuff up for too long.

Friday, June 24, 2011

My Favorite Pizza Dough + a Recipe to Try

There's a learning curve to making homemade pizza, don't you think? The dough might not turn out, or you cook it and the middle is soggy... nobody likes feeling like a pizza failure! 


 I've finally found a no-fail recipe for a dough that I love, and now my family has homemade pizza almost every week - and that's quite an accomplishment, considering my husband hates cheese of all sorts and varieties. Weirdo.

Anyway, I thought I'd share the recipe, because I'm the sharing sort.

I make my pizza dough in the breadmaker -- I start it in the afternoon and it's ready to go for dinnertime. Love it.

  
This week, I made BBQ/onion/apple pizza and it was delicious. My husband was a bit skeptical but he was pleasantly surprised.

Start by spreading your dough on a stone or a pan -- I no longer have a fancy round pizza stone, they keep getting broken mysteriously when someone in my house starts the oven's self-cleaning cycle with a pizza stone inside. This person's name rhymes with "shmy shmusband," but that's the only hint you'll get.


Smear on some barbeque sauce -- whatever sort you love, except for that really inexpensive Kraft stuff. Unless you like it. When I was first married I thought I was being so frugal and amazing buying it, and then I discovered it doesn't taste at all good. Is it just me?


Add some cooked chicken and carmelized onions. Ideally, your onions should be more carmelized than mine. I ran out of time. I was packing and trying to get kids to baseball practices, people! If you run out of time, rest assured that partially carmelized onions will still taste good.


Lastly, add your mozzarella cheese (grate your own, you'll be glad you did!) and peeled, sliced apples.


Throw it in the oven for 16-20 minutes (I keep it in for the full 20) then let it rest for 5-8 minutes more. The resting time is important to avoid floppy fish slices when you pick your pizza up.


Then it's time to enjoy!

Easy Pizza Dough (from this recipe)

2 tsp. yeast (I use bread machine yeast)
3 c. flour
1 tsp. salt
2 Tbs. sugar
2 Tbs. olive oil
1 c + 2 Tbs. water

Put all ingredients into bread machine, select the "dough" setting and start. When it's done rising, punch it down, shut machine door and let rise a second time for 45 minutes. Turn out, and divide into two equally sized dough balls. You can freeze them or use right then.

If you're using the dough immediately, form your pizza, top with desired toppings and bake at 425° F for 16-20 minutes until your cheese reaches your desired melty brown-factor. 

Wednesday, June 22, 2011

Gift Tag {Printables}

Happy Wednesday! Let's celebrate with a printable.


I love being able to grab and go from a stack of tags when it comes time to wrap presents, especially (confession time) since I loathe buying cards in addition to a child's birthday party gift. Tags make it easy; just write a little message on the back, or even just your child's name, and you're set. Easy peasy lemon squeezy, y'all. This is definitely one area in my life where I don't sweat the small stuff.

(Click on a photo to enlarge, then save to your computer and print.)

{blue "happy birthday" tags}


{pink "happy birthday" tags}

{yellow and gray "happy day" tags}

Tuesday, June 21, 2011

Adventures in Packing, Running, and Wasting Time

Oh. my. gosh. GOSH!!

You guys, I'm already over the craziness that is my life for the next couple of weeks and I'm totally embarrassed that I didn't plan ahead and have something fancy like guest posts or at least scheduled posts ready to go in my infinite lameness. Anybody want to guest post, haha!

 Last weekend I was kicking serious Ragnar boo-tay with the coolest team ever (obviously, you even saw our fabulous vans) and my family just returned home yesterday. Today I am doing 6,000 pounds of laundry. So that I can pack it back into suitcases... so that we can go back to Park City again on Thursday. And then next week, when we get back from that trip and I empty my town's water supply via my washing machine yet again, we get to drive to California for the holiday weekend to go to the memorial service for my husband's grandma.

You can't see me right now, but I drew this rendering for educational purposes (because I have oodles of time to kill, right?)


And yes, my feet really are that big in real life, thankyouverymuch pregnancies + running.

I will get myself together tonight and figure something out to post tomorrow that is supremely awesome, or at the very least not entirely embarrassing. I will also post the highly anticipated next installment of "How Does Your Garden Grow?" because let's not kid ourselves, we're all dying to see more baby green growth in a sea of dirt.

In the meantime, here's a couple pictures of Ragnar awesomeness from the last weekend for your enjoyment. No, we didn't place. But out of 713 teams in our coed open division, we came in right in the middle, and that's a-okay with me! Have you ever run a Ragnar Relay? They are 200ish miles of faaaaaaabulousness! (that was my Oprah voice)


(Don't look too closely at the junk in the background. Ragnar vans are made to be broken.)


Can't wait for next year!

Thursday, June 16, 2011

Just Keep Running...

This week has been a whirlwind, my sister-in-law flew in from Tennessee and tomorrow we start running in the Wasatch Back Ragnar Relay.

This has nothing to do with DIY. But it might have something to do with DIE. Ha! Forgive me if you were expecting something more house-related, but this is so fabulously fun that I have to share.


Tonight our awesome team ("Saints & Sinners" -- holler at me if you're running the race and you see us!) met for pizza and vehicle decorating. 


Wish us luck! I'll be back next week to report and share some photos. 

Tuesday, June 14, 2011

Grout Sealing -- A How and A Why

Last weekend, I tackled a project that was definitely lacking in the DIY glamour department.  However, it was an important bit of routine maintenance that I think a lot of people forget about; plus it's pretty simple, so I'm expecting that this post will start a DIY revolution and this week you'll all spend a little time... sealing your grout! Woooohoooo.

I remember when I was in full-on nesting mode before I had my younger son, and I spent the larger part of an afternoon on my hands and knees with a toothbrush scrubbing grout lines in my guest bathroom. If only I had known then what I know now... I'm not sure that back then I was even aware that you could, or should seal your grout.

So why should you seal your grout?
Grout is porous, even if your glazed tile is not.
Sealing it helps repel water and stains
Sealed grout is easier to keep clean
Sealing will add to the lifespan of your tile floor

It's also really easy to do, which is a big bonus in my world. Check it out:

1. Clean your grout. If your grout hasn't been sealed in a while (or ever) this might take a while, but just focus on how much easier it will be in the future to clean your fancy sealed grout -- that helped me work through the grout cleaning drudgery. If your grout is brand new, make sure to let it cure for a month before you seal it.

(see? DIY is not always pretty. Ugh.)

I use a solution of oxygen bleach (like OxiClean) and water, and I scrub the grout with a stiff toothbrush. If you have stubborn stains, let the solution sit for 5-10 minutes before scrubbing. Make sure to clean the tile really well afterwards to remove all traces of the cleaner from your grout lines, and give it plenty of time to dry completely.

2. Apply grout sealer and follow the label instructions. There are two types of grout sealer, one which coats the top of the grout and one which actually penetrates the grout. The penetrating type is a little more expensive, but it's going to do a better job, especially in wet areas like bathrooms.


The sealer I used had an easy-to-use spray which made it easy to just aim and shoot; it took me less than 5 minutes from start to finish.  Make sure to wipe off any grout sealer that got onto your tiles to keep them from developing a permanent haze. It required 2-4 hours to absorb and dry, and then we had to keep the are completely moisture-free for another 24 hours. If your house is anything like my house, this will require locking a door to keep your children as far away from the grout as humanly possible.

And then... you're done! Your sealed grout should last for one to two years, depending on use and cleaning.

Sealing your grout is a simple task, but it's often overlooked by homeowners. Making sure your grout stays in good shape and free from stains will add to the overall appearance of your home, and preventative maintenance is always a less expensive option that replacing worn tile or grout.

Monday, June 13, 2011

A Little Bit of Backyard Progress

I had this master plan, where I bought my husband a hammock for Father's Day and had my brother-in-law sneakily hang it so I could unveil Mike's gift with a melodramatic "voila!" 


I purchased this hammock from overstock.com, and my plan would have worked brilliantly, except that it didn't. Two days after I ordered the hammock, UPS came to my door and I thought to myself, "it couldn't be!"

I had barely enough time to shriek sweetly ask my husband to stay away from the door before he walked into the room dragging a giant box labeled 'HAMMOCK' behind him while looking at me quizzically.

Hmm. Happy Father's Day!

Mike was excited about his spoiled surprise though, so we decided to hang it that evening. Long story short, hanging a hammock turned into a mini overhaul of the unused corner of our yard in prepation fors its conversion into an outdoor den of manly relaxation. Except for when I'm in the hammock with a girly drink; then it shall be known to all as "the shady nook of leisurely delight."

The unused corner in question is under a canopy of trees, and it was home to a wobbly potting bench, some rotting railroad ties and a compost pile which I liked in theory, but made me nervous. It was just a pile of composting material right up against the fence -- and I'm already dealing with holes in my fence on the other side of the yard from the raised garden beds that were built against the fence with nothing between the soil and the wood.


So we spent a little bit of time this weekend making things look a whole lot worse...

(Squinchy exertion-related faces of the demolishers have been removed for the protection of their egos)

... and raking up several years' worth of dropped needles on the ground... 


(enough to fill 5 giant bags, in fact)


And.. (melodramtic hand flourish)

 "voila!"


I'm glad I still got to have my dramatic unveiling, even if it was a few days late and to you guys instead of my husband.

We still have a lot of work to do in this area, but I'm really happy with how different it looks! I can't wait to get my margarita on, even if I have to use a stump for a table. I suppose I can compromise and allow some manliness into my shady nook of leisurely delight.

Sunday, June 12, 2011

06.12 How Does Your Garden Grow?

Ahem. I am pleased to announced that I finally see green when I look at my gardens. It's not quite out of the "boy, that's a lot of weeds" phase, but I'm convinced that it will soon start to look more garden-y (even if it's a sad garden of the sparse sort) and less like I'm completely ignoring the space.

Aaand, just a warning -- I was totally lazy busy and I forgot to take photos until midday, which means the sun is high and my dirt photos are dappled which means they're harder to see. Sorry 'bout that, won't happen again.

First, the garden under the cherry tree. See what I meant about dappled?


The little plants are smaller in this garden, but at least there are more springing up. Maybe the squirrels didn't eat every seed.


And next, the garden along the fence:


There's several larger plants growing there -- I'm not sure if they came from my wildflower seed shaker or if their weedy invaders from the neighbor's garden. If they were in my front garden I'd pull them, but back here? In my wildflower zone? No clue. Anybody want to tell me what they are? Should I pull them?


My Seussical honeylocust has made progress too!


The next three weekends are pretty much festivals of craziness for my family, so I'm currently trying to figure out if "How Does Your Garden Grow" posts will even be possible. I might have to do them a day or two early, if that's all right!

Interested in following along? Go back to see last week's photos or jump ahead to the next post.

Friday, June 10, 2011

Calling All Party Smarties - Mayday, mayday!

Ohh, I am supremely out of my league right now.

I am not cute or crafty, I shrink at the prospect of scrapbooking, when people tell me to use something crazy like grommets to hold two pieces of paper together I hold up roll of tape and look at them like they need to be evaluated. I selectively avoid reading blog posts about party decorations and table themes, not because I have no interest, but because I end up feeling bad about myself instead of feeling inspired.

But now I'm in trouble. My older son saw me secretly looking at party ideas when I was suffering from delusions of crafty grandeur or temporary insanity, and flipped his lid over a Super Mario Brothers themed birthday party. What could I say, except "oops?" This will now be happening in a month.

I don't know if y'all remember but I had a bit of a party fail last October and I'm pretty scared at the idea of trying again. At-home parties are super intimidating to me, guys.

Here's a photo from the party in question:


No joke, that photo captured the single moment when everyone was amused at the same time. A mom who was there seriously told me, "It's okay, parties are hard." Just in case you think I don't suck at this as much as I say I do. Party sadness!

I have a few links to some great Mario party ideas to go from, but to be completely honest I am worried. I have this tendency to bite off more than I can chew, and I have a limited budget to work with (no rented climbing walls for this mama), so I would love some tips from anyone who has successfully thrown an at-home party.

I'd also appreciate it if you could:

1. Please tell me to avoid fondant. I've never, ever, used it, and in fact my cakes usually border on disastrous. I'm scared that I will decide that it looks crazy easy and go for it. This could will be ugly.

2. Mail me some kleenex boxes for my inevitable breakdowns, I'm pretty sure I'll run out. I tend to be melodramatic like that.

3. Share links to posts you've discovered which are titled "Parties for Dummies," or "How To Successfully Lay Out A Buffet Table If You Suck At Presentation"

4. Tell me to stop doing dumb stuff!!

5. Hold me when I cry.

Wednesday, June 8, 2011

Paint Color Details

On Monday I addressed a question I've been getting pretty often over the last couple months and posted a step-by-step tutorial for creating crisp lines and pinstripes with paint.

Today, continuing in the Dear Abby vein, I'm going to talk about two paint colors that I get asked about!

An aside: Maybe we should start an "Ask Anna" feature here on Take the Side Street. You could ask me anything, bonus points for crazy questions! I'm a sharer, and I have an opinion about pretty much everything. Just saying, we should consider it. Feel free to overwhelm me with earth-shatteringly important questions about your love life, carpet color, pet guinea pigs or baked goods. If I don't know the answer, rest assured I won't rest until I track it down! Unless your question is about politics or religion, and then I'll probably pretend I lost the email. Guffaw.

How do people actually guffaw? Is it unladylike? Maybe I should ask myself, hardy har har.

Anyway, moving on to paint colors.

I've been asked for quite some time about the paint color in my master bedroom, and I've answered it in emails and I think comments, but I wanted to put it out there for the universe.


The color in my master bedroom is 'Comfort Gray' by Sherwin Williams. Except it's actually not identical, because I get my paint made at Lowes or Home Depot and their computers aren't so hot at matching Sherwin Williams and Benjamin Moore colors, in my experience and opinion. So, to be specific, it's a color match of "Comfort Gray" in Valspar paint.


I've also gotten a lot of questions about the new paint color in my guest room. This one is a bit more complicated. I wanted 'Rainwashed' by Sherwin Williams, but I had learned my lesson about colormatching so I had the friendly employees at Lowe's do it manually after a seriously unsatisfactory attempt by their computers.

It took two different bases and a couple hours (and a husband telling me I was nutty for being this much of a perfectionist), but I really wanted that blue-green shade that I loved. I was so worried that it wouldn't be close, I actually bought a $5 sample of 'Rainwashed' at Sherwin Williams and painted it next to my custom color, and they were almost identical but mine had maybe half a smidge more green and I actually liked it better. Mwahaha. Success.

Here's a photo of the top of the can,  you have to add the two labels together plus the handwritten addition at the end (that was me asking for more green from a second, slightly crabbier employee):


The paint is Valspar Eggshell Base 1 (#70658), by the way... just in case it doesn't say that in fancy paint-speak on the label.

And to deciper, here's the sum of the colors for a final formula for my custom Valspar 'Rainwashed' knockoff:
101-19.5   103-10   107-13.5   103-5

Happy painting!

Tuesday, June 7, 2011

Oh, Honey!

Hey there loves!

It feels like we've had more rain than sun this "spring" (ha!) so I'm going to transport us magically to a little land a couple hours south, a nice little place called "Utah," the land of my childhood and my parents. This little land is experiencing some wonky weather too, but right now I think it's slightly  less crazy than ours.

I'm the youngest in my family, and when I moved out years ago my parents were undoubtedly crushed; I'm sure of it! To bring meaning back to their life and pass the countless hours without my sunny rays of fabulosity and delusional behavior, they recently bought some bees.


They decided to go with Russian bees, which (to my extremely limited understanding) are just as mild mannered as the standard Italian bees but are more resistant to mites and may even produce more honey than their standard bee friends, no doubt because they're not taking numerous Gelato breaks.

(Just between you and me, a life without Gelato breaks is no life worth living. But cheers to the industrious Russian bees of the world.)


I'm really looking forward to sampling the fruits of my parents' (and the bees') labor.

Did you know:
  • Local honey may actually help seasonal allergy sufferers (the more local the better, but I'm going to say that Utah is local enough to justify a possible health benefit because I like justifying things)
  • Having bees around will increase pollination and boost your fruit and vegetable yields (which is good for my parents because I'll be sampling the contents of their garden as well!)
  • Bees are cool little creatures that are fun to watch. (it's a fact, so I included it)
  • Some cities aren't okay with bee keeping, so check your local laws before you borrow 15 books from the library, buy a bee suit and drive cross country to pick up 30,000 new little friends.
Do you know anyone that keeps bees?

(Both photos from my fabulous folks)

Monday, June 6, 2011

How To Paint Crisp Lines (and Pinstripes!)

I don't get a ton of questions from readers, but one that I have heard several times is "How did you actually paint the stripes on your stairs?" or "What do you mean, leave the tape on and paint over it?" And several variations on those themes.

When I painted the pinstripes on my stair project, I mentioned it in a general sense but I didn't take step-by-step photos to really illustrate the process. And judging from the comments that the stair project receives, I think people thought it was a much bigger undertaking than it was.


So I put together a "how to" for your painting pleasure and to demistify the pinstripe process.

I started with a leftover piece of 2x6 from my kids' bunkbed project from last summer (I've gotten some serious mileage from the scrap from that project, let me tell you).


But you can start with whatever you like, stairs perhaps?


Step 1 - Paint the base color! You've got to start somewhere, right?

Step 2 - Measure and tape off for your stripes.

Step 3 - Paint the original base color over the edge of the tape. This essentially seals the tape so the new color cannot leak under that line. Brilliant!

Step 4 - Paint your second color (blue).


Step 5 - Lay a second piece of tape over the second color (blue) for your pinstripe (you'll be able to see the outline of the first piece of tape under the paint to use as a guide). Take your time on this step, I just eyeball it to keep the stripe thickness consistent.

Step 6 - Paint the second color (blue) over the new tape, sealing its edge -- remember, this second piece of tape is laid over your second color (blue) so if any paint seeps under it will match the existing color (blue!) Translation: no bleeding!

Step 7 - Paint your pinstripe color between the two pieces of tape.

Step 8 - Remove the tape.

Voila!


I like to remove my tape when it's still wet, but has sat for long enough that it's tacky and won't run. I give it 5-10 minutes to set up and then I pull the tape at a nice moderate-to-slow speed, almost doubled back onto itself at a 135-degree angle. (Tell me if that doesn't make sense and I'll draw a diagram or something fancy to illustrate),

If you're careful, you'll have a nice line with maybe just a couple of 'oops' spots like this:


But you should only have a few if you don't let the paint dry too long and are gentle while pulling the tape off, and you'll make short work of those spots with a fine paintbrush.

See? Not as difficult as it looks, and I think the pinstripe gives it a nice finished look. Is anyone itching to paint some stripes yet?

Sharing at Just A Girl

Sunday, June 5, 2011

06.05 How Does Your Garden Grow

Ah, watching plants grow. It's almost as fun as watching water boil! Maybe I need to get some Miracle Grow. I just keep telling myself that one day (God willing) I will have a flower somewhere in my backyard. Let's all keep our fingers crossed, okay?

You can at least see a hint of overall green in this photo (even though most of the green is grass clippings, gold star sticker for us for finally getting the lawn mowed):


The other garden, under the cherry tree, isn't quite as advanced. I'm sure it has something to do with this garden getting less sun throughout the day, but I'm also considering foul play. Squirrels better watch their backs.You can barely even notice the green in this photo. Sigh.


But it's there. It's just small and a bit more spread out.

The thornless honeylocust we planted last year is finally leafing out in earnest (apparently they leaf out late, and late spring in Idaho is June. Ha.)


Our apple tree is still alive with the sound of bees buzzing in the warmth of the day, but as you can see it has started to drop its blossoms. This poor tree has fire blight, but for now I'm pretending that everything is happy in its little world. Shhh, don't tell it that it has to come out this year or next. Sad face.


If anybody actually reads these weekend garden posts besides me, thanks for watching my plants grow! I can't wait until I have something a bit prettier to share than vast expanses of dirt.

Interested in following along? Go back to see last week's photos or skip ahead to next week.
Related Posts Plugin for WordPress, Blogger...