


Last weekend, I tackled a project that was definitely lacking in the DIY glamour department. However, it was an important bit of routine maintenance that I think a lot of people forget about; plus it's pretty simple, so I'm expecting that this post will start a DIY revolution and this week you'll all spend a little time... sealing your grout! Woooohoooo.
I remember when I was in full-on nesting mode before I had my younger son, and I spent the larger part of an afternoon on my hands and knees with a toothbrush scrubbing grout lines in my guest bathroom. If only I had known then what I know now... I'm not sure that back then I was even aware that you could, or should seal your grout.
So why should you seal your grout?
Grout is porous, even if your glazed tile is not.
Sealing it helps repel water and stains
Sealed grout is easier to keep clean
Sealing will add to the lifespan of your tile floor
Sealing will add to the lifespan of your tile floor
It's also really easy to do, which is a big bonus in my world. Check it out:
1. Clean your grout. If your grout hasn't been sealed in a while (or ever) this might take a while, but just focus on how much easier it will be in the future to clean your fancy sealed grout -- that helped me work through the grout cleaning drudgery. If your grout is brand new, make sure to let it cure for a month before you seal it.
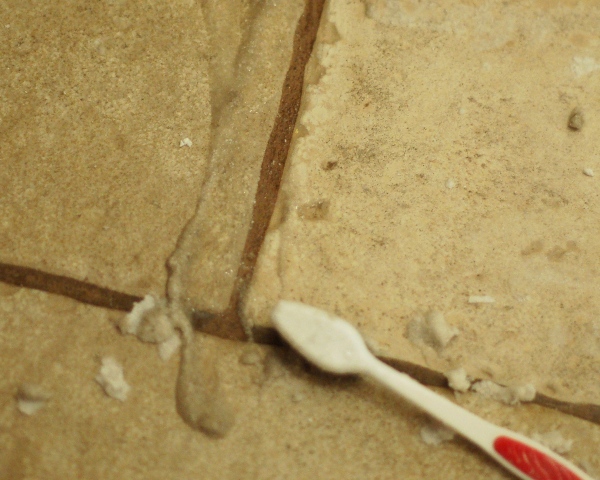
(see? DIY is not always pretty. Ugh.)
I use a solution of oxygen bleach (like OxiClean) and water, and I scrub the grout with a stiff toothbrush. If you have stubborn stains, let the solution sit for 5-10 minutes before scrubbing. Make sure to clean the tile really well afterwards to remove all traces of the cleaner from your grout lines, and give it plenty of time to dry completely.
2. Apply grout sealer and follow the label instructions. There are two types of grout sealer, one which coats the top of the grout and one which actually penetrates the grout. The penetrating type is a little more expensive, but it's going to do a better job, especially in wet areas like bathrooms.
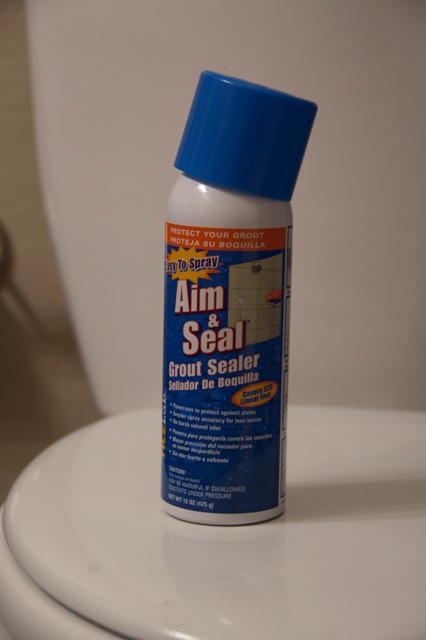
The sealer I used had an easy-to-use spray which made it easy to just aim and shoot; it took me less than 5 minutes from start to finish. Make sure to wipe off any grout sealer that got onto your tiles to keep them from developing a permanent haze. It required 2-4 hours to absorb and dry, and then we had to keep the are completely moisture-free for another 24 hours. If your house is anything like my house, this will require locking a door to keep your children as far away from the grout as humanly possible.
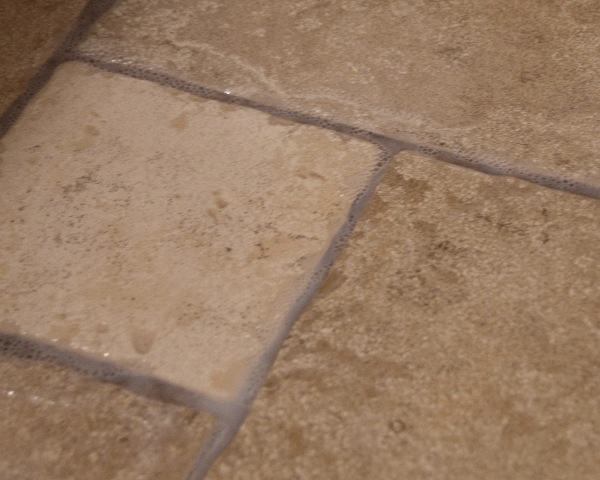
And then... you're done! Your sealed grout should last for one to two years, depending on use and cleaning.
Sealing your grout is a simple task, but it's often overlooked by homeowners. Making sure your grout stays in good shape and free from stains will add to the overall appearance of your home, and preventative maintenance is always a less expensive option that replacing worn tile or grout.


Just a word of caution, you have to be sure to wipe any grout sealer off of the tiles if you happen to spray too haphazardly. Grout sealer leaves a cloudy, foggy film on your tiles that is impossible to remove once it sets.
ReplyDeleteThanks for the reminder, I forgot to include that and have edited the post!
ReplyDeleteI really appreciate this post. We just bought an older home whose grout has NEVER been sealed, I can assure you. My dear mother spent weeks on her knees scrubbing because we could not afford to replace it. In some cases, it was simply stained and there wasn't anything we could do.
ReplyDeleteThanks for this reminder! We will be moving into a brand new house soon & it will be easier to seal it at the start (after the 1st month, that is), rather than clean it later.
ReplyDelete