


Every once in a while I get a desperate need to try something new; to push the boundaries of my skills, if you will. Being crafty is a great way to do that, because I don't have to pus very hard to find myself in brand new territory. My crafting territory is about the size of a small backyard, and it's full of toddler play equipment.
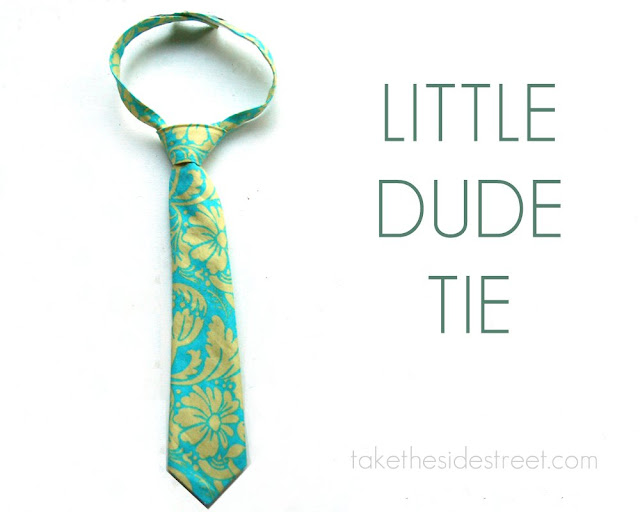
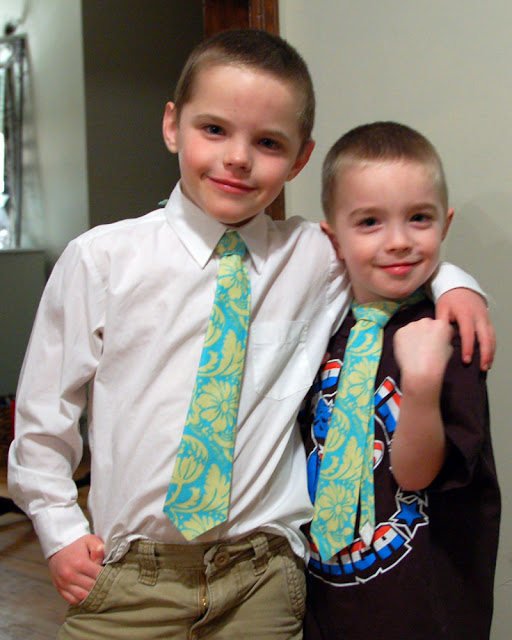
My boys love ties, so I decided to whip a couple out for Easter. I got to use my new sewing machine (an anniversary gift from Mike) for the first time -- it's fancy and computerized, which means finally there's someone in the house knows how to sew! Woohoo!
Actually, making the ties wasn't hard at all. I was pleasantly surprised (and that doesn't happen a whole bunch when I start sewing) and felt like a superstar.
Mike wears ties to work almost every day (and looks so haaaandsome) so the boys love it when they get the chance to dress up. Unfortunately (for them) I'm a polo shirt/khaki pants kind of mom when it comes to dressing nicely. They have one red striped tie that came with my oldest's white button up shirt (which we only purchased for a wedding... it's made of thin material, it's white, and it needs ironing which is three strikes in my world).
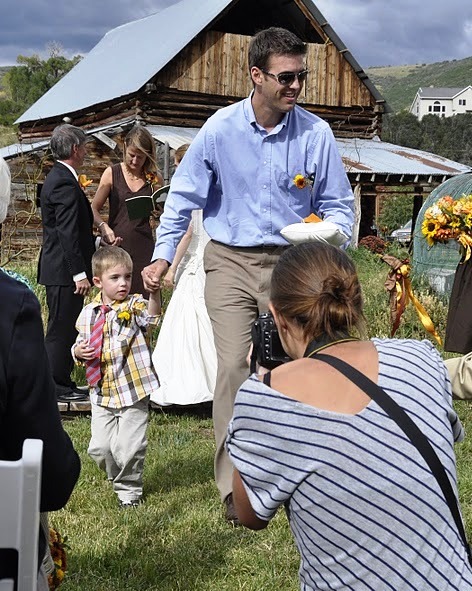
My younger son really loves that tie, especially when paired with his yellow plaid shirt. He thinks he is hot stuff, and I'm 100% okay with him wearing that ensemble to places like church. But then I'm also a superhero-costume-to-the-grocery-store kind of mom. (for them, not me. promise.)
I bought 1/2 yard of material and 1/2 yard of 100% cotton lining which was more than enough for both ties. I started looking on Pinterest and ended up finding a link to the blog Very Homemade - she had made darling ties and even had a great template that I used (I did add a couple inches for my oldest boy's tie though).
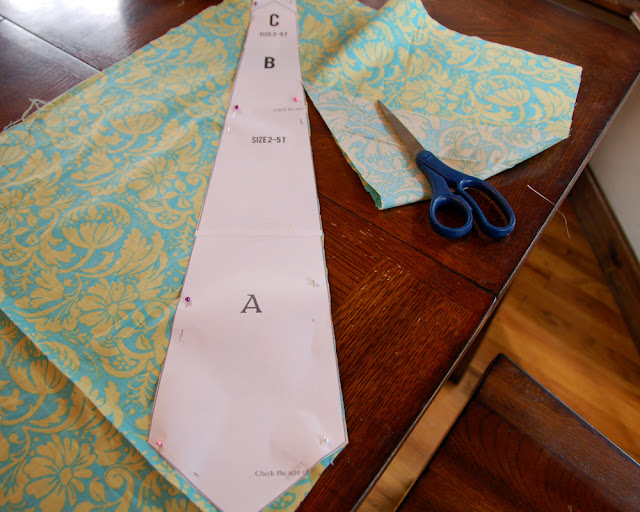
I cut the tie shape out in both my fabric and the lining material along the bias, and I also cut a rectangle of tie fabric 2.5" x 17" for the neckband.
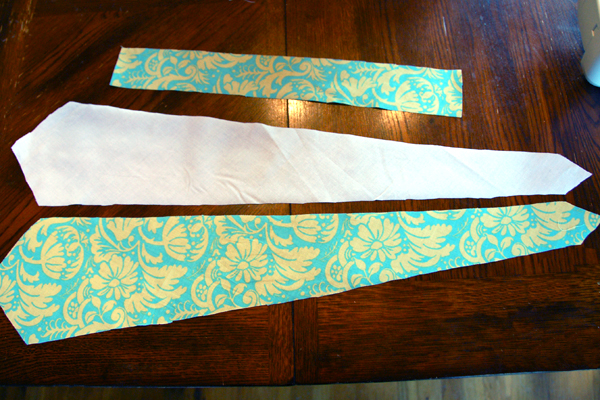
I pinned the two pieces for the tie with their right sides facing toward each other, and sewed just the two pointed ends together with a 1/4" seam allowance. Then I trimmed the inside of the points close to the seam so it would turn out and be nice and pointy. Pointy ties are sort of important I guess.
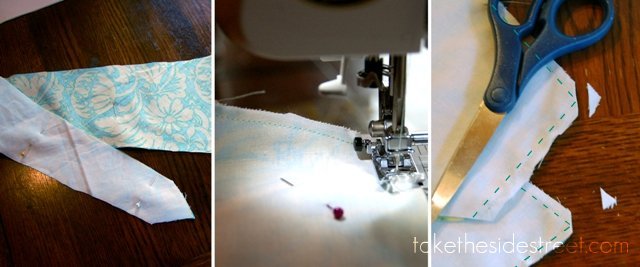
(I drew in where I sewed so it would be more visible)
Turn the tie right side out and press so both points are nice and crisp.
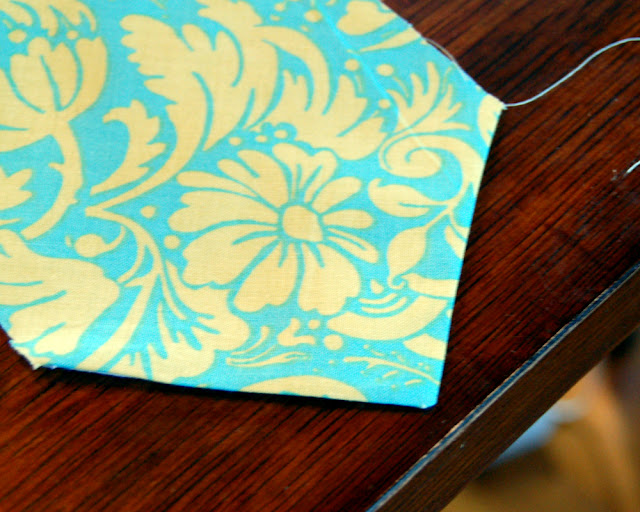
(mine's not really pointy here... do better than that.)
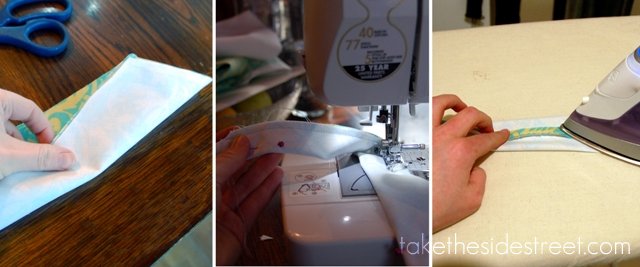
Next, fold the tie in half lengthwise so the tie material is sandwiched inside the lining, pin, and sew one seam up along the edge. Just make sure you catch all four edges in your seam -- if you make the seam allowance wider, you'll end up with a skinnier tie. Which is sort of a fancy pants GQ thing right now anyway. When you're done sewing, press the seam open.
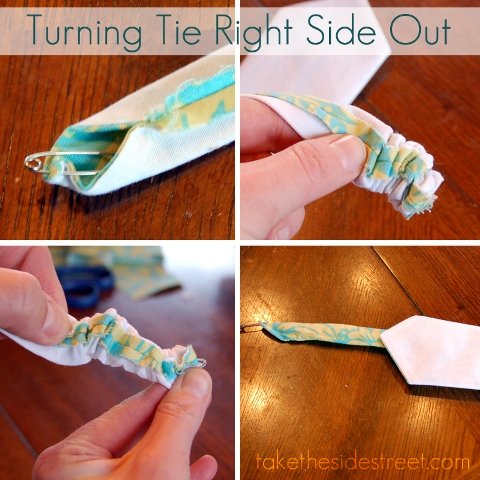
Now comes the fun part. We're going to turn our skinny little tie tube right side out! Grab a big safety pin, and get to work. You're going to put the pin through the skinny point and feed it back into the tie, working it up through the length in small sections then pulling the excess down, until the pin pops out the other end and you can pull it out and finish flipping the tie.
(Of course I made a photo illustration for this step, because it took me a minute to get the hang of it... just make sure you hold on to the tip of the safety pin so it doesn't slide back down the tie.)
Now press the finished tie again, centering the long seam in the back.

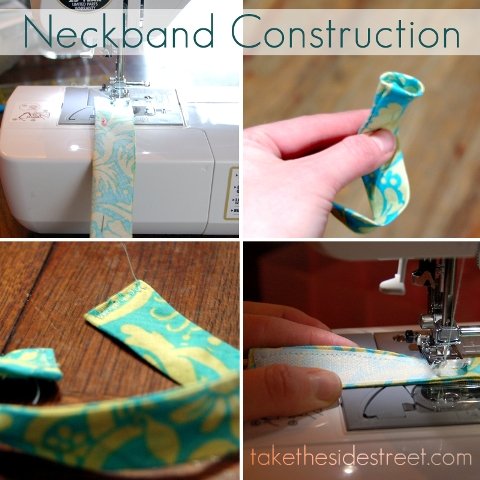
Set the tie aside and pull out the strip of fabric you cut for the neckband. This one is easy too. Just fold it hot dog style with the right sides in and sew along the edge. Flip it using the safety pin method and press it with the seam on the bottom edge. Then sew a couple inches of soft velcro to both ends (just make sure one piece is on one side of the fabric and the other piece is on the opposite side so when you wrap it around someone's neck they'll match up.)
Also, I like to have the rougher piece of velcro facing out -- I know it's usually worn over a shirt anyway, but I'm sure my kids will wear them with tshirts too, and that will help avoid skin irritation when there's not a shirt collar between velcro and neck.
Now all you need to do is tie your two pieces together, like this:

(click to enlarge - oh, how my floors need refinishing!)
And you're done! Presto, change-o! Abracadabra!
In all honesty, it was very simple. I shared a ton of photos because I need about 1,700 of them in any tutorial I use or I'm totally helpless and end up rocking back and forth in some corner in tears. I was done with boy ties in less than an hour so I know it wasn't too difficult.
Go forth and make Easter ties!
Linking up to the Pinterest Challenge hosted by Young House Love, Bower Power, Hi Sugarplum! and The Great Indoors

Go forth and make Easter ties!
Linking up to the Pinterest Challenge hosted by Young House Love, Bower Power, Hi Sugarplum! and The Great Indoors


Good job! I find it hard to find little ties, so I might have to try this one. I really like the fabric you selected.
ReplyDeleteLove the fabric you picked! And might I add that you have a mighty good looking family.~ : )
ReplyDeleteSmiles!
Sammy ~ Renew Redo
Nice Job and very cool dudes..
ReplyDeleteThose boys are stylin' in their Easter ties. Go YOU! Wes's choice of shirt is totally him. ;)
ReplyDeleteWay to go mama! They look so sweet in their ties! Love that material too.
ReplyDeleteLook at you! These ties look great! The fabric you chose is killer. Thanks for posting your creation from my tutorial. You made my day!
ReplyDelete