Tuesday, January 31, 2012

Have a Seat, We'll Make a Plan...

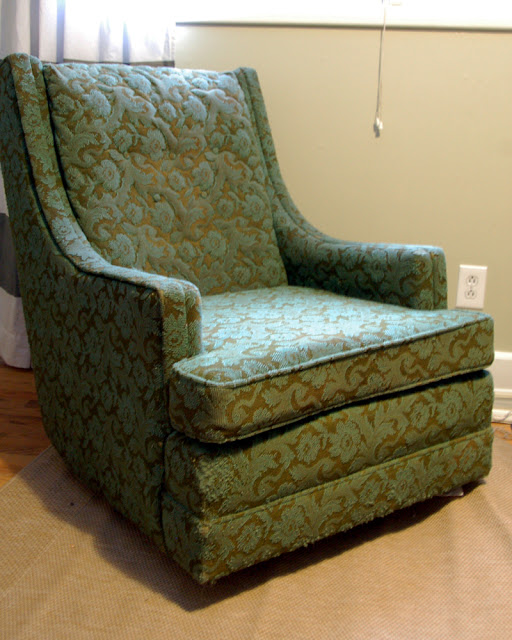
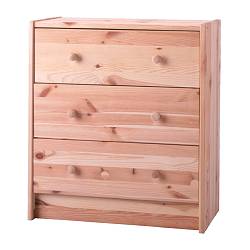
Remember how a while ago, I posted about a chair that I had sort of fallen in love with online?

Well, I bought it. My precious.

 
I only bought one in case I didn't love it, or it didn't work in the room, or in case I woke up and was suddenly pregnant and had made a furniture purchase based on pregnancy hormones (which in my personal experience leads to nothing but post-purchase heartburn and woe).

The good news is none of those things happened so I'm thinking that I might need another one. You know, a set. How cute. 


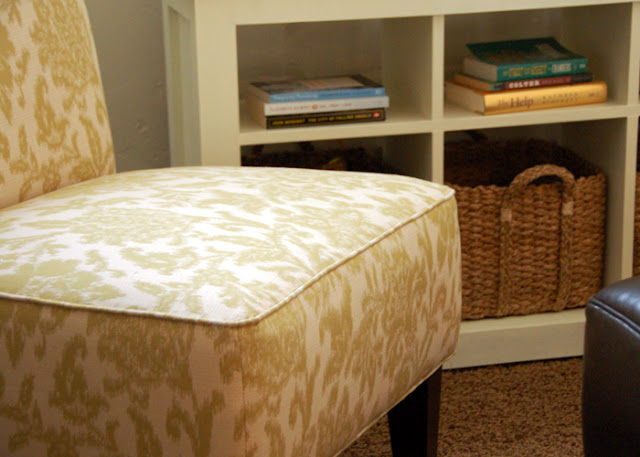
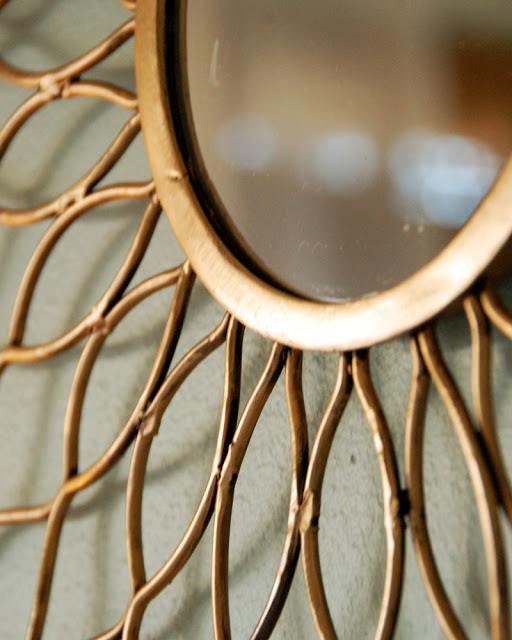
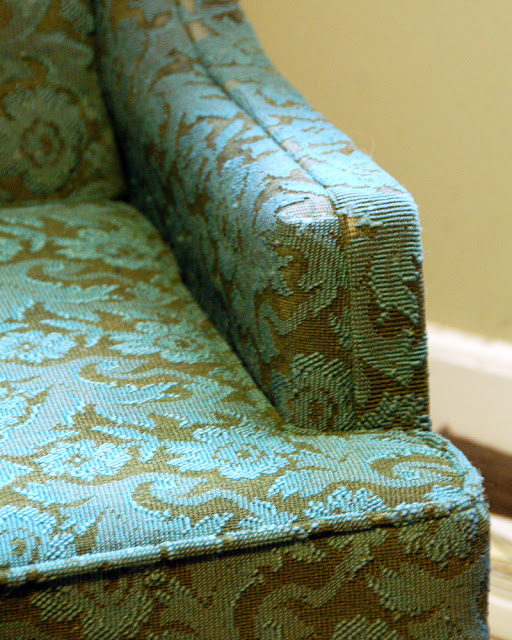
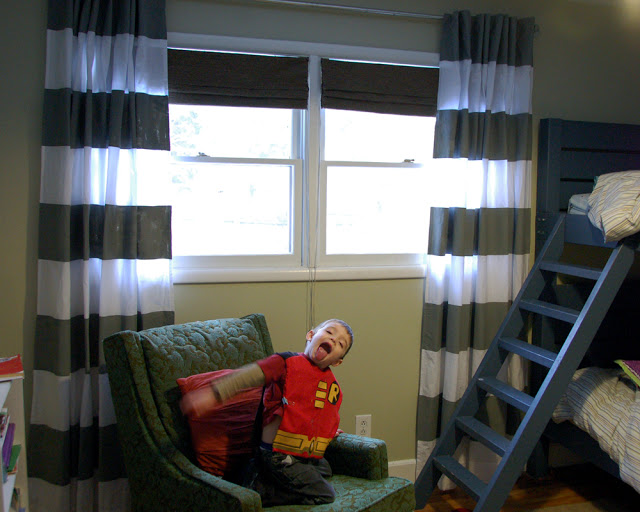
It is a little greener in real life than it appeared online, much more of a lemongrass color that I thought it would be... but that was a good surprise.


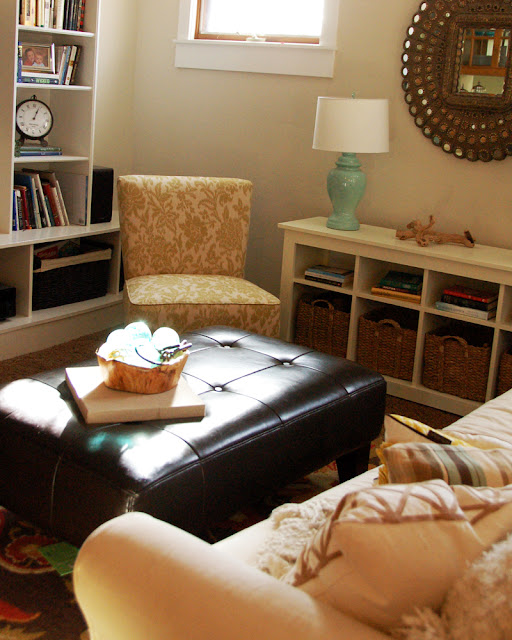
Speaking of changes to my living room, notice the sofa table has moved with the arrival of the new couch? Well, at least for the time being... we'll see what happens. I change my mind a whole lot and find rearranging rooms to be relaxing... have I mentioned I'm a little neurotic and have weird habits?

Last month I also made a design board for the living room, and since we're already on the subject, let's take a look at it:


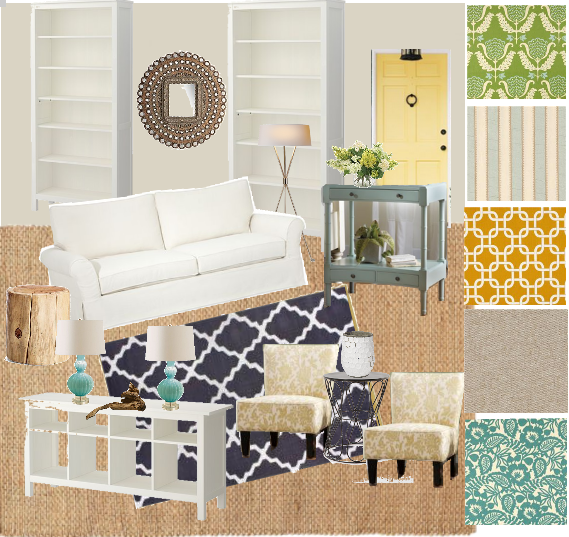
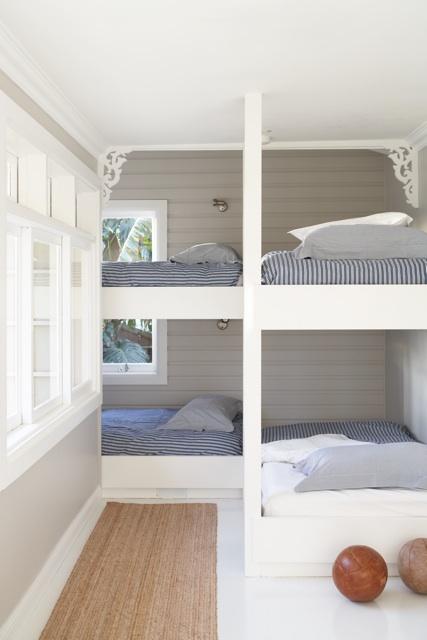
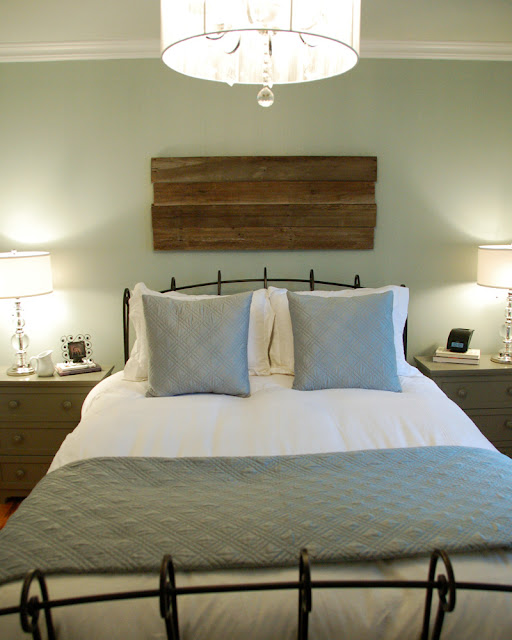
Anybody else notice that (purely by accident) the color scheme is mighty similar to that in my boys' room? I must really like those colors... ummm, it's all about cohesiveness. I toooootally did it on purpose! Swearsies. Cough.

My husband isn't thrilled with the idea of layering a small colored rug over a large natural fiber rug over the existing carpet, and I can see his point. Darn that carpet! I love the pop of navy though so we might have to introduce it another way. Aaaand I think I'm going to have to find a different yellow fabric, since I didn't realize until now that it's the same fabric I bought for pillows for my boys, just in a different color. Oops.

I like what I like, okay? ;)

Friday, January 27, 2012

Rub 'n Buff Convert

One the first blogs I stumbled across way back when was Isabella & Max Rooms, which is written  by the incredibly talented Janell Beals (she's also the founder of and creative force behind the online magazine House of Fifty). Several times Janell has shared the magic of a little product called Rub 'n Buff -- and I have always been interested in trying it, but it would get filed to the back of my mind (which is a dangerous place to be filed) and then I'd forget. Boo.

Well today, I remembered. This is a feat in and of itself, guys... no shopping list, no post-it notes stapled to my t-shirt, and no personal assistant reminding me (although I'm happy to consider your résumé if you'd be interested in a coughunpaidcoughcough personal assistant internship).

And guess what? I love it. Looooove it. 


I came across this mirror at JoAnn today while grabbing some yarn. ('cause I am legitimately crafty when it comes to crocheting hats, but that's it. I'm like a hat vending machine. Don't ask for socks. Or scarves. That would cause the crochet-blue-screen-of-death.)

The mirror was 50% off, so it came in at a whopping $20... and suddenly Janell's face floated from the cerebral-filing-cabinet-of-eternal-cobwebs and  into my conscious mind, and I experienced an "ah ha!" moment. Maybe it wasn't her face; that sounds a bit creepy.

Moving on. The before? Meh.


Ze after? Voilà! C'est si bon! Oui, oui! Escargot, s'il vous plaît.
(I took spanish, if you can't tell. Le sigh.)


This stuff? Is magic in a tube, y'all. Incredibly easy to apply, ridiculously fast drying, and it appears that it will last forever.


You can hardly even tell I used any (aside from all the messy gold swipes all over the tube...)

What say you? I wish I was Oprah... "and you get a Rub 'n Buff! And you get a Rub 'n Buff! And you, and you, and you! Rub 'n Buff for eeeveeerryyooooooonnneeee!"

Sharing at My Uncommon Slice of Suburbia , Home Stories A to Z, Thrifty Decor Chick

Thursday, January 26, 2012

Crazity Thrift Store Chair

I keep meaning to write about the chair I found for my boys' room last month, and I keep forgetting to do so. You may have seen it in the curtain post yesterday... but allow me to officially reveal it in all its thrift store glory to you now:


It was $10, y'all. Do you believe that something can be so ugly it's cute? I'm not sure that ugly is the right word for this thing... but it's definitely something. (my husband thinks ugly is the right word, by the way...)

Whatever it is,  I'm a fan. Of the swoopy arms, the crazy olive and teal floral pattern, how obviously retro the whole thing is... I don't even care that it's worn in a few places. I think the shape is fun and if I ever decide to reupholster it (read: pay someone to reupholster it) it will look snazzy. But for now, it's a perfect read-before-bed chair for two little boys.


The one thing I'm planning to do to it soon is replace the rocker with some feet -- my boys keep banging it into the walls on accident. Even if my husband isn't the chair's biggest fan, the boys seem to love it. And helloooooo, what fun colors! It'll fit right into their room makeover.

What do you think? Spill!

(unless you're on team "ugliest chair ever" and then you should click to some of my other fabulous projects and remind yourself that we won't necessarily agree on everything, but we can still be friends!)

Wednesday, January 25, 2012

DIY Painted Backtab Curtains

Yesterday I made curtains for my boys' room. Panels with big wide stripes and hidden back tabs. I'm really happy with them even though they took me all day - that was my fault, not the poor curtains'. I must have forgotten my coffee or something.

I used sheets again, because y'all know I can't turn down a $5 curtain opportunity. I'm cheap like that. I was also on a time crunch, because two curtains laid out end to end in my dining room take up 99% of the usable floorspace, which meant that all pets and children were restricted to half the house (the "boring half," naturally) while I got my paint on. I admit, I might have thought that one through a little better. Hindsight is 20/20, right?


First I made curtains from the sheets - I followed this great no sew backtab curtain tutorial at Design a la Mod, with just a couple of tweaks:

1. First I folded over the extra length that I wouldn't need and attached the backtabs to that section, then finally I sewed the entire folded section in place (following the existing stitch line and going over the iron-on hem tape at the bottom for some extra strength). I attached the hem tape to this folded-over section so there would be less chance of it showing through since the sheet fabric is thin.


2. Instead of attaching the iron-on hem tape at both the top and bottom as in the original tutorial, I used velcro on the top section so that I could "open" my curtains because my boys' new curtain rods are made of galvanized piping. Once you screw all the pieces of pipe together it's solid and has to be entirely removed from the wall to add or remove traditional curtains -- and that wasn't going to happen.


I promise the original tutorial is much easier to understand, so make sure to click over there if you want to make some normal backtab curtains!

Once I finished making the curtains, it was time to lay them out and paint. I taped 9" lines on them and then realized I didn't have a foam roller. Like I said, maybe I forgot my coffee yesterday morning. To the store we went.

Back from the store and new roller in hand, I starting painting with scads of acrylic craft paint and fabric medium. I went with regular craft paint since I had heard that using regular wall paint (even with fabric medium) could result in crunchy curtains, and fabric medium seems to be "designed" for the regular craft paint. News flash: mine are still a tad crunchy. Oh well! I might sand them lightly to soften them up.

Regardless of what paint you choose, buy more than you think you'll need; fabric sucks it right up. I used 9 bottles of craft paint and 4 small bottles of fabric medium and that was cutting it close. Did I mention that I had to run to Michael's midway through painting to buy more? I am a super planner, guys. Who wants me to plan their wedding? Ha!

The best part of all my poor planning? My  prisoners children were forced lucky enough to have a picnic for dinner! A... um... front room floor picnic! On plastic Christmas plates I forgot to put away! Thirty minutes before bedtime! Go me!

Okay, so it wasn't my smoothest project ever, but now that it's over I'm really happy to have these curtains up even though my 6 year old dubbed them "weird." Pfft. What does he know? I think they look great!


So does Robin over there. We think they look great. Holy cool curtains, Batman!

Sharing at Home Stories A to Z ,Thrifty Decor Chick

Monday, January 23, 2012

A Girl Can Dream: Built-in Bunks

Kids love a good bunk bed. Do you?

Regular bunk beds can be extremely practical - great for small spaces (like anything in my house) and shared rooms. But most of them leave me wanting more in the fabulousness department -- they can be big and sort of clunky looking. Is it just me? Yes, I built one for my boys and yes, I've made peace with it (sort of). But I can't admit I don't get miniature design pangs when I stare at fabulous bedroom designs sans bunks.

I will tell you though, there is a type of bunk that leaves me weak in the knees (because I'm officially the world's biggest geek who gets jelly joints over cute furniture). What I really want when I escape into my fantasy and renovate a home on the coast in order to become a professional beachcomber... is a room of built-in bunks. Be still my heart. Who can resist a row of beautiful built-in beds? The charming ones with ladders and rustic sconce lighting? And beautiful architectural details? Oh, how I love them. Love them love them, "pass a note across the desk asking them to be my Valentine and to check yes or check no" love them. 


 via 

 via


 via 

 via 

 via

Do these built-in beds stir the same feelings in you? They feel like summer, and adventure, and fun; all are extremely good things in my world. I would love to own a vacation home with a room of bunks - preferably a home with a view like photo #2's, okay? ;)

Friday, January 20, 2012

Boys' Room: Weathered Warehouse Pendant

See, I told you I was working on my boys' room. 

If you saw the design board I posted earlier, you may have noticed an industrial looking warehouse pendant -- I did buy it for an outrageously affordable $25 from the big orange HD. It was just too shiny and new looking though, plus the inside was white, and say what you will about white reflecting light, blah blah blah... I wanted a  more weathered look -- something that looked a bit like galvanized steel or at least something old. Something that may have actually been in a warehouse? Maybe an old one by the sea, oxidized by the salt air? Look at me imagining life stories for my light fixtures.

Time to pull out my trusty spray paint!


The good news is this was incredibly easy, and I'm over-the-moon happy with the results.


I used 3 products:


Gray primer, Rustoleum's Metallic Matte Nickel and Krylon's Original Chrome (the stuff I used for my lazy man's silver leaf mirror frame). Look at me, being such a rebel... Rustoleum and Krylon, playing nicely together on my little project.


1. Prime (I did gently scuff up the metallic side with sandpaper prior)
2. Spray with metallic nickel paint
3. Lightly and unevenly spray with the Original Chrome paint -- resulting in a flecked, mottled appearance with a bit of texture.

I did that on both the inside and outside of the fixture and the ceiling canopy, and that was that. Easy peasy. I think it looks great and I can't wait to throw a couple more galvanized steel-y accents in there with it...


Not bad for a $25 fixture, right?

Thursday, January 19, 2012

IKEA Hack Nightstand Construction Details

Yesterday I showed you my fancy new nightstands, and today I'm outlining the steps I took to construct and finish them. Buckle up, because here are the steps to make your own!


Step 1: Assemble RAST nightstand per included instructions.


Step 2: Cut and glue lattice on drawer fronts.
I purchased  a few sticks of 1/4" hemlock lattice at my local HD. It's nice and smooth, great for crafts - if you can find it. It took me forever to locate it in my store even though it was just in the regular moulding department... I struggle. I cut it into 7 7/16" lengths and 20 3/16" lengths and attached it with wood glue. Instead of clamps, I used heavy cans of food to hold the lattice in place until it dried - we're super professional over here.


I decided against mitering the corners after looking at several nightstands I liked and noticing this style of joint on their drawer fronts. I'm a total copy cat.

Step 3: Attach decorative moulding to top
Next I used small moulding (removed from various places in my 1960 house, layers of old yellowed poly included free of charge!) and trimmed out the top of the nightstands. I used a thin piece of scrap lattice to fill and reinforce the gap along the front created by the nightstand's wider side pieces.


Step 4: Details!
- Tighten any visible screws until they suck up into the wood so you can fill them with wood putty and sand them flush.
- Cut away a rough opening in the toe kick-thingy with a jig saw.
- Add a few pieces of scrap  lattice to the top of the toe kick so that a 3/4" piece of MDF placed on top of them will sit flush with the front of the nightstand.


Step 5: Cut out decorative front piece with jig saw
I drew a template, traced it onto two pieces of 3/4" MDF pieces that were each 23 1/8" x 3 13/16" and went at it with a jig saw. Mine has a little twisty knob that helps make sharp corners, and I just tried to get them as close as possible. Mine are definitely not perfect - I used my orbital sander with  rough grit sandpaper to smooth them out and help conceal any boo-boos.  After they're done, attach them to the nightstands with glue and nails through the sides and where the 1/4" lattice scrap is.


One quick tip: I stood the nightstands up when I fit the decorative front piece on to make sure it was flush with the bottom of the nightstand and to help prevent any issues with the bottom drawer opening if it was placed too high.

Step 6: Attach table tops
Cut a piece of MDF a little larger than the size of the nightstand + decorative moulding. My tops were 26" x 12 3/4". Attach them with glue and nails.


Step 7:  Caulk if you want - I only caulked between the table top and the strip of moulding, I purposefully left the tight joints on the drawer fronts as is. Also fill any nail holes and seams with wood putty, then sand smooth.


Step 8: Prime with oil-based primer (remember, it's MDF and raw wood. Oil-based!)

Step 9: Finish with paint of your choice.
I used Martha Stewart paint in Mushroom (love) and a little bit of Floetrol, an additive that helps minimize paint and roller lines in latex paints (there's also something called Penetrol for oil-based paints, FYI)
I used an angled brush and a small high-density foam roller to apply two coats of paint.


After the paint dried, I applied a non-yellowing water-based poly with a foam craft brush -- do not use a roller as that will result in bubbles. Promise. Coat an area with poly and then work your way back across the entire surface, pulling in one direction to help minimize any lines.

Let that dry, add some knobs and voilà! You have a nightstand. Or two!


Hopefully it doesn't take you 4 months like it took me! I took my time to uh...make sure... everything was perfect. Or something.

Updated to add: Apartment Therapy already featured these nightstands! A couple observant people over there commented on the lack of baseboard/outlet cover in an otherwise nice photo (y'all know how I struggle with baseboard... le sigh.)  So, for fun, I made up a pretend photo so we can all imagine it's done and everything's pretty-like.


Ahh. Much better, right? If only it was really that easy!

Sharing at My Uncommon Slice of Suburbia, Home Stories A to Z, Thrifty Decor Chick

Wednesday, January 18, 2012

Finished Nightstands {Reveal}

Y'all, I am so excited to share this project. I have wanted nicer nightstands in my bedroom for several years now, but didn't want to pay hundreds of dollars. I'm cheap, I admit it.


I finally finished these (seriously, I'm the biggest slacker ever... I started these in October. The shame.) and got them into the master bedroom. Love them. Weep.
(That was me weeping with joy. What? I'm totally normal. Pfft.)

Would you believe that this....


used to look like this?

Yep, it's an IKEA hack! I had seen a few great hacks of this $35 RAST dresser and I couldn't pass up the chance to have great looking nightstands myself. Love!


Our cat Fig seems a bit suspicious, but she's neurotic.  I love them! I'll post some construction details tomorrow, but I just couldn't wait to share. What do you think?

Monday, January 16, 2012

Finishing What I Start... 3 Months Later

I promise you, I will stay the course and finish my boys' room... I'm actually working on it right now! (Not literally right now right now, since I'm sitting here typing, but you know... right now. Promise)

The thing is, I'm also finishing up a project I started last October -- yep, before Halloween. As in, I'm the slowest DIYer ever? The kind that refuses to work in the garage when the temperature dips and instead wistfully stares at half finished projects occupying the space where her car should be. The same car she does battle with daily as she attempts to scrape frost from the windshield in order to drive children to school, all the while cursing the stupid project sitting frost-free (and probably under a layer of lazy-dust) on the other side of the garage door.

I'm finishing a pair of nightstands for the master bedroom, and then I'll get back to the bedroom. There's only so much stink eye this girl can handle. My husband was getting less and less impressed with my "awesome nightstand idea!!!" so I had to do something quick. I've really been busting this one out, which usually means I end up taking over the entire house for a few days while laundry piles up and the kids eat Cheetos and juice boxes. Not really. (except maybe really, sort of)

I started in the entry, since nobody needs to use the front door or anything. Pfft.


Then I moved over to the dining room, since the Golden Globes were on. (hellooo, priorities!)


Now I just need to put a top coat on them...


...and finish painstakingly painting the knobs by hand...


(that part sort of sucks)

...and we'll be all set. Can't wait to show you the finished nightstands!
Better late than never, right?
Related Posts Plugin for WordPress, Blogger...