


In December I shared my kitchen's mini makeover where I installed a slate backsplash on the cheap, and today I'm going to share how I did it (because as I mentioned, my methods were a tad unorthodox... redneck? resourceful? Let's go with resourceful.)
When we purchased our house one side of my galley kitchen had a row of appliance garage-style cabinets at the back of the regular counter top (which means I have pretty much the deepest base cabinets on the planet... they are 1.5 times standard depth to accommodate both a counter and these cabinets).
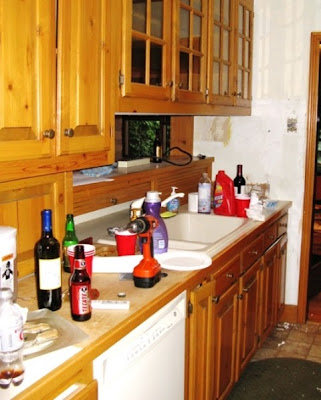
The problem was, I didn't like them. At all. See them? I can't believe I'm posting this pre-blog photo, again. They're behind all the beer and soda bottles, a cordless drill and the fabric softener? I was removing 1960's wallpaper, hence the fabric softener, and other people were working magic in other rooms...
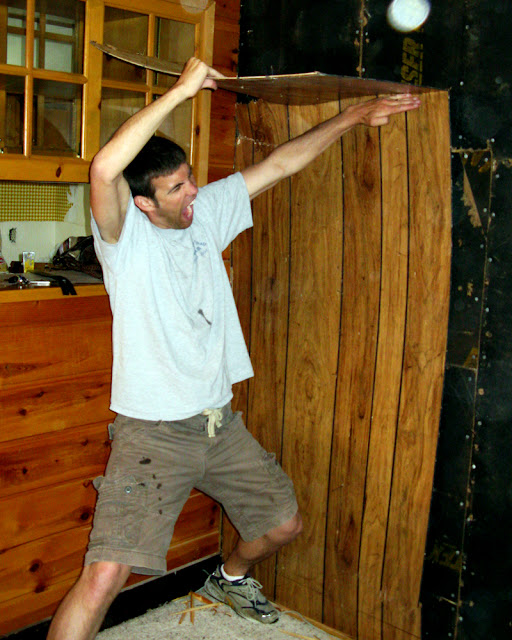
(my resident ninja)
...and sometimes when you're knee deep in wood paneling and plaid wallpaper, you forget to clean your kitchen. Did I mention we weren't living there yet?
Anyway. Fast forward 2 1/2 years and it was finally time to do something about it -- a backsplash!
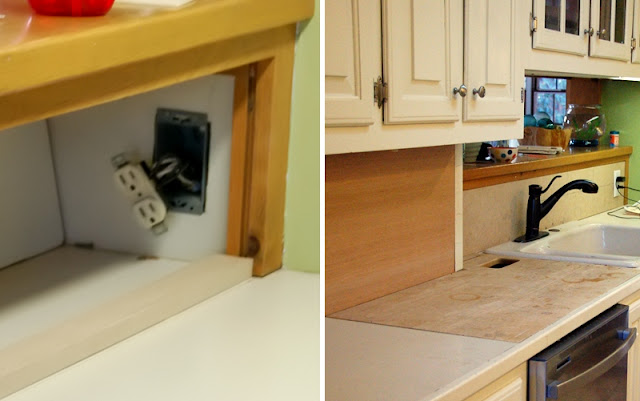
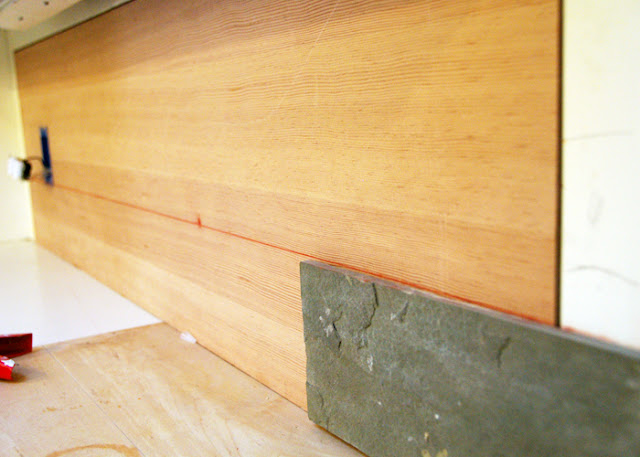
First we extended the outlets out into a new box that would sit behind the new "wall" with a little Romex wire and some wire nuts. Then we glued and nailed cleats to the top and bottom of each open space and used them to attach a piece of 1/4" scrap flush with the existing cabinet frames to create a solid surface for the tile job.
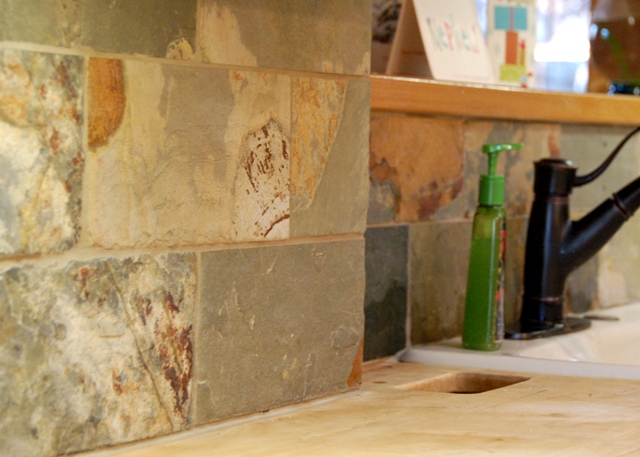
Next, we snapped a chalk line for the first row of tile; we started in this middle section because if you can see in the other photos, the two sections of backsplash are at different depths so in the middle the tile had to wrap around and span both those two areas. We tackled that first to make sure it looked just how we wanted and then moved out from there.
Next we attached the tiles. I didn't want to buy a giant bag of thin set for 15-20 square feet of backsplash (and the cement board that I would have needed also) so this is where my method becomes interesting. Ahem.
We used two adhesives: hot glue to instantly but temporarily hold the tile and Liquid Nails Marble & Granite adhesive, which takes a while to set up but then holds strong without swelling or staining.
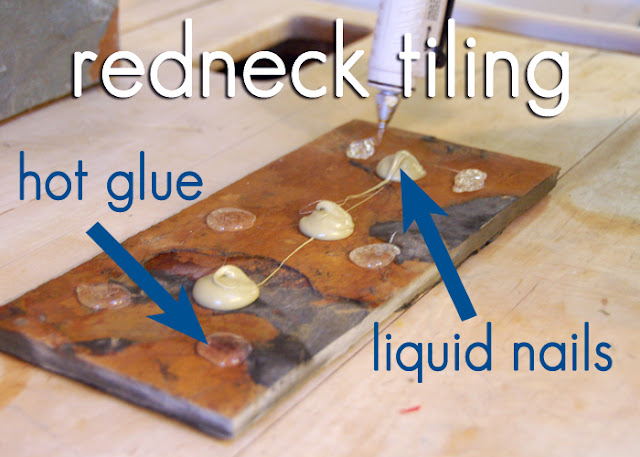
I found the Liquid Nails at Home Depot, again -- right next to the regular adhesives and caulks. I don't know how well this method would work on a floor or something that gets a lot of use since I didn't cover the entire back with adhesive, but a backsplash isn't exactly a high-traffic area so my guess is that it will work just fine for me.
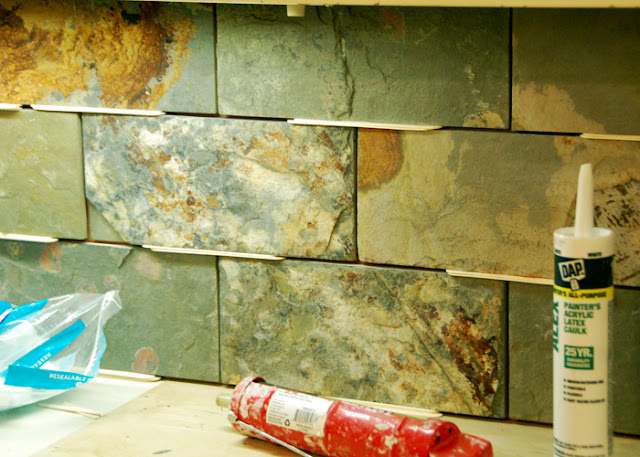
Are you prepared to get even more redneck resourceful? I used craft sticks as spacers and to keep the tiles from shifting! Go me!
Next it was time to grout. And grouting slate really isn't a whole lot of fun (honesty is always the best policy), as it is quite uneven and has lots of little nooks and crannies. If you have the budget I'd go for tumbled slate as it's much more smooth and level-like. Here's how I did it:
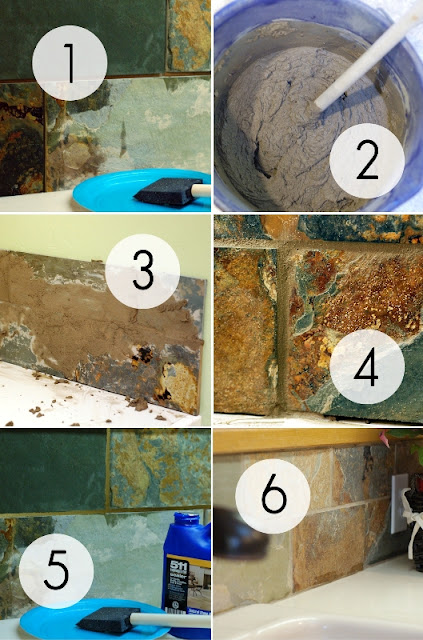
1. Before I started I sealed the tile, taking care to avoid the inside of joints where grout would need to adhere; sealed slate is supposed to be much easier to wipe clean after grouting, and I promise there will be plenty of grout to clean.
2. Mix your grout. I found a small bag of grout for under $10 which was great for a project this size -- I still had lots of waste. I did have to add more water than called for to get it to a peanut butter-like consistency. You want it smooth and moist - too dry and crumbly and it will just fall apart instead of working into the joints, and too wet and it will run down instead of staying put.
3. Slap the grout on. I had to get a bit creative here as it didn't work the way it did when I tiled my nice, level, smooth bathroom backsplash - the whole 45-degree angle application rule didn't work at all. I ended up using my fingers to squish it in in some places... whatever worked. Like I said, slate is a bit tricky to grout. It will look super messy, and that's okay.
4. Let the grout sit for a few minutes... I would do one area and then go back and clean the whole thing before moving on, so my grout might have sat there for about 5-10 minutes. Just don't let it dry completely because then it will be crazy difficult to clean. Use a big wet sponge, wring it out as best you can and then start wiping. It took me a long time; you saw how much grout was left on my uneven slate! There were lots of nooks and crannies to attend to and lots of weird uneven joints -- the nice thing with slate though is that it doesn't have to be perfect. Because the stone is natural and uneven, you can have a sloping grout line between two uneven tiles... and it looks fine. Just use your judgement -- it's your house, after all.
5. After the slate is squeaky clean, let the grout dry. Then a few days later (depending on the recommendations of whatever sealer you buy) you can seal again -- this time it's for the grout, but I went ahead and sealed the tile again too, just for fun. Haha.
6. Finally, I used a special tile caulk that was made to match my grout, and caulked where the slate met the counter and around the outside edges of the backsplash. This gives your project a finished look and helps prevent water from getting behind the tiles. You can find tile caulk next to the grout. In the interest of full disclosure, tile caulk is messy to work with. 'Twas no fun at all, but I'm glad I did it.
Phew. There you go.
Breakdown of costs:
19 sq ft multicolored slate: $28.12
2 tubes adhesive: $9.88
tile caulk: $6.74
small bag grout: $8.27
Total project cost: $53.01

Honestly, if I was truly redoing my kitchen I would have sprung for the cement board and thin set and all those goodies to adhere it "properly" but my goal was just a decent backsplash that would help my kitchen look more finished until we have the money to redo the room. I love how it looks and for just $53 it can't be beat, even if it wouldn't hold up for 30 years.
What do you think?
P.S. I used Polyblend brand grout and tile caulk, both in the color 'Light Smoke' and the slate is just regular multicolor slate from the Home Depot.
P.P.S. I received no compensation from any of these brands, in fact they'd probably all be shocked and dismayed at my resourceful tile adhesion method if they saw this; I just wanted to share what I used!
P.P.S. I need a nap now. Editing photos and writing that took foooorever. Blogging is hard work, y'all... good thing it's fun! ;)
19 sq ft multicolored slate: $28.12
2 tubes adhesive: $9.88
tile caulk: $6.74
small bag grout: $8.27
Total project cost: $53.01
Honestly, if I was truly redoing my kitchen I would have sprung for the cement board and thin set and all those goodies to adhere it "properly" but my goal was just a decent backsplash that would help my kitchen look more finished until we have the money to redo the room. I love how it looks and for just $53 it can't be beat, even if it wouldn't hold up for 30 years.
What do you think?
P.S. I used Polyblend brand grout and tile caulk, both in the color 'Light Smoke' and the slate is just regular multicolor slate from the Home Depot.
P.P.S. I received no compensation from any of these brands, in fact they'd probably all be shocked and dismayed at my resourceful tile adhesion method if they saw this; I just wanted to share what I used!
P.P.S. I need a nap now. Editing photos and writing that took foooorever. Blogging is hard work, y'all... good thing it's fun! ;)


10 comments:
Your kitchen looks great! I'm collecting backsplash ideas for my own kitchen project. Your slate tiles definitely make it on my list :)
I think it looks awesome! Your redeck methods are too funny! Great look for just 53 dollars. I never would have thought to use the slate but I really love it. Great job and thanks for the idea!
Great job! LOVE IT!! Thanks for sharing the "how to".
You mean that's not how "real" tiling is done? I love your resourcefulness! I have a travertine fireplace that has been the bane of my existence for nearly 16 years. I'm thinking of tiling right over it. What do you think, resourceful one?
Can I just say, "Holy Crap!"?
It looks so good and I love the redneck tiling idea!
It looks amazing and thanks for the great tutorial!!
I love the color of the slate with your beautiful white cabinets!
Thanks ladies!
Sandra, eep! That's quite a question... I wish I had a definitive answer about tiling over existing tile. My gut says it would be tons better to demo it first.
I know but to demo means the whole thing means it has to come off the wall and that could lead to more of headache. I have painted the wood surround a few different colors and finishes trying to love the travertine but no luck. We never use that fireplace, its just for looks. I guess I will look at it awhile longer until a solution presents itself! Its not like I don't have any other projects to focus on!
Love your kitchen! And love that it was done on a resourceful budget. Sometimes the smallest budget projects (not counting the time & sweat) turn out to be the biggest bang.
Love the soda, beer, fabric softener and carpet cleaner bottles...I, of course, immediately spotted the red wine bottles! Cheers to you!
Post a Comment