


As it gets colder and wetter, people start tracking all nature of things into your abode. If you live with 3 boys and nature decided to dump a surprise snowstorm on top of your dried leaves, well then you're probably resigned to having wet and dirty floors until May.
Newsflash, friends: it doesn't have to be that way. I can't completely fix your floor situation, but I can recommend something that might help a bit.
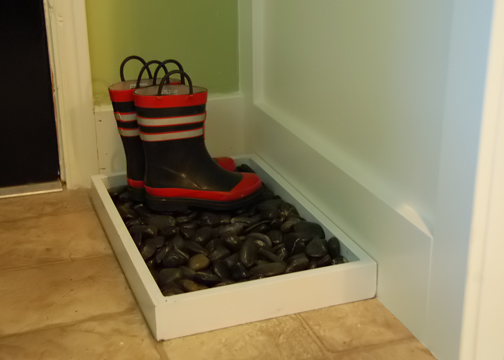
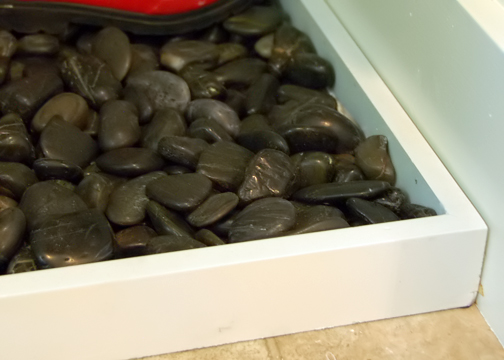
Boot trays help corral the mess of fall and winter -- any wet shoe-like accessory (ahem. shoes.) you place on them will drip onto the rocks, where the mess (dirt, snow melt, etc.) will be contained and will evaporate, leaving your floors cleaner. Brilliant? It just may be.
You can buy large plastic trays designed for the job, or you can get creative.
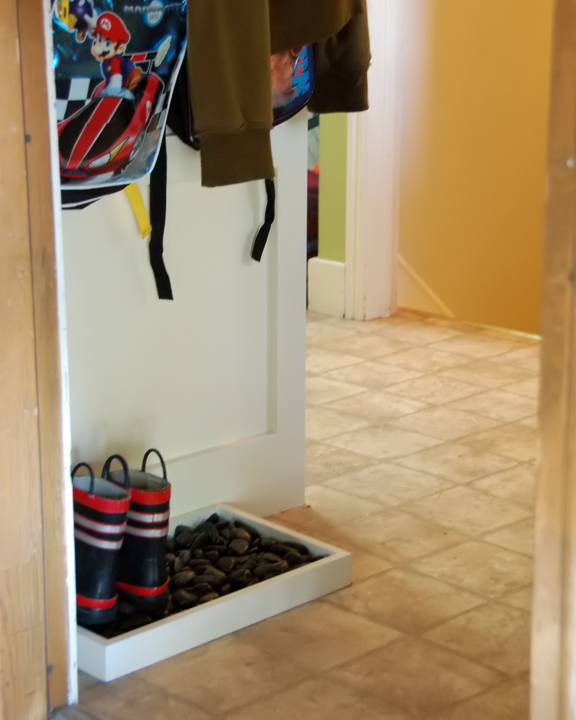
I found this tray at T.J. Maxx in the spring on clearance for $2.50 and I said to myself, "self, this will make a boot tray fit for a king." Or maybe I didn't say exactly that, but either way I bought it and then forgot it existed until I started seeing leaves and wet footprints on my kitchen floor and my eyeballs started to twitch a little.
Because the tray bottom was metal I had to do a little extra prep work to avoid rust stains or drips. First I used a flexible waterproof silicone sealant to go around all the seams, being careful to avoid the top corners that would be painted as silicone is not paintable like regular white acrylic latex caulk we use on furniture and trim.
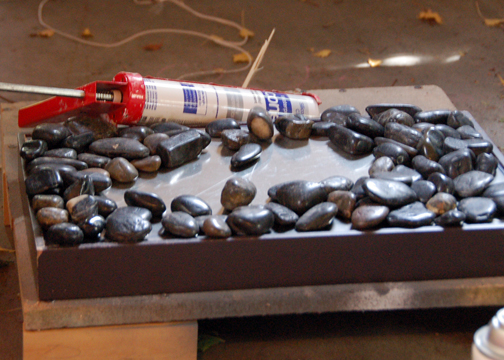
(I used rocks to weight the tray bottom so it would dry flat, since it was a little loose to begin with. Hey, it was on clearance!)
I primed and painted the tray using a can of spray paint I already had. I didn't take any photos of that step since I think there are already about 250 spray paint photos on this blog. If you have a question about spray paint, feel free to comment on this post or shoot me an email.
Next I cut a nice, big piece of my inexpensive plastic drop cloth from my door painting adventure (three cheers for resourcefulness!), folded it a couple times and stapled it to the sides of the tray as a liner to hopefully avoid any water/metal interactions.
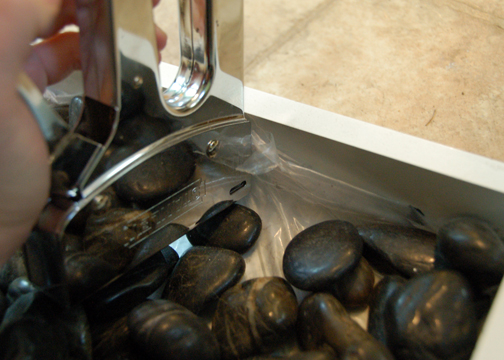
I put four foam furniture pads on the bottom corners to raise the tray off the ground just a bit and help prevent it from sliding around, and filled it with polished rocks from the dollar store.
Now my kids have no excuses. They must remove their jackets, backpacks and wet shoes first thing upon entering the house and put them in their assigned locations. Mwahaha. Organization!! Today, my entry... tomorrow, the world! Or at least their bedrooms... but most likely not.
Total cost for my boot tray:
- Tray - $2.50
- 6 bags of rocks - $6.00
- Paint, primer, silicone, plastic liner, sweet fireman boots - $0 (already had)
Not too shabby, guys.
{Click here to see the other posts in my 31 Days of Fall Nesting series...}


5 comments:
love this..I need to make one I get so tired of saying take your shoes off
I have seen this around and am thinking of making one. We have a rubber mat with sides that is specifically for boots (it's by the door in the mud-room.) However, the snow melts off the boots and then they sit in the water. Rocks might help them drain.... I like how you did yours. I found your blog on "31 days" and have really enjoyed following it!
I love this but I have to have a much larger tray. I am on the hunt now. I love this idea for sure! Dianntha
Love the idea- I actually do have a question about about spray paint. I have spray painted a piece of furniture and the finish isnt as even as I would like. You cant really see it unless the light hits it just right, and then you can see what I can only describe as shiny spots. Ive done 4 coats so it shouldnt be a problem of coverage, and the finish is satin and not gloss so I dont know where the shine is coming from. Do you have any idea what is going on there? Suggestions? Should I just top coat it with some kind of poly and hope it fixes the problem?
Hey Sarah, most likely the shiny spots are because of the paint application. Make sure to go back and forth PAST the thing you're spraying before changing direction, and do several light coats. You usually need more paint than you think you do, but an extra can for an even finish is worth it. Check out how I painted my side door, I even talk about shiny blotches in it ;) https://www.takethesidestreet.com/2011/09/black-door.html
Post a Comment
I ♥ comments. Me + you = BFFs 4VR.
(P.S. URAQT)