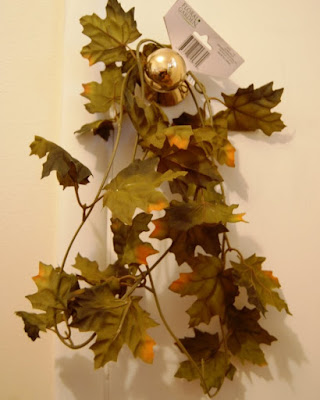
All right, friends. It's time to share one of those projects I promised. I wanted to create something beautiful out of something inexpensive (and maybe not so beautiful). As a reminder, here was my $1 Dollar Tree garland before:
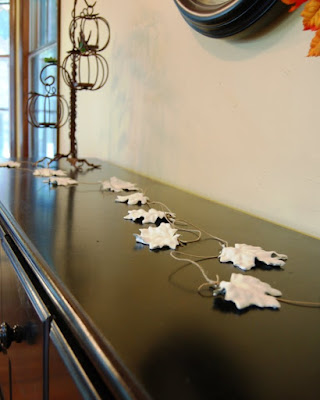
And here is is after:
Ooh. Me likey. Never you mind that it's not hanging since I have nothing to hang it from that my kids can't get to. The sadness of having no mantles in my home. Sigh.
One day I was sitting in my house, minding my own business (and probably cleaning up some matchbox cars that are constantly littering my floors) when I started thinking that white leaves would look so great! Why did I think that? No clue! I think I might be obsessed with white decor. Anyhoosies. I grabbed that garland at the dollar store, and quickly decided that (1.) I didn't know how well painted leaves would turn out, since the garland would continue to flex - what if it cracked or peeled? And (2.) I must have too much time on my hands.
But back to the garland -- I thought I'd have better luck getting the leaves to look good if I could somehow harden the leaves. I started pondering - and I'm really not a very creative person - so the first thing I saw in my basement tub o' crafts was a big container of plaster of paris.
"Of course!" I said. "I'll just dip the leaves in the plaster!"
Brilliant, right? Well, it turned out to be a touch harder than that, because I apparently have no idea how to work with plaster of paris (why I had some in my basement escapes me). I cut all the leaves off the garland, and first tried painting the plaster on with a brush. Well that was just plain time consuming and ridiculous. I like wasting time, but not on painting leaves with white goop. Not when there are books to read and toenails to paint.
So I mixed some more plaster in a cup, and dunked the leaves one by one. Then I laid them out on a sheet of wax paper and let them dry.
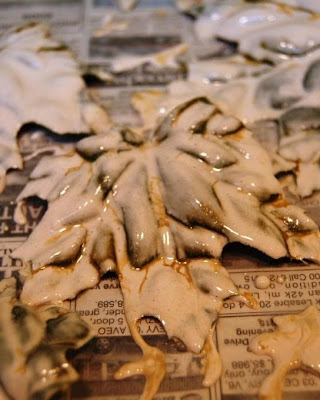
Hmm. Not quite what I was going for...
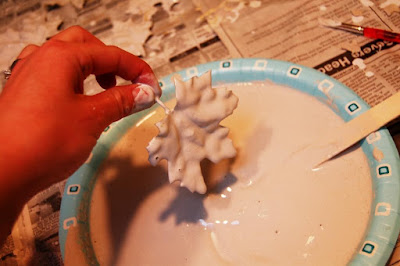
The next day, I decided they needed a second coat (anyone surprised?) This time I poured the wet plaster onto a disposable paper plate (one of the deeper ones with a wax covering) since the leaves had hardened with the first coat of plaster.
I coated each leaf, did my best to shake off the excess goo, and returned them to the wax paper overnight.
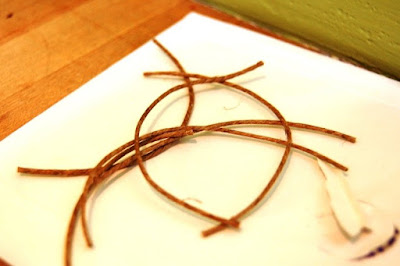
Finally, I cut a length of twine (or whatever I had -- think it was actually hemp jewelry rope stuff) and folded it in half to find the middle, which I then marked. I also cut several short lengths of twine to tie the leaves to my new garland.
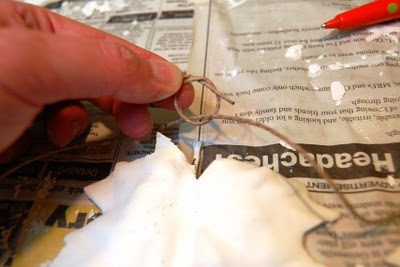
I wrapped a short length around the garland, tied a knot in it and inserted the end of a leaf into the knot before I tightened it.
I pulled it tight to (hopefully) prevent the leaf from sliding along the length of the twine garland.
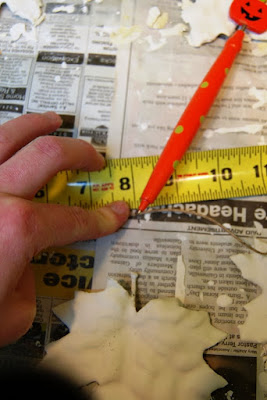
Next, I took a measuring tape and marked 8 inch lengths on my garland with my son's trusty pumpkin pen (Why did I pick 8 inches between leaves? Not a clue. It looked good, perhaps) And repeated the process down the length of the garland.
Note: It might be a good idea to secure each knot with some hot glue or super glue? Just a thought.
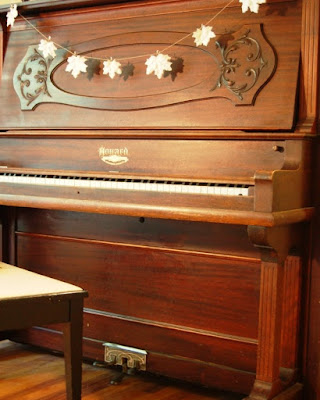
Voila!
And let's just pretend my kids would leave it alone for a moment....
I'm linking this up to:
Today's Creative Blog
Lucky Star Lane
Me and My Bucket
Blue Cricket Design
Someday Crafts
My Backyard Eden
This Blessed Nest
Hope Studios
Just A Girl
Centsational Girl
Finding Fabulous
Remodelaholic
Serenity Now
Be Different Act Normal
Chic on a Shoestring
C.R.A.F.T.
Under the Table and Dreaming
Ain't She Crazy!
The DIY Show Off
Tatertots and Jello
C.R.A.F.T.
Under the Table and Dreaming
Ain't She Crazy!
The DIY Show Off
Tatertots and Jello










That is a wonderful idea! They look beautiful! I'm smiling at your comment about "lets pretend my children would leave them alone for 5 minutes." Yeah, I'm running out of "safe" decorating spots in my home too. (Not to mention the "safe" spots are all covered with clutter...mainly, all the stuff I need to keep out of reach of the kids already. *Grin*
ReplyDeleteI absolutely love this and can't wait to try it! Good job - it's beautiful!
ReplyDeleteThis is delightful! Thanks for sharing.
ReplyDeleteIt looks so pretty hanging on you piano!! Thank you for sharing!
ReplyDeleteWhat a totally cool idea! I highlighted this at somedaycrafts.blogspot.com. Grab my "featured" button.
ReplyDeleteI love how they now look like fragile ceramic! Great idea :)
ReplyDeleteincredible! it looks wonderful. something about that white plaster with the leaves. it's like i have the same love for it that i do for white pumpkins. beautiful.
ReplyDeletethanks for linking to the FALL FESTIVAL!
kellie
Great idea!! I love white too. :) Your garland turned out really nicely! Thanks so much for joining the party. :)
ReplyDeleteWhat a great idea!! Genius.
ReplyDeleteSo fun!! Great idea (:
ReplyDeleteWow, that's gorgeous! I love how your garland came out.
ReplyDeleteThese look fabulous. What a brilliant idea! They look great hung in front of the piano, (yes I have to deal with little hands dismantling things too) but at least you have a pretty photo to remember it by : )
ReplyDeleteFor saying that you're not creative... I think you did a pretty bang up job! We'll probably see those in next years Fall Pottery Barn catalog!
ReplyDeleteThat is gorgeous! One of my favorite fall garlands EVER!! (And I have seen a LOT of fall garlands!)
ReplyDeleteThose are perfect! I tried this and it didn't turn out, it was very messy and the leaves didn't hold the plaster consistently so I gave up. You did a great job on these.
ReplyDeleteI have never used plaster of paris. I remember Lucy and Ethel using it to make a mold of Lucy's head, that's the only reason I knew what it was, lol! Very cute. I too, am obsessed with everything being white. :)
ReplyDeletesuper creative! come on over and link up to MMM :)
ReplyDeleteWhen are you gonna do something about the middle pedal on that piano for goodness sake? :-)
ReplyDeleteWOW! Great idea...going into the to try file.
ReplyDeleteBeautiful! Love it matched with the twine too! I bet you could also coat little mini plastic pumpkins and gourds to go with the leaves. Even plastic acorns (or the real thing) could be dipped and look great in white! Awesome idea! -Karen
ReplyDeleteWhat a different idea :)
ReplyDeleteThis is so unique and the effect is great! I'd love it if you linked your post to my Thursday Theme Party. :)
ReplyDeleteSo beautiful! I think anything in white is stunning! Very Creative! {visiting from Aint She Crazy}
ReplyDeleteOoo!! I love this. I am marking it for future projects. This might be pretty on the Christmas tree too.
ReplyDeleteI saw it on pinterest, clicked, and here I am... Bravo ! It's really nice !
ReplyDeleteLouise (from Paris)