


Last spring, when I was reading blogs but not writing them, I saw some great DIY tufted headboards and I decided to embark on my first craftastic blog-inspired project.
What I really wanted for my guest room was something like this...

{Pottery Barn Seagrass Headboard}
But it cost $399. Zoinks. I needed a plan B. I was unable (and unwilling) to spend that much for my guest room, especially since it's a full-sized bed. I have issues with full-sized beds. I should see a therapist.
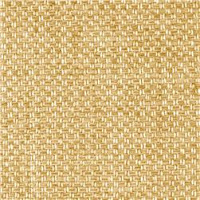
Since I hadn't seen any tutorials out there for weaving your own headboards, I decided that a upholstered headboard was the next best thing. I did select a fabric that has a pronounced weave though, to bring an extra bit of texture to the room since I couldn't have my beloved seagrass.
And then I got really anal focused. I looked at buckets of tufted headboards and discovered that I preferred the diamond pattern (offset tufts) to the straight rows of tufts. I studied the proportions on my inspiration headboards and created my own template.

{Click image be taken to the larger version of my full-sized headboard diagram}
Yep, that's right. I made a crazy detailed template and it had nothing to do with creating a blog tutorial -- you all just get to reap the benefits of my neurotic behavior.
Because I did this project BB (before blogging, of course!) I don't have step-by-step photographs for a tutorial, but Kate at Centsational Girl shared a tutorial for creating a tufted headboard which is very similar to the process I used for my guest room bed.
I can, at least, share a few tips I learned to make the process easier:
- The smoother the foam's outside edges are, the nicer your end result. I've heard of a lot of people using electric knives to cut foam, and in Kate's tutorial that I linked to she used squares of foam and she tucked the cut sides inside so that the smooth factory edges were around the outside of her headboard.
- I saved a little money by using two twin-sized eggcrate foam pads with the eggcrates facing inwards together + a large piece of clearanced 1-inch foam on top, instead of one more expensive piece of 2- or 3-inch foam.
- Pick your button covering kit carefully -- my fabric was a little thicker and it was an absolute nightmare to cover the buttons. When I found Kate's tutorial later on and saw that she went through the same thing, I had to laugh. She at least offers a suggestion for a better brand to try... I would definitely take her advice.
- Use upholstery thread as it's much stronger than regular thread.
- You can use rings or brackets to hang your headboard from, but I would actually recommend using a french cleat. You can buy them, or watch this short video to see how to make one -- they are very strong, secure, and easy to make.

And that's it. They're actually pretty simple to make and I love what it does for my guest room room. It probably cost around $75 to make and took a weekend.
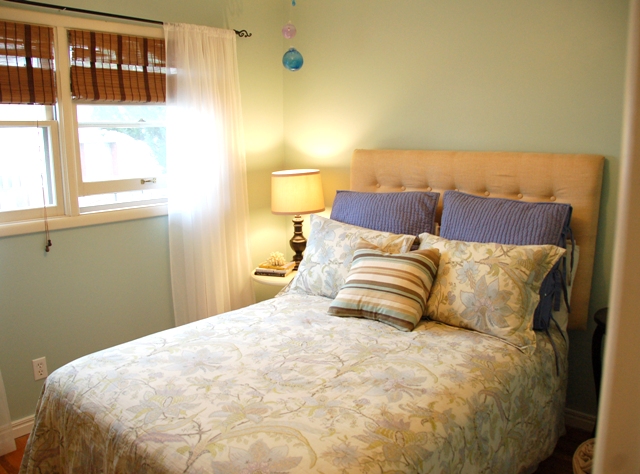
Don't you think it makes the room? Now I just need something fabulous on the wall above it, and we'll be set.
Sharing at Home Stories A to Z, Thrifty Decor Chick, The Shabby Chic Cottage, Just A Girl, Under The Table and Dreaming, The DIY Show Off


GORGEOUS!!!! Seriously, I love it! I have been dying to make one for my bed but am a bit intimidated to attempt it on a CalKing. I really love it! ps, love the new look of the blog too :)
ReplyDeleteWow, you did a fabulous job! Your guest room looks beautiful!
ReplyDeleteAbsolutely fantastic!! Your hard work paid off!
ReplyDeleteLove the headboard :) I really like the pattern on the comforter too...where did you get it?
ReplyDeleteThanks! The comforter is from Pottery Barn years ago. :) It's called Brigitte.
ReplyDeleteJust beautiful! I am also going to tackle a headboard project soon too But I am still trying to find just the right fabric. Thanks for sharing!
ReplyDeleteLooks awesome! I'm a sucker for a tufted headboard and even more thrilled when I see one DIYed as well as yours!
ReplyDeleteHow awesome is this!?!? I love it!! I have been wanting to do this for quite some time!!Thank you so much for sharing!!
ReplyDeleteI am having my very first link party and this would be PERFECT!!!
It's called Show Me How!!! ~ Friday ~ Tips, Tricks, & Tutorials ~ No. 1 ~
It's going on RIGHT NOW :))
I would love for you to join the party!!
And feel free to link up as many as you want :))
LOVE FROM TEXAS!!
~~Michella~~
www.michellamarie.com
~~~~~~~~~~~~~~~~~~~~~
I am loving these tufted headboards! Great tutorial!
ReplyDeleteWow, beautiful & impressive!
ReplyDeleteWarmly, Michelle
What an adorable DIY project! Thank you so much for sharing.
ReplyDeleteHappy Monday!